Rio de Janeiro is, quite literally, the most beautiful city I’ve ever visited—and I’ve been to cities across more than 60 countries. There’s something unreal about how it all fits together: long stretches of beach, lagoons and lakes, giant monolith mountains rising straight out of the city, and pockets of real jungle just a short drive away. One moment you’re in the middle of noisy streets and busy cafés, and the next you’re looking down at the coastline from a summit above the clouds.
This 7-day itinerary is written for travelers who are short on time and want to experience as much of Rio as possible - so yes, it’s intentionally intense. It’s also very hike-heavy, because the best “Rio moments” often happen from above. If you have more time (or simply prefer a more relaxed pace), it’s easy to stretch this plan out, swap a hike for a beach morning, or add extra rest days without missing the essentials.
Day 1: Two sides of Rio - Downtown highlights + Rocinha favela walk
🚶 Morning: City center walking tour
Start the day with a walking tour of Rio’s historic center. I highly recommend Joel as a guide—he’s a fantastic storyteller and genuinely makes Brazilian history come alive.
A quick safety note: parts of central Rio can feel a bit sketchy, so stay close to your group, pay attention to your guide, and follow their advice on when to keep your phone out vs. tucked away.
My favorite stops were:
- Metropolitan Cathedral of Saint Sebastian (Catedral Metropolitana) — striking brutalist architecture
- Real Gabinete Português de Leitura — an incredible Portuguese library that looks more like Hogwarts than a typical reading room 📚


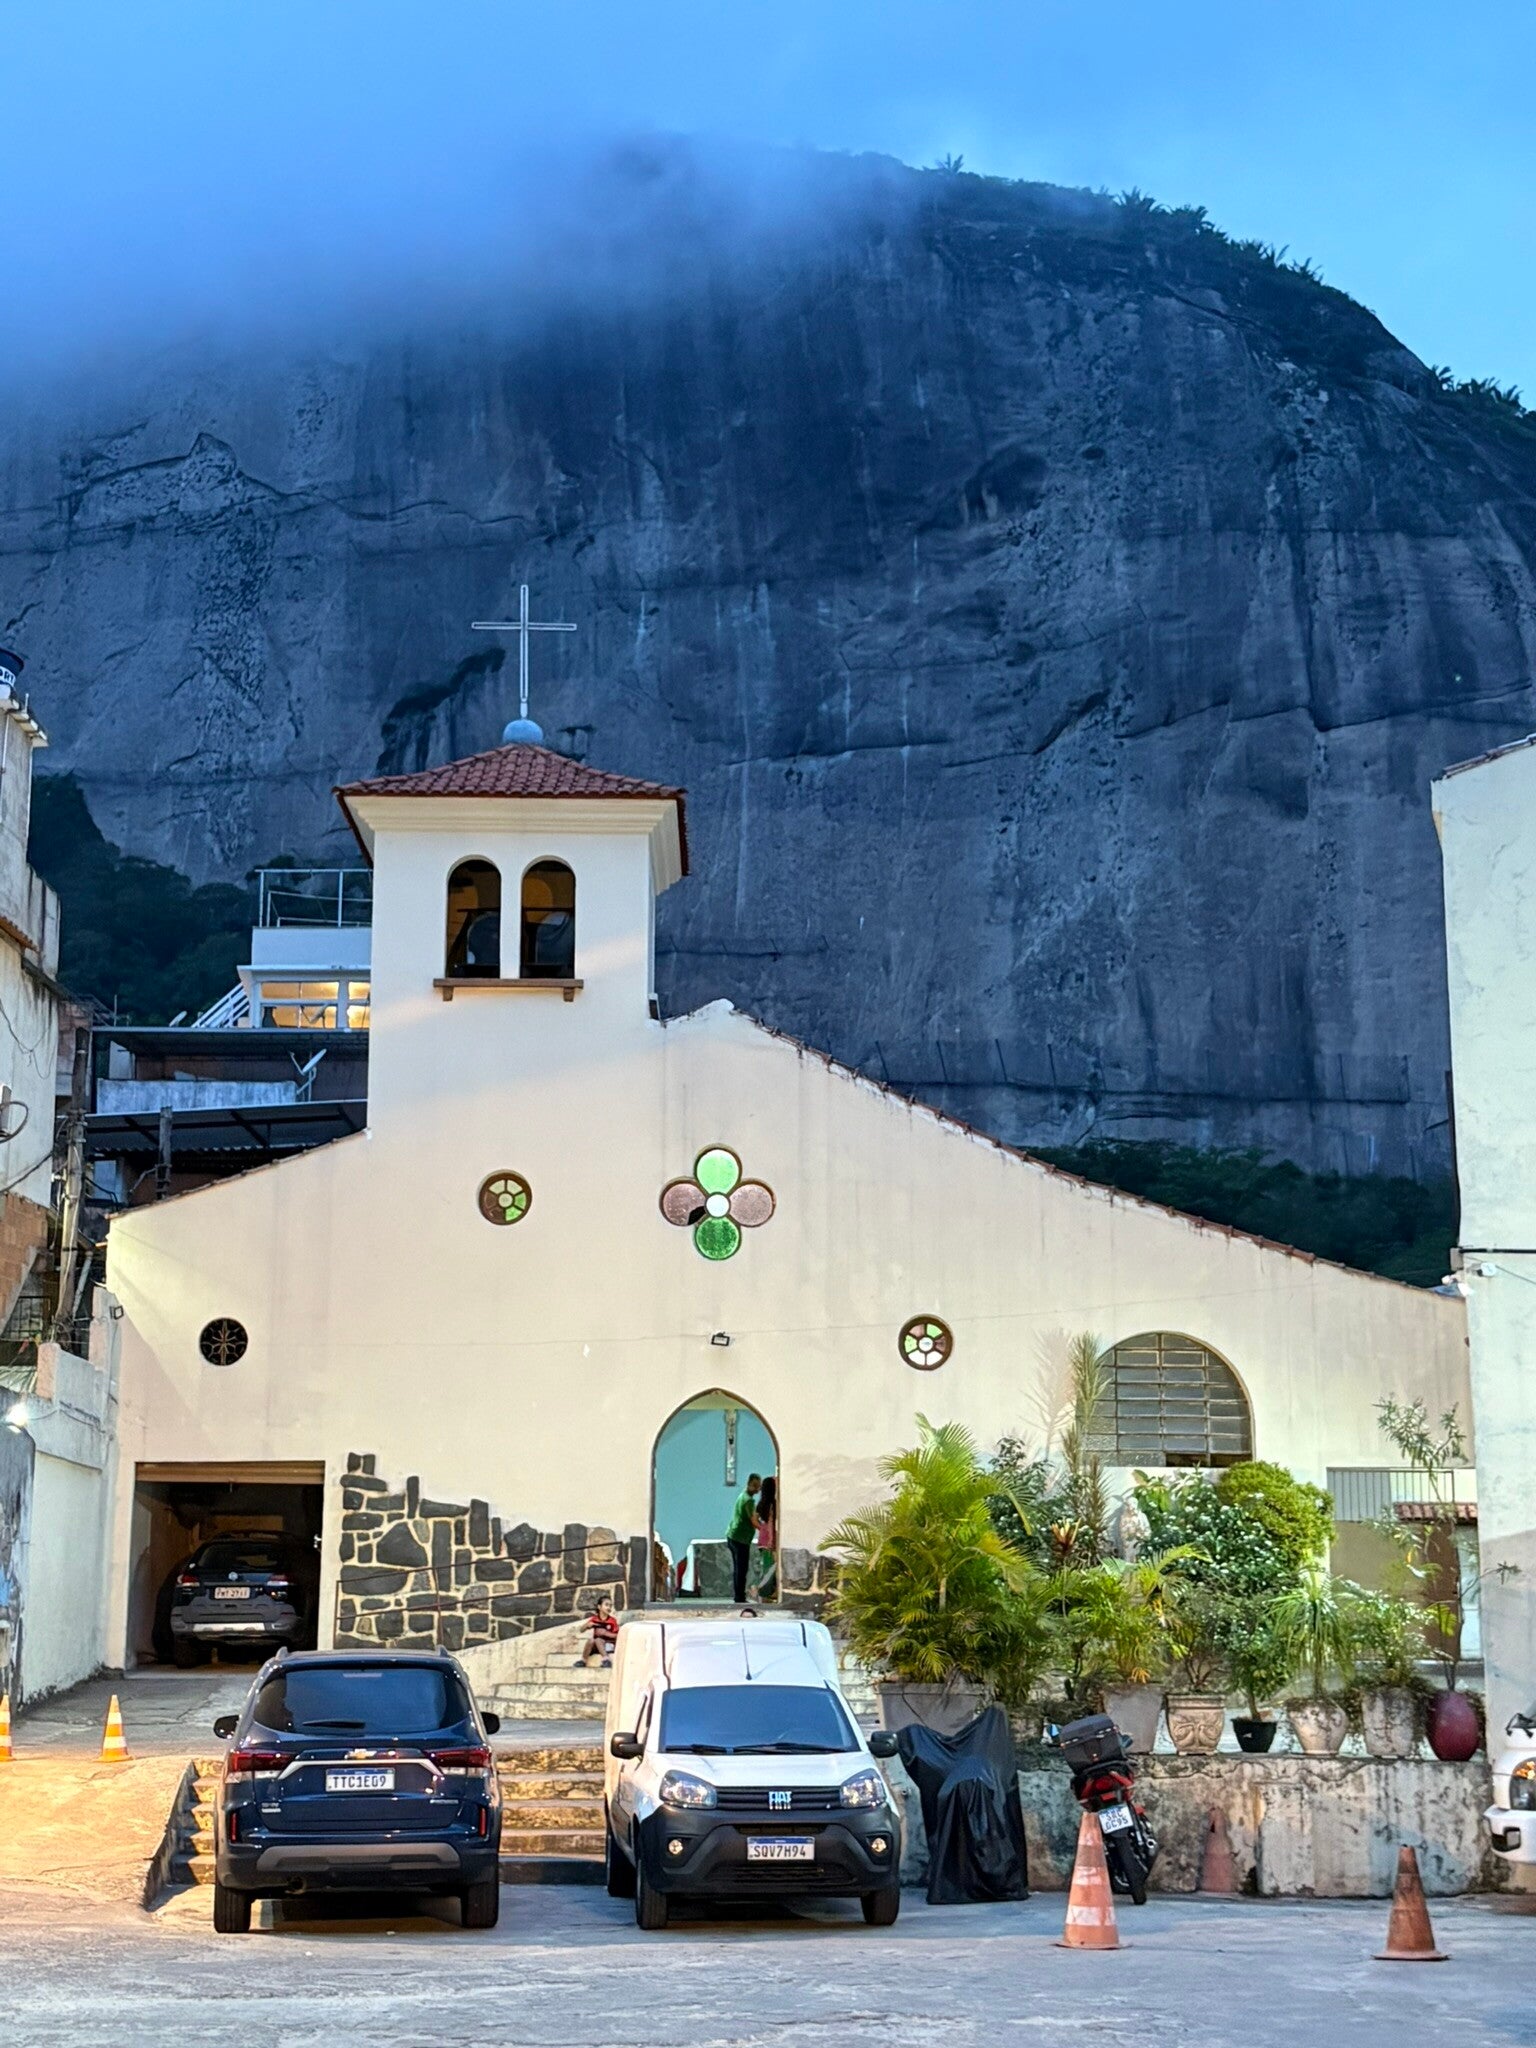
🏘️ Afternoon: Rocinha favela tour (with a local guide)
In the afternoon, you can join a guided visit to Rocinha, the largest favela in Rio and in Brazil in general. I went with Favela Walking Tour and had a very positive experience.
What I appreciated most was that the guide:
- spoke excellent English
- answered questions openly
- and didn’t avoid complex topics (such as co-existing with drug mafia, local justice rules, police presence and so on).
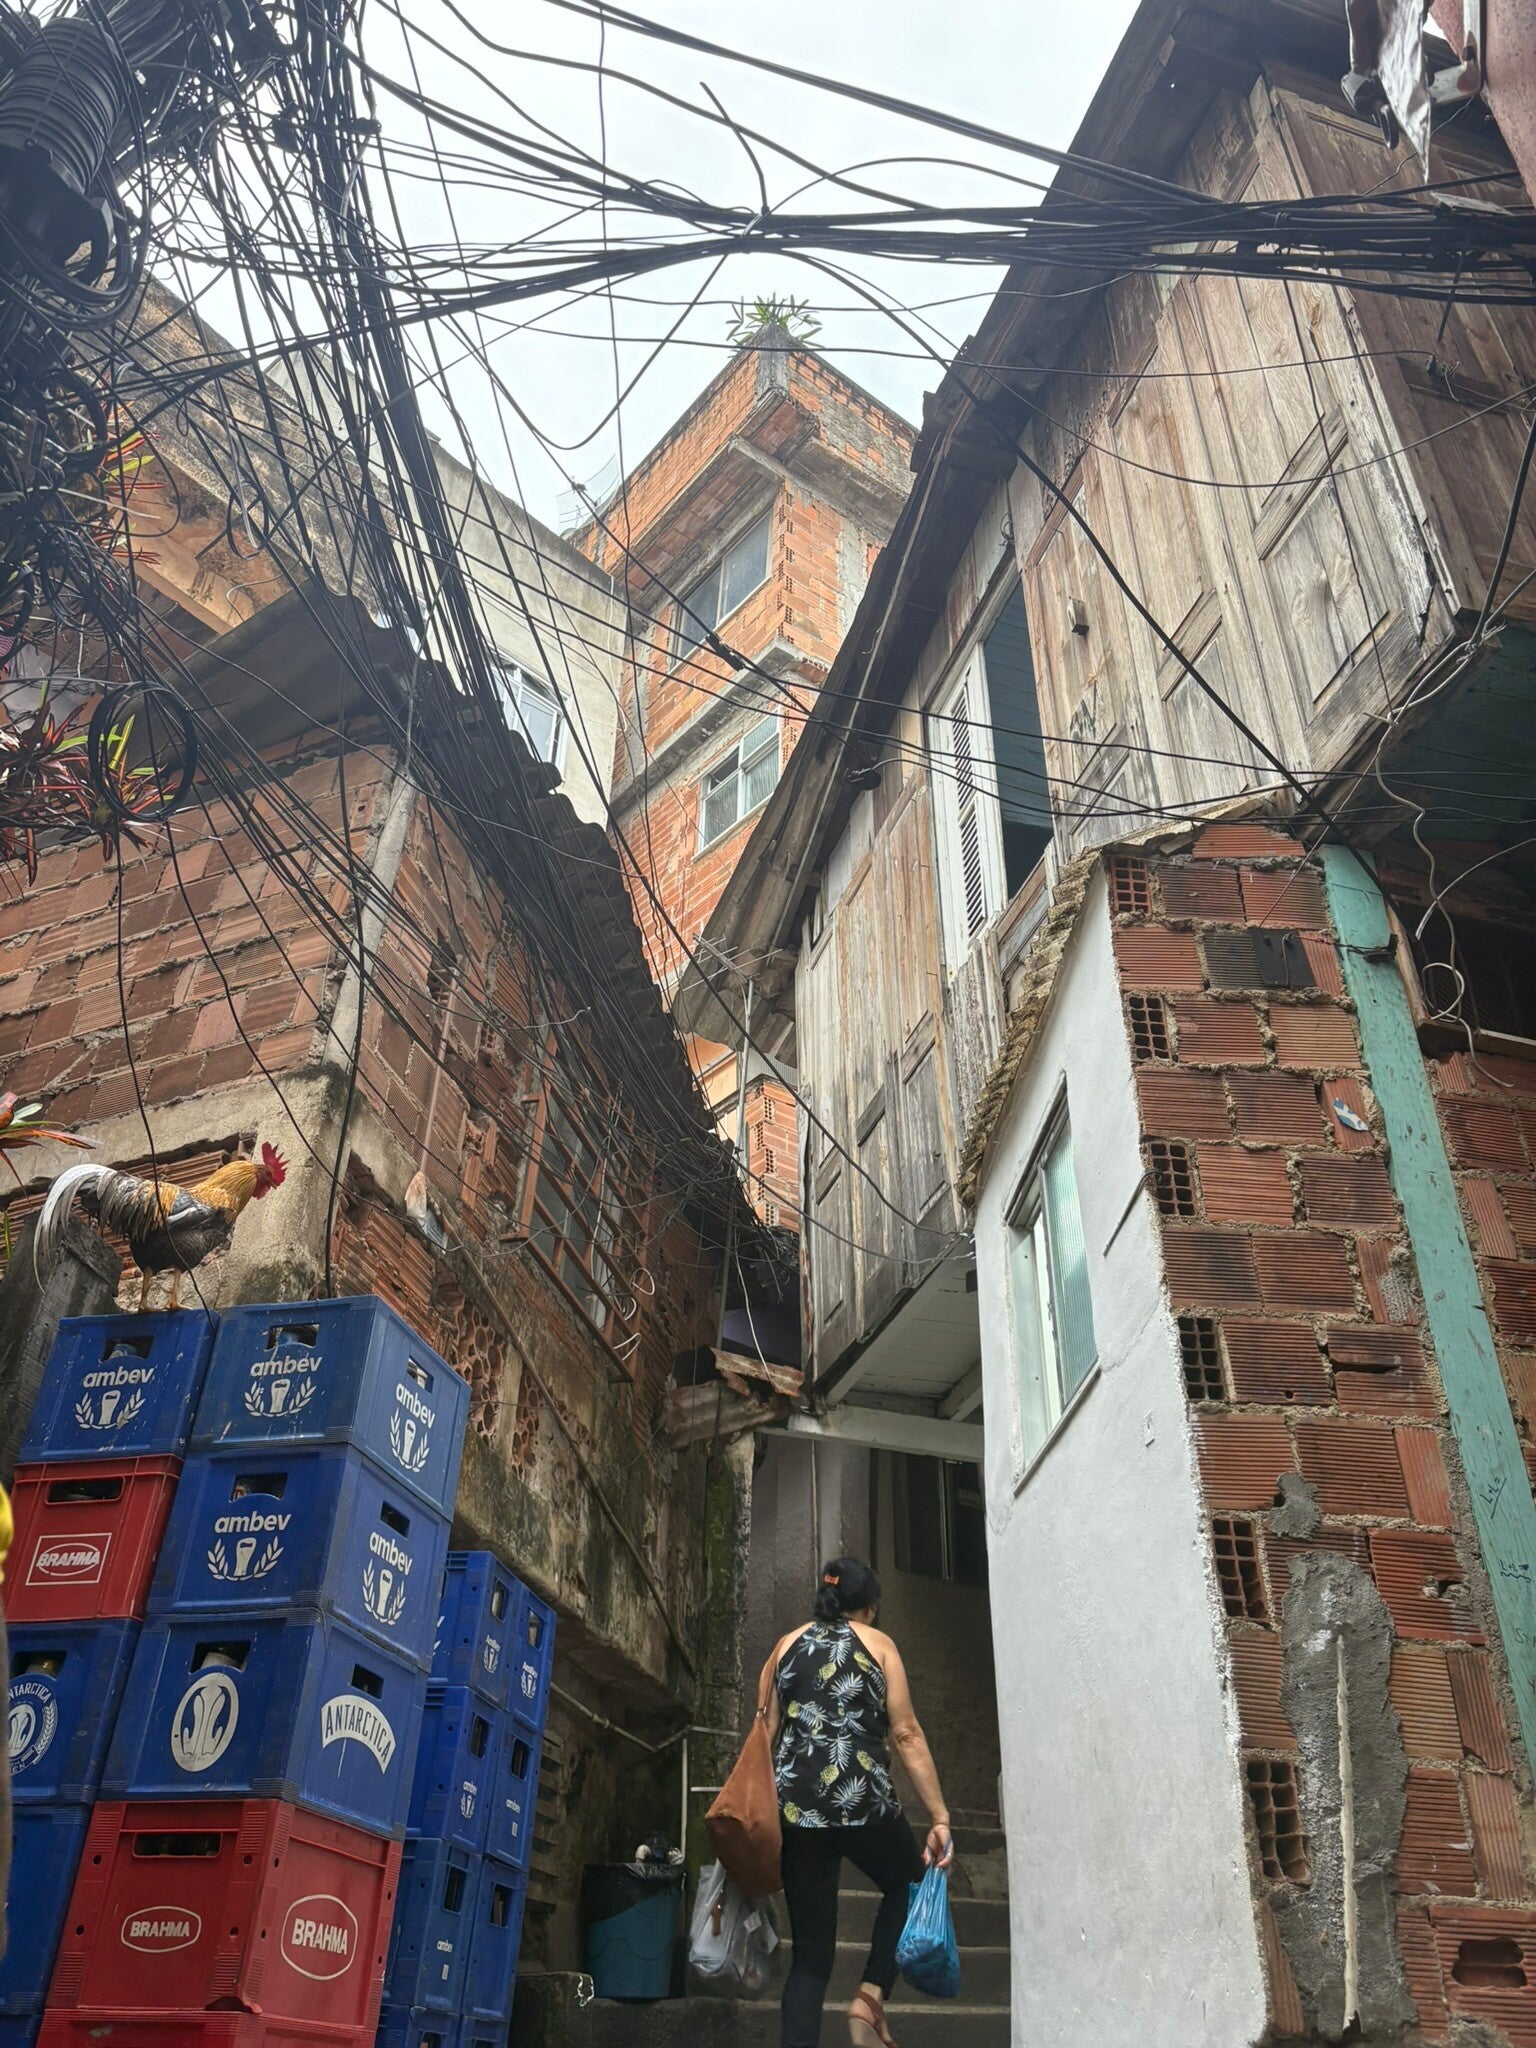
Because Rocinha sits on a hillside, the tour starts at the bottom where a mototaxi takes you to to the top (included in the price). From there, you walk through alleyways and rooftop viewpoints. In some places there’s a small entry fee paid directly to a local family, so bring cash.
The tour ends back at the bottom of the favela.
🏠 Interesting detail: Rocinha’s “real estate logic”
One thing I found fascinating is how rent and desirability can work differently here:
- Bottom of the favela: often the most expensive, because of easiest connection to the city
- Top of the favela: more “mid-market", as you need to you rely on mototaxis, but the views can be amazing
- Middle sections: often less desirable - less view, and still not the easiest commute

🛡️ Safety: can you bring your phone? can you take photos?
If you’re wondering whether it’s safe to join a favela tour, the answer is yes. You are absolutely safe during the tour as long as you follow your tour guide's instructions.
That said, there are important rules:
- In some areas, photos/videos are not allowed and your phone needs to be put away.
- You may be asked to remove sunglasses, because some locals worry about being recorded (especially with smart glasses). Even if your sunglasses are “normal,” it’s best to follow the rule to avoid unwanted attention.
Maybe you are wondering why a favela, which is normally run by drug gangs is or can be safe. Reality is that drug gangs enforce very strict punishments for those that commit crimes inside the favela. They do it as they need a peaceful and stable favela with very limited police presence to keep running their business. For that reason, all the crimes need to be reported to the gangs, who don out justice measures based on the severity of the crime. I don't want to spoil the specifics that will be explained during the tour, but suffice to say that punishments are so strict that there have been no rapes in Rocinha favela in the last 5 years (it has a population off 150.000 people). In case crimes would pick up, police presence and raids would intensify which is bad for business.
And for what it’s worth: I personally felt more at ease in Rocinha with a guide than in parts of the city center!
🤝 Ethical note: should you visit a favela?
There are many opinions on whether you should visit a favela at all—whether it does more good than bad, or whether it’s simply poverty tourism. I don’t think there’s one right answer here, so do what feels right to you. My impression from talking to favela guides is that favelas are at least marginally better off with tourists than without, because it does bring some additional revenue into some of the poorest areas of Rio de Janeiro.
If you do decide to do a favela tour, I’d strongly recommend choosing a local tour agency—meaning an agency based in the favela and using local guides—so the money actually goes into the local economy. Also support local vendors by buying snacks, drinks, etc. while you’re there. And finally: avoid taking photos directly of people, don’t act in an intrusive way, and respect that this is a normal neighborhood where people are just living their daily lives.
Day 2: epic coffee and even better views
Morning: Confeitaria Colombo (coffee break with serious style)
Spend the first half of the day relaxing and grabbing a coffee in the city center at Confeitaria Colombo, which has stunning Art Nouveau architecture and was historically a meeting place for Brazil’s elite. Today it’s open to the rest of us, but it’s still considered a cultural and artistic heritage spot in Rio.
It’s honestly gorgeous—ornate crystal mirrors, French stained glass, the whole thing—but it is touristy. There may be a queue, and there’s usually a professional photographer offering photos for a fee. That said, in my opinion it’s still worth it: the service is quick and the pastries are excellent (I tried a pistachio éclair and it was delicious).
P.S. due to a mishap with my phone, I lost photos of this place but you can easily google it! :)
Quick stop nearby: Real Gabinete Português de Leitura 📚
A short walk from Colombo is the Real Gabinete Português de Leitura. I mentioned it on Day 1 as part of the walking tour, but if you didn’t do that tour, I highly recommend visiting the library independently.
The entrance is free and it doesn’t take more than 10–15 minutes, but it’s one of the most spectacular historic libraries I’ve ever seen. Built by the Portuguese community in 1887, it holds 350,000+ rare books and genuinely feels like stepping into a Harry Potter universe. It’s often listed among the most beautiful libraries in the world—and for once, that’s not an exaggeration.


Optional alternative morning: Santa Marta favela (if you want more favela time)
If you haven’t had enough of favelas, here’s an alternative morning plan: instead of Confeitaria Colombo, you can visit Santa Marta favela. It’s much smaller than Rocinha (around 5–8,000 residents), but it became famous because in 1996 Michael Jackson filmed “They Don’t Care About Us” video there.
At the time, the filming caused controversy because authorities worried it would expose poverty and harm Rio’s tourism image. In the end, the production negotiated with Comando Vermelho (from Red Command gang), which controlled the favela, to ensure support and protection during filming. Hundreds of residents took part in the crowd scenes, and the video was shot in real streets, alleys, rooftops, and doorways—so the community was a major part of it. Later, a bronze Michael Jackson statue was installed at a viewpoint now known as Michael Jackson Square.
Now, the reason I personally recommend Rocinha over Santa Marta: Rocinha felt more focused on cultural understanding and how the favela functions day-to-day, whereas Santa Marta leans heavily into the Michael Jackson story and “celebrity visits” (Madonna, Beyoncé, Hugh Jackman, etc.). Some moments also felt a bit tourist-trap-ish, like teenagers doing a not a very well rehearsed drum bit on “Michael Jackson’s rooftop” and then asking for donations.
Still, if you’re into pop culture history, it can be a fun couple of hours. I won’t recommend the tour company I used, though, as the guide was extremely hard to understand in both English and Spanish, and the 4.9-star rating felt undeserved. So definitely do your own research if you decide to visit Santa Marta 😉


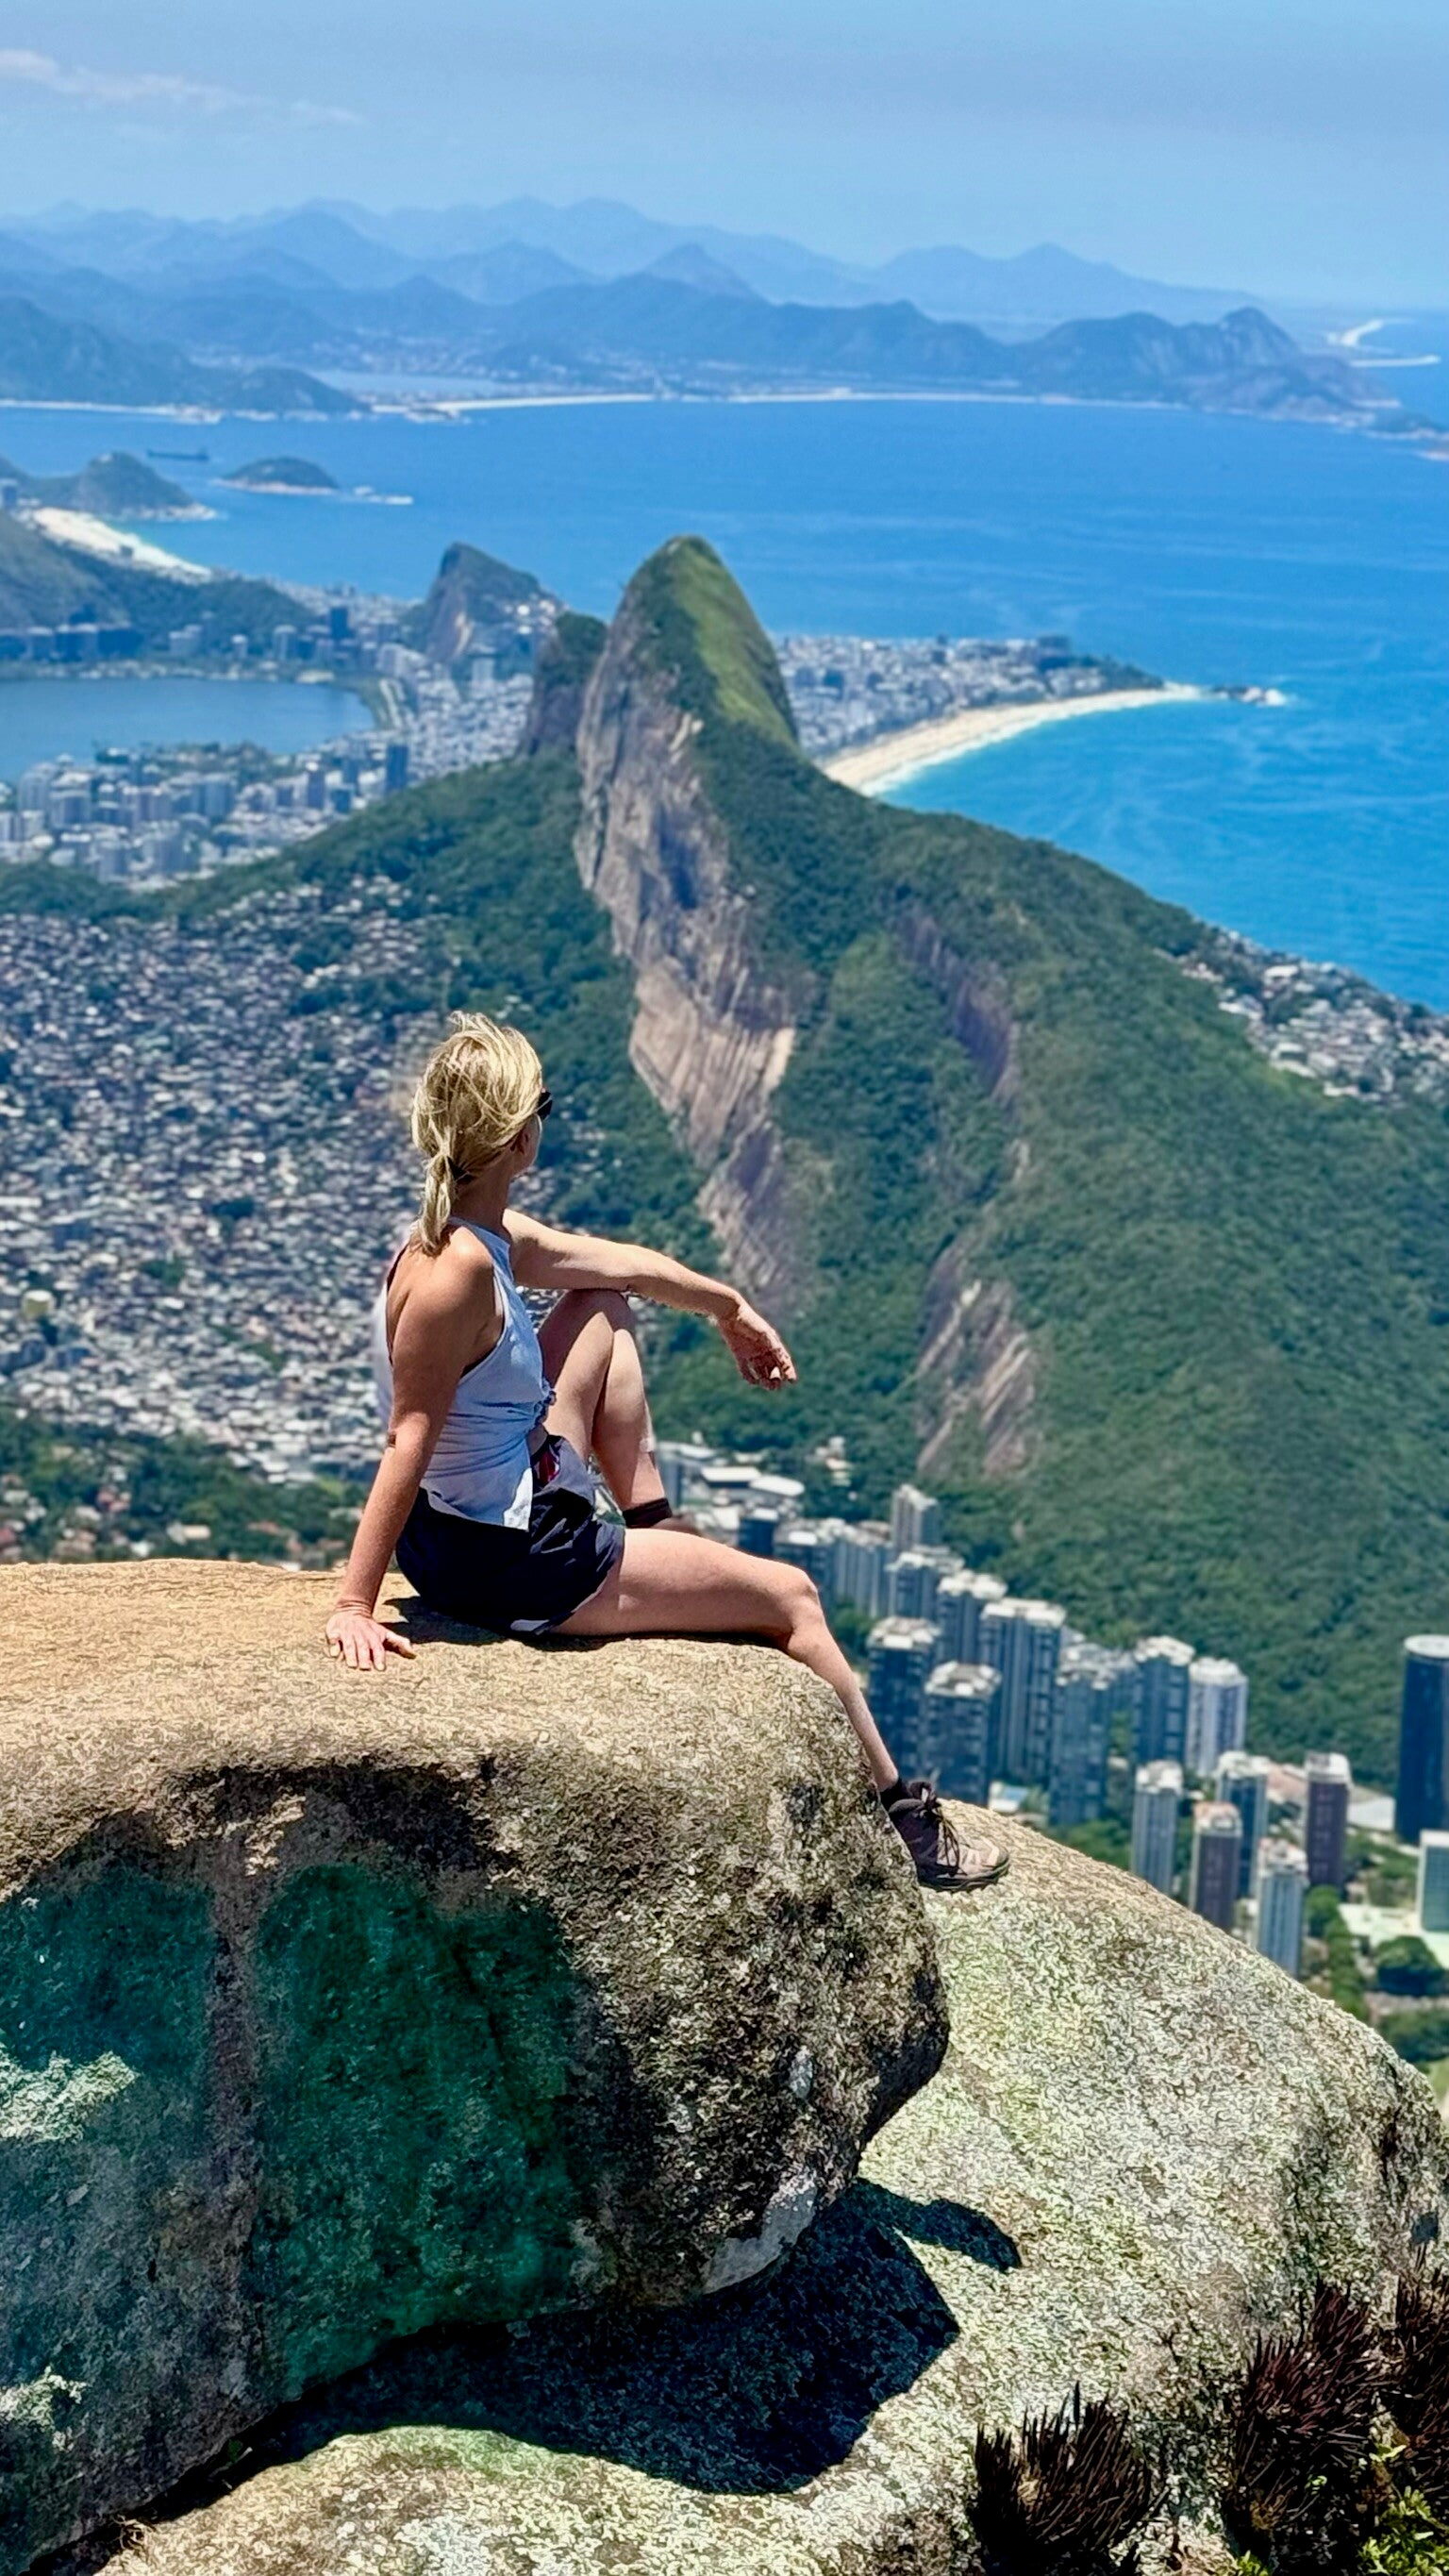
Afternoon/Evening: Sunset hike to Dois Irmãos (Two Brothers) 🌅
After either Confeitaria Colombo or Santa Marta, get ready for one of my favorite experiences in Rio: a sunset hike to the Dois Irmãos (Two Brothers) viewpoint. The hike itself isn’t particularly difficult. It takes about 1 hour at a moderate pace, so almost anyone without mobility limitations can do it.
Important detail: while this isn’t marketed as a favela tour, the trail starts at the top of Vidigal favela. To get there, you’ll take a mototaxi from the meeting point near the bottom (this depends on the tour agency). The mototaxi costs around 7 BRL (~$1.5 USD) each way. At the start of the trail you pay an entrance fee of 10 BRL (~$2 USD)—or you can donate 2 kg of non-perishable food instead.
You can do this hike at sunrise or sunset. Sunrise is more popular, but sunset felt much more solitary. I was in a group of three, and only a few other people were at the top—such a nice break from the crowds you’ll hit at many of Rio’s other viewpoints. If you choose sunset, the guide will bring headlamps for the walk down after dark.
Honestly, I didn’t feel a guide was strictly necessary because the trail is straightforward. If you’re comfortable finding a mototaxi yourself (there are usually plenty waiting around Vidigal’s main square) and you’re traveling in a small group, you can do this without a guide.


Day 3: Pedra da Gávea summit: hard work, insane reward
If you haven’t had enough of big views and you’re reasonably fit, Pedra da Gávea is the hike I recommend most in Rio. It’s my all-time favorite viewpoint in the city. That said, unlike Dois Irmãos, this one is properly hard.
Pedra da Gávea is the largest monolith in Rio, rising to nearly 900 m (3,000 ft), and it’s steep. Much of the route is a combination of hiking and scrambling, meaning you’ll regularly use both hands and feet. There’s also one section where you need to climb and descend using a harness, so you should be comfortable with heights and have decent cardio to enjoy this rather than suffer through it.
⏱️ What to expect
- Time: ~6,5 hours round trip
- Time at the top: ~30–45 minutes
- Trail type: out-and-back
- Facilities: there’s a bathroom and a snack stall at the start/end of the trail
- Bring: plenty of water + snacks (you’ll earn them)
🧗♀️ Tour company (my experience)
I went with Desbravando Rio and can highly recommend them. We had two guides, one of them didn’t speak English, but he more than made up for it by being an incredible photographer. He took tons of great photos of everyone, pointed out the best spots to sit/stand at the top, and even coached poses (honestly appreciated 😄). You can also choose to buy drone footage if you want extra dramatic shots.
Photos are then shared via Google Drive, which is great because the quality stays intact.
👥 Crowds
Because the views are arguably the most dramatic in Rio, this hike is popular. The summit can be a bit crowded, and there may be short queues around the harness section. Go in with patience and don’t expect a fully secluded experience, but trust me, it’s still 100% worth the effort.
You’ll usually be back at your accommodation around 3 pm, which leaves the rest of the day for a well-deserved shower, recovery, and potentially a lazy afternoon on the beach.


Day 4 - Classic Rio (icons day: Christ the Redeemer + Sugarloaf)
Today is your recovery day after all the hiking—while still ticking off Rio’s most famous “postcard” locations. Christ the Redeemer and Sugarloaf Mountain are the two landmarks most associated with Rio de Janeiro, and they really are beautiful. Just keep in mind: they’re also very touristy and often crowded, so while they’re a must-do, they may not end up being the most memorable parts of your trip.
✝️ Christ the Redeemer (Corcovado)
Christ the Redeemer (one of the New Seven Wonders, voted in 2007) is best visited right after opening. You’ll still see plenty of people up there, but going early helps you avoid the worst queues and gives you a calmer experience at the viewpoint.
A few practical tips:
- Aim for the earliest entry slot. Although the monument officially opens at 8:00, you can often buy a ticket for 7:30 and enter between 7:30–8:00.
- No parking at the top, so you’ll need to go by van or train.
- You choose the transport and boarding point when booking online.
- The van is usually the cheaper option (entry + transport is roughly ~$17 USD).
I boarded the van at the Corcovado Visitor Center around 07:40 and reached the monument around 07:50. Vans run frequently, so you typically don’t wait long even if it isn’t full.
At the top, take a moment to read about the monument’s construction and enjoy the 360° views over Rio, including Guanabara Bay and Sugarloaf.


🚡 Sugarloaf Mountain (Pão de Açúcar): cable car classic
After Corcovado, you can take an Uber from the visitor center to the Sugarloaf cable car station. When you set the destination, make sure you type “Bondinho Pão de Açúcar” (Sugarloaf cable car), not just “Pão de Açúcar”, as that name is also used by a supermarket chain!
Sugarloaf is stunning, but it’s not the most budget-friendly activity, as return cable car costs about 196 BRL (~$38 USD)
The ride has two stages:
- First stop: Morro da Urca (you switch cable cars here). Take time to walk around—views of Guanabara Bay with yachts and the nearby helipad are very “Rio glamour” .
- Second stop: Pão de Açúcar summit, with another dramatic viewpoint over the bay, Niterói, and back toward Christ the Redeemer.
If you start early with Christ the Redeemer, you’ll likely be done with both icons by around noon, which leaves the afternoon free for one of Rio’s beaches—perfect for recovery and a slow, happy end to the day.


🥾 Optional
If you still want a bit of movement (or want to save a few reais) you can hike up to Morro da Urca (easy hike, usually under 1 hour) and then take the cable car from there to Sugarloaf for around 135 BRL (~$26 USD).
It’s not possible to hike all the way to the top of Pão de Açúcar as it’s a monolith that requires climbing gear/experience and there is no regular hiking path.
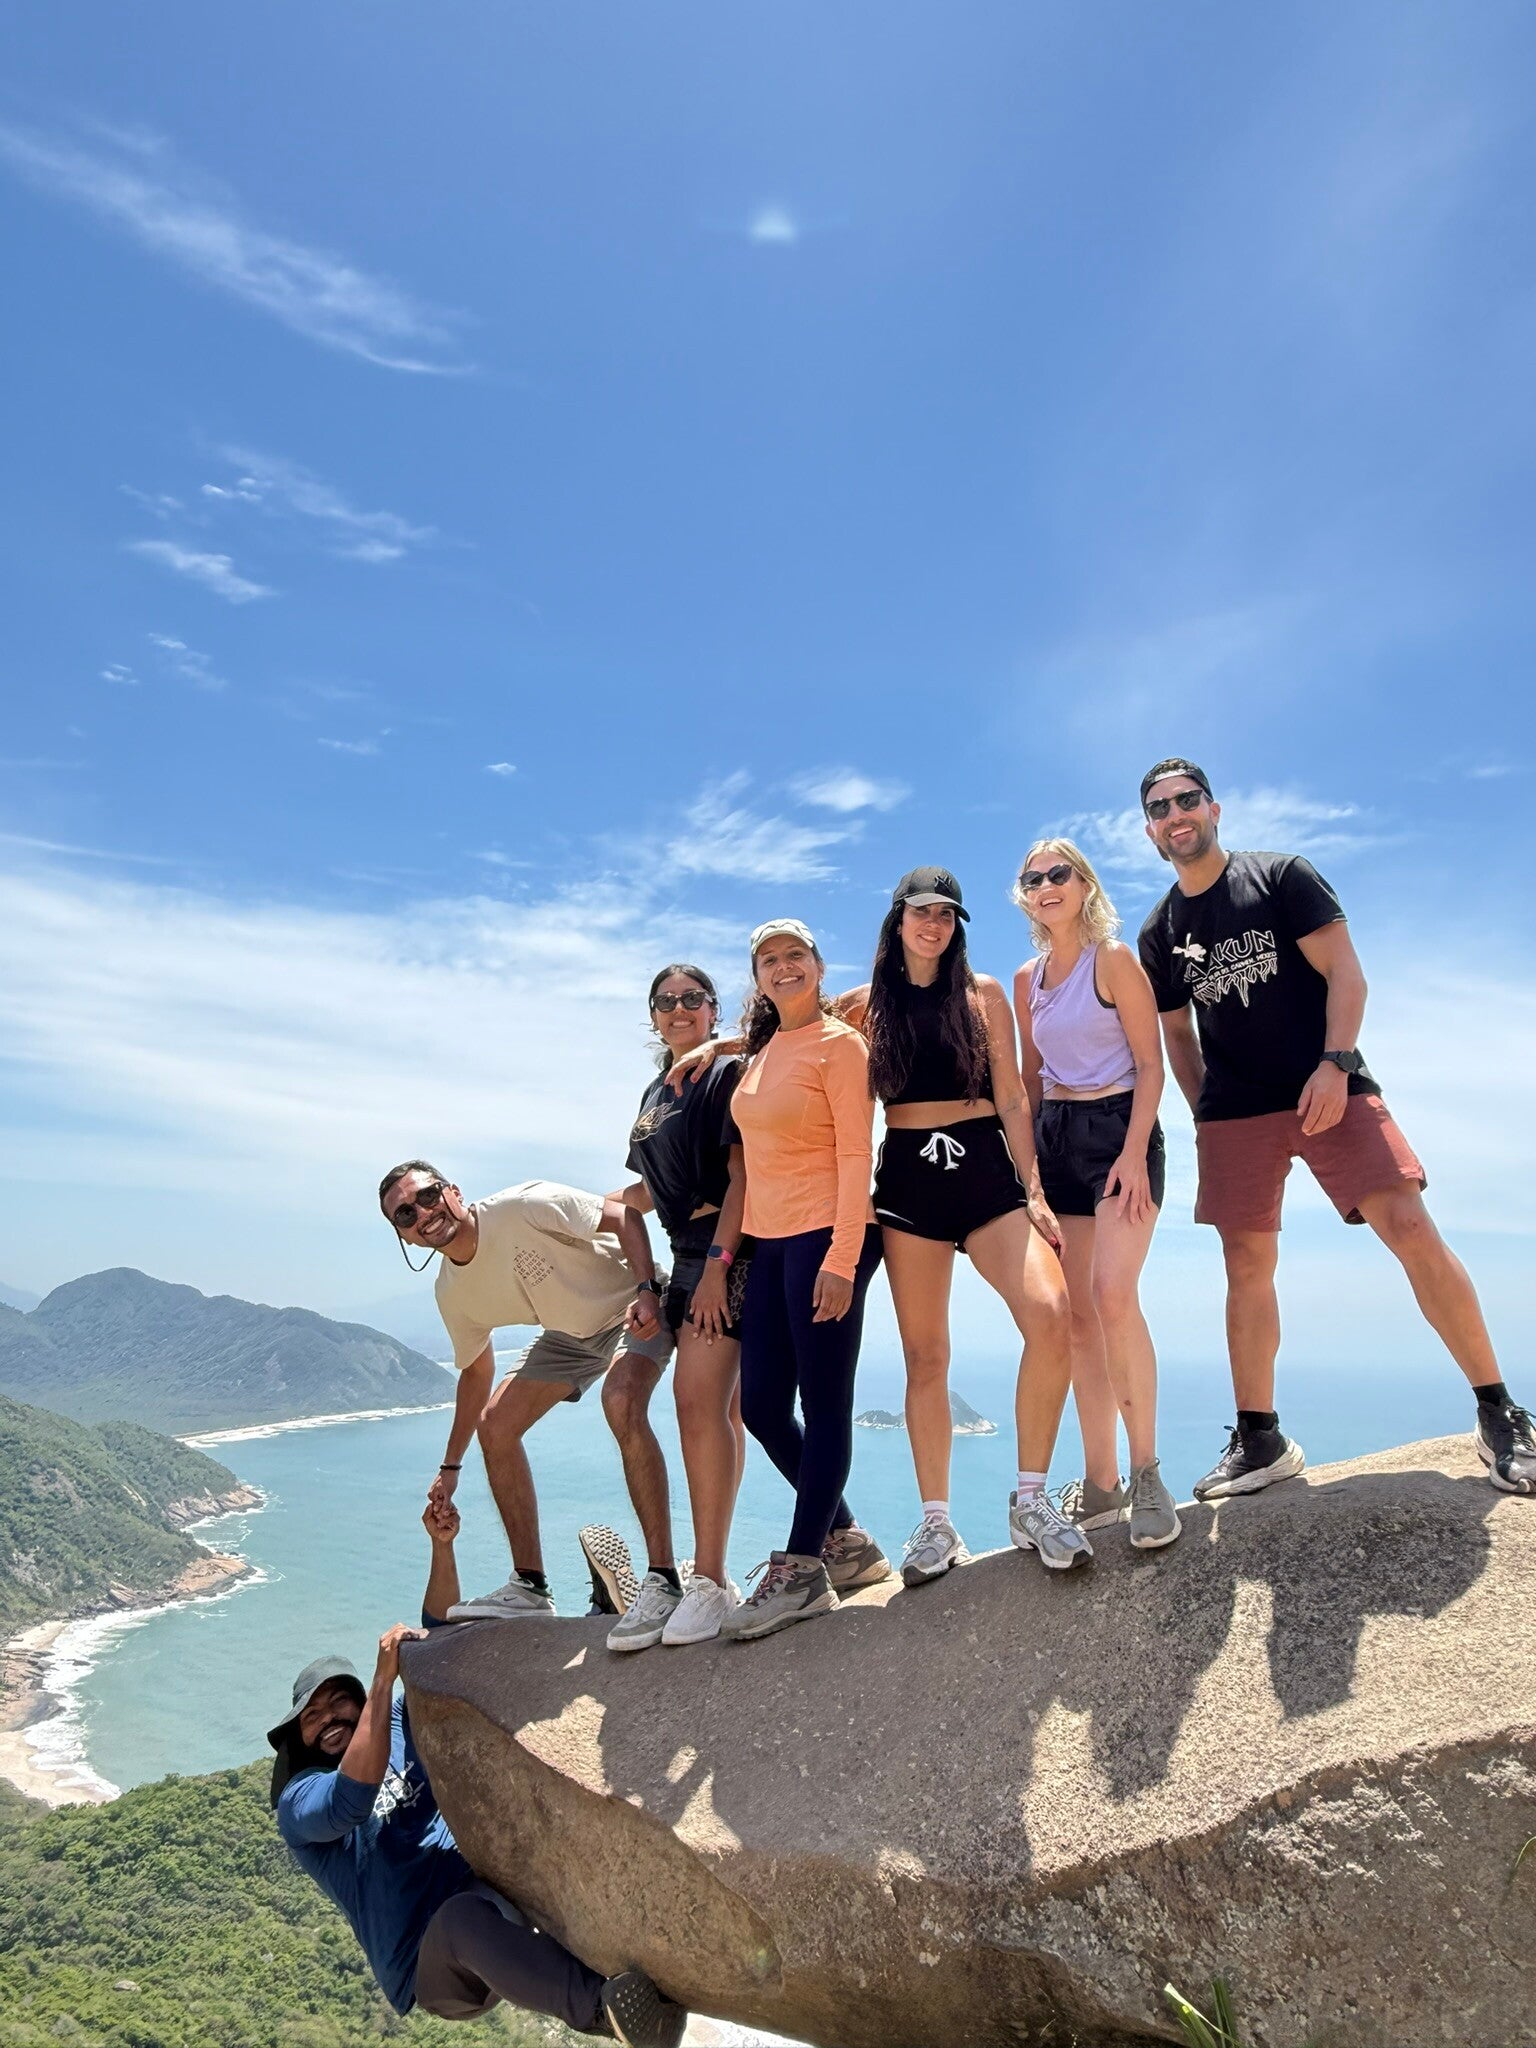
Day 5: (pretend to) be daredevil at Pedra do Pedra do Telégrafo!
Today is time for another easy hike and one of Rio’s most iconic photo spots. You may have previously seen the pictures: someone hanging off a rock as if they’re about to fall into an abyss, while a friend pretends to kick them off Lion King style. The fun part is that it’s all an optical illusion - and it happens at Pedra do Telégrafo.
The viewpoint is reached via an easy-to-moderate hike of about 1 hour and you can just walk on top of the rock from the ground! The “danger” in the photos is created purely by framing the camera angle so the distant beach is visible, but the safe footing nearby is not. Voilà, it's ultimate Instagram vs. reality moment!
Another added bonus of this hike is that you will likely see many small monkeys (common marmosets) endemic to Brazil playing in the trees!
📸 Go with a tour or DIY?
You can absolutely do this hike with or without a tour. It’s popular, and generally easy and safe to do independently.
Tour pros:
A guide will guarantee great photos (and sometimes drone shots, if you’re lucky).
DIY tips:
Keep a trail map saved on your phone. Most of the trail is clear, but there’s one sneaky turn that’s easy to miss—and you don’t want to hike for an hour and accidentally skip the rock!


After the Pedra da Telegrafo hike you'll have an option to visit some of the more secluded beaches nearby. Note, that these beaches don't have many (if any) facilities, so make sure to bring enough water, food, sunscreen etc. Good options include Grumari and Prainnha beaches, or wild beaches such as Praia Funda, Praia do Meio and Praia do Perigoso that can be reached by forest trail.
If you still have energy after hiking and beach time, you can finish the day in Lapa, Rio’s nightlife neighborhood. It can be a lot of fun, but do keep your wits about you—petty theft and robberies are unfortunately common there, especially late at night.
Day 6: Bohemian Rio in the morning, tropical Rio in the afternoon
🎭 Morning: Santa Teresa + the yellow tram (bondinho)
Santa Teresa neighborhood has a bohemian, artsy vibe and is known for its painters, musicians, writers, galleries, and small artisan workshops. The neighborhood’s symbol is the old yellow tram (bondinho), which crosses the Arches of Lapa and climbs the hill of Santa Teresa. It’s one of the few remaining tram lines in Brazil and it feels like a nostalgic Rio postcard.
A few practical notes:
- It can be very touristy and crowded, so expect some waiting time unless you go early.
- Ticket price: around 20 BRL (~$4 USD)
- Ride time: about 20 minutes end to end
- Main boarding point: Largo da Carioca (Estação Carioca)
Beyond the tram ride, one of the best stops in Santa Teresa is Parque das Ruínas, a former mansion turned into a partially restored ruin and art space, with great views over the city. The entrance is free.
At the bottom of Santa Teresa you’ll find the Selarón Steps, one of Rio’s most internationally recognized landmarks. It’s an open-air artwork created over decades by Jorge Selarón, who lived right by the steps.
He began decorating them in the 1990s and continued almost daily until his death, using hand painted tiles, tiles he traded and thousands of tiles donated by visitors from all over the world. Selarón Steps became even more famous after appearing in Snoop Dogg and Pharrell’s video “Beautiful”.
Guided tour or go solo?
You can explore Santa Teresa independently or with a guide if you want more historical context. I went with a guided tour, but found the amount of information a bit overwhelming and felt it took away from the vibe, so I won’t recommend the specific tour I took.


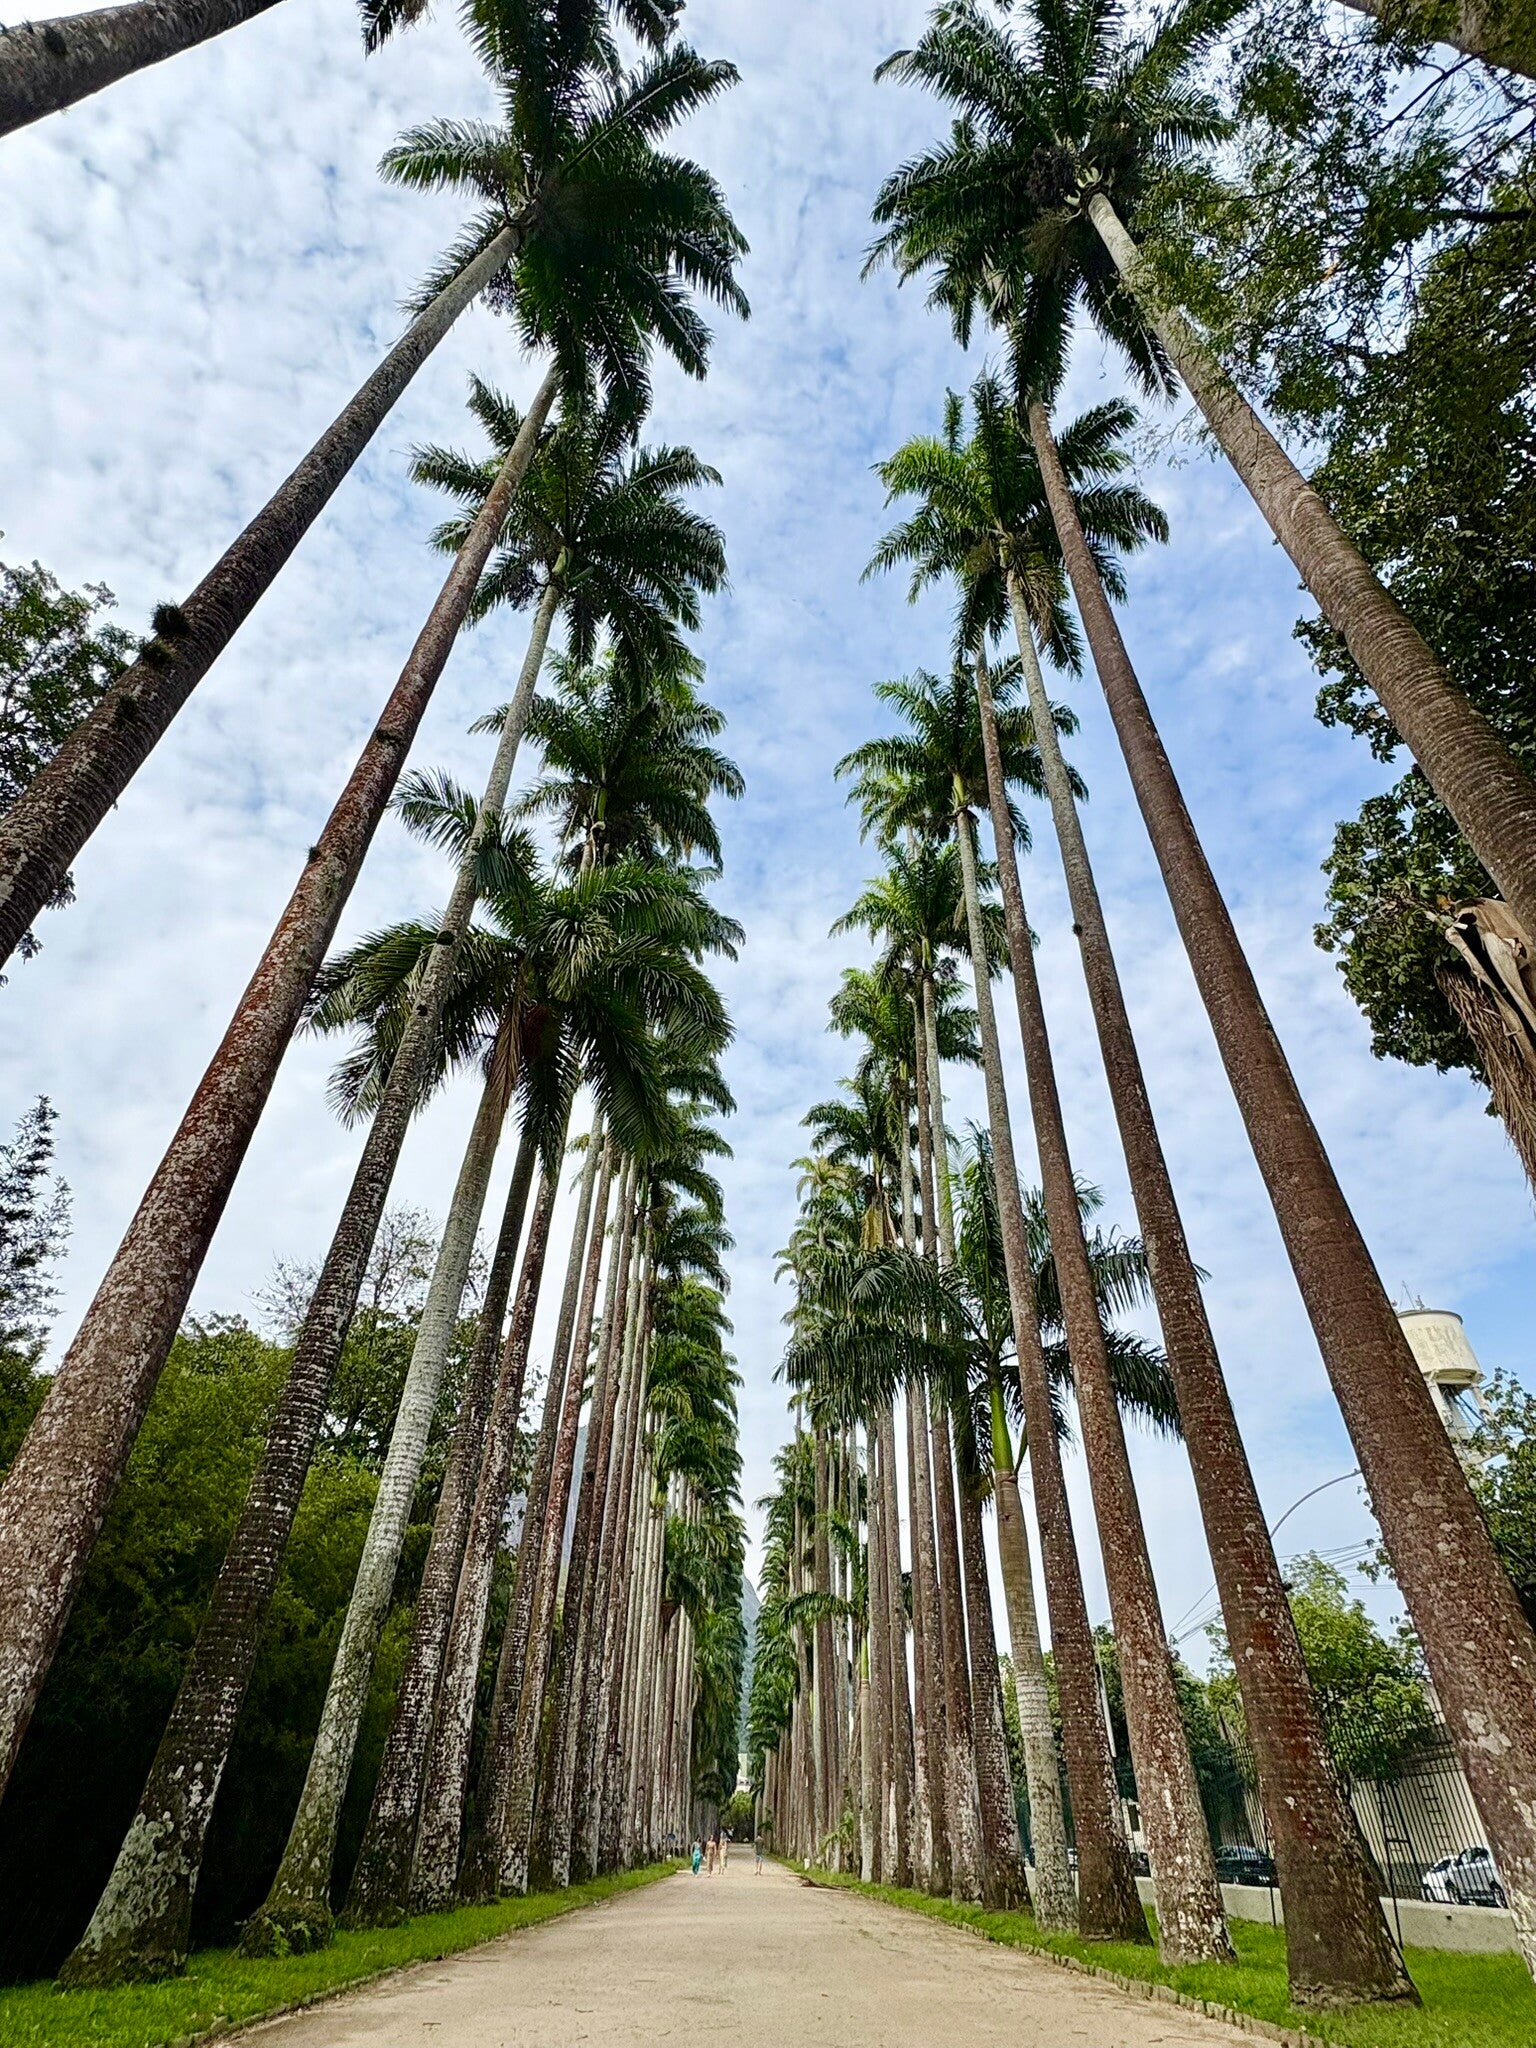
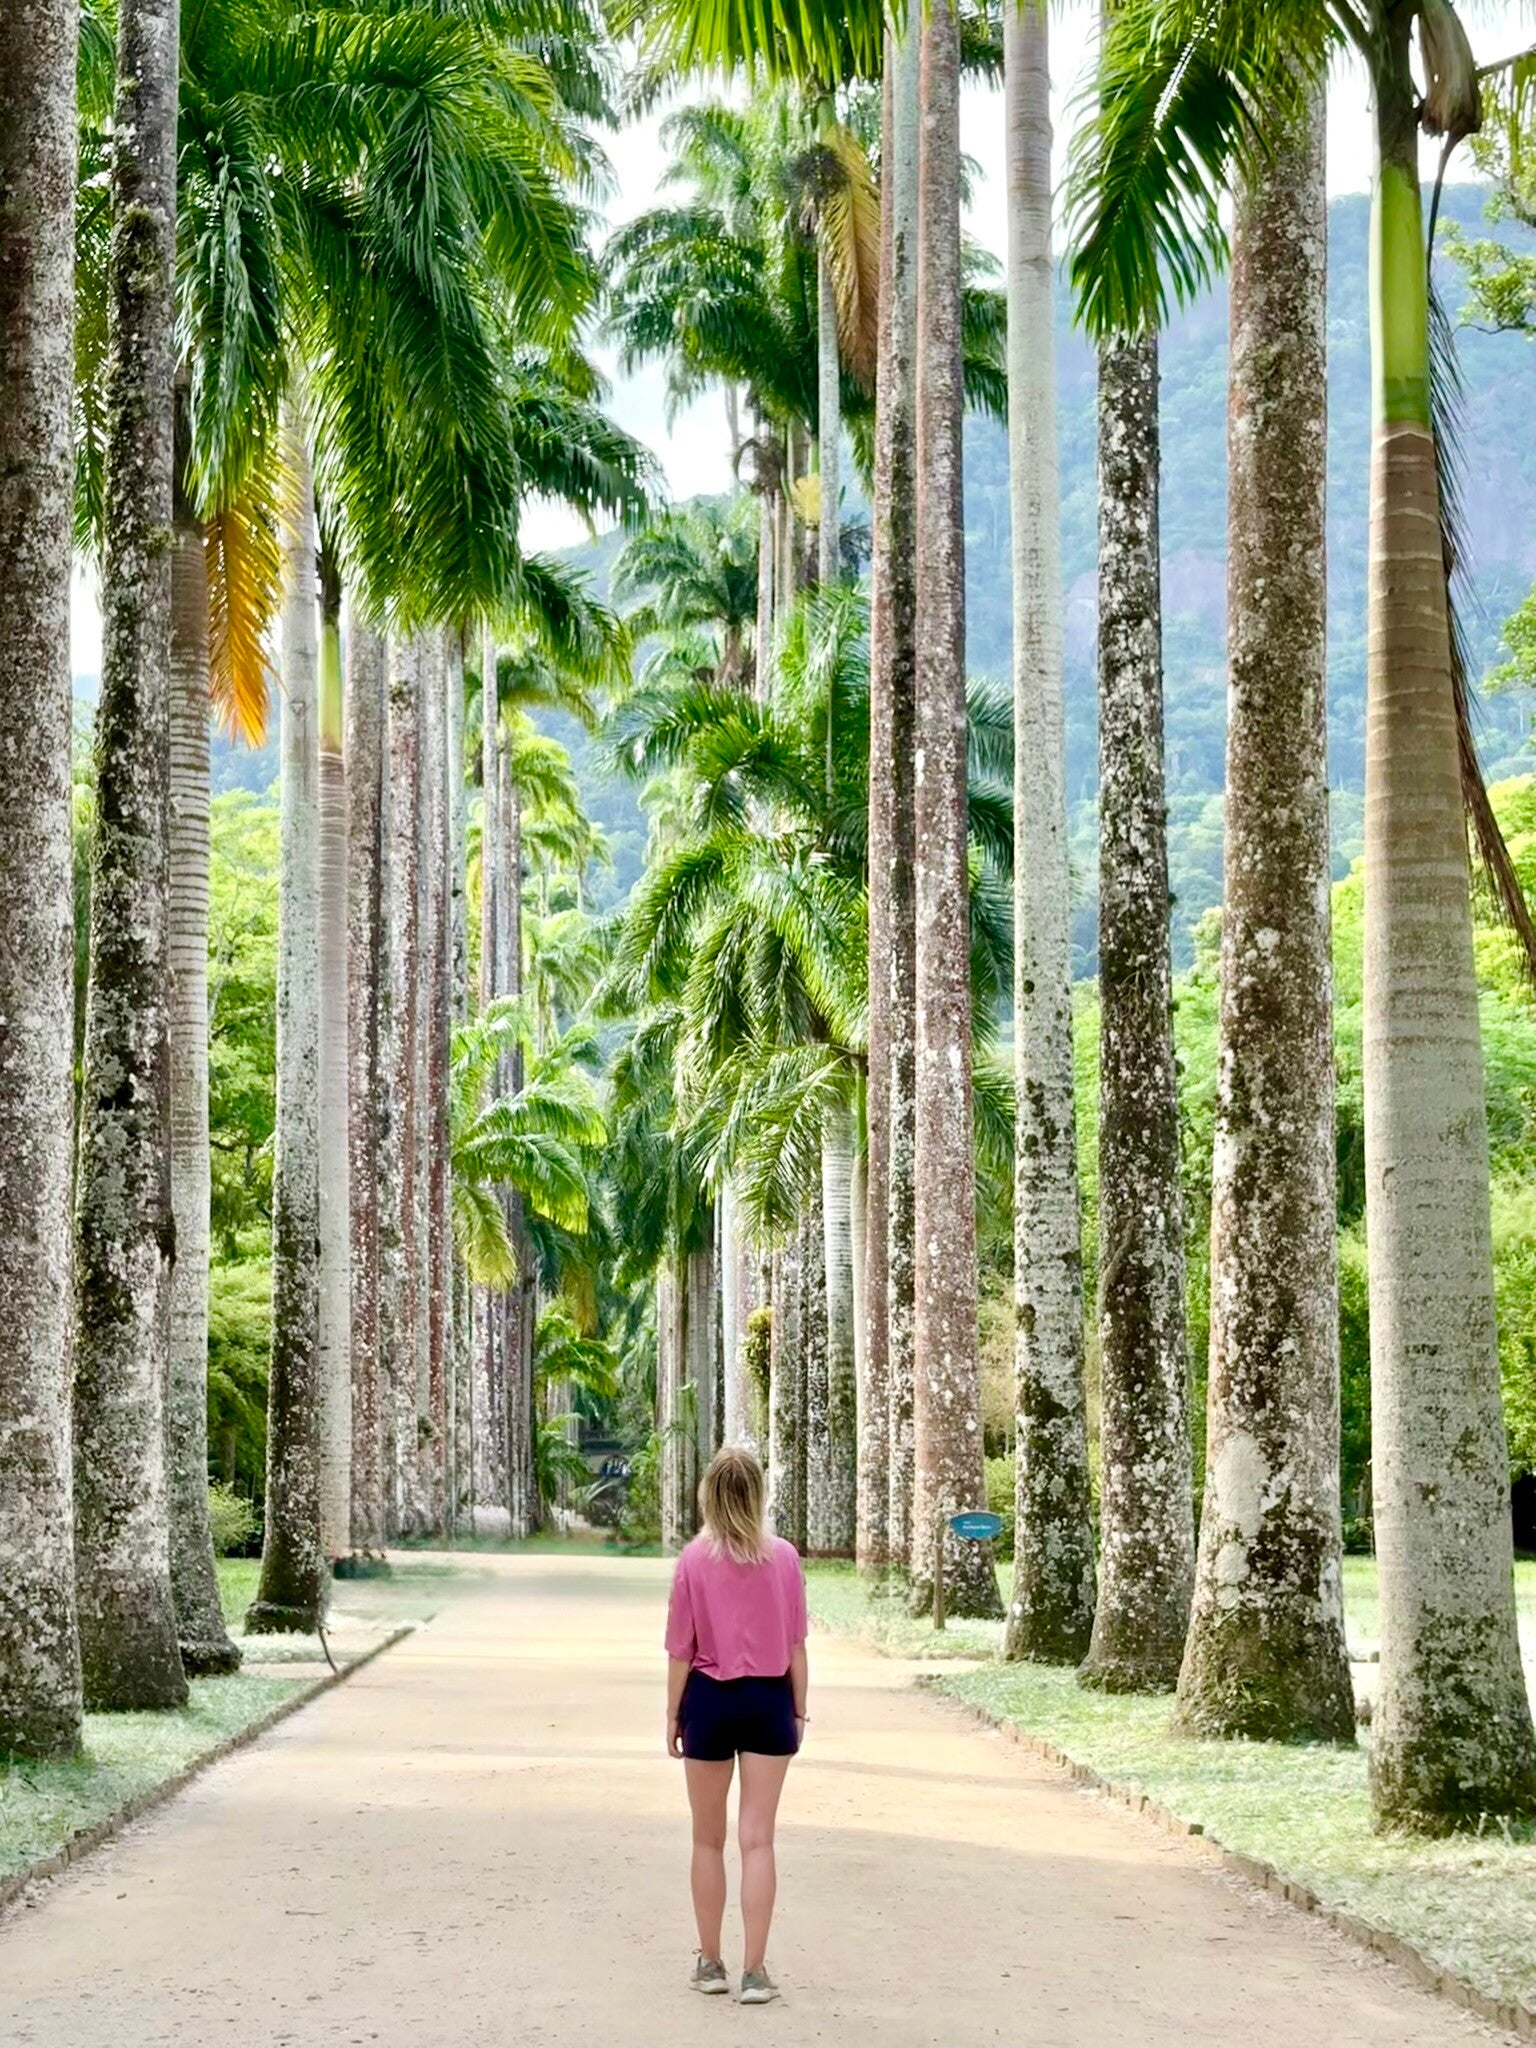
🌴 Afternoon: Rio Botanical Garden (Jardim Botânico)
In the afternoon, head to one of my favorite places in Rio: the Rio Botanical Garden. It’s a beautiful, calming contrast to the busy sightseeing earlier in the day.
Entry: around 80 BRL (~$15 USD)
Time needed: 2–3 hours
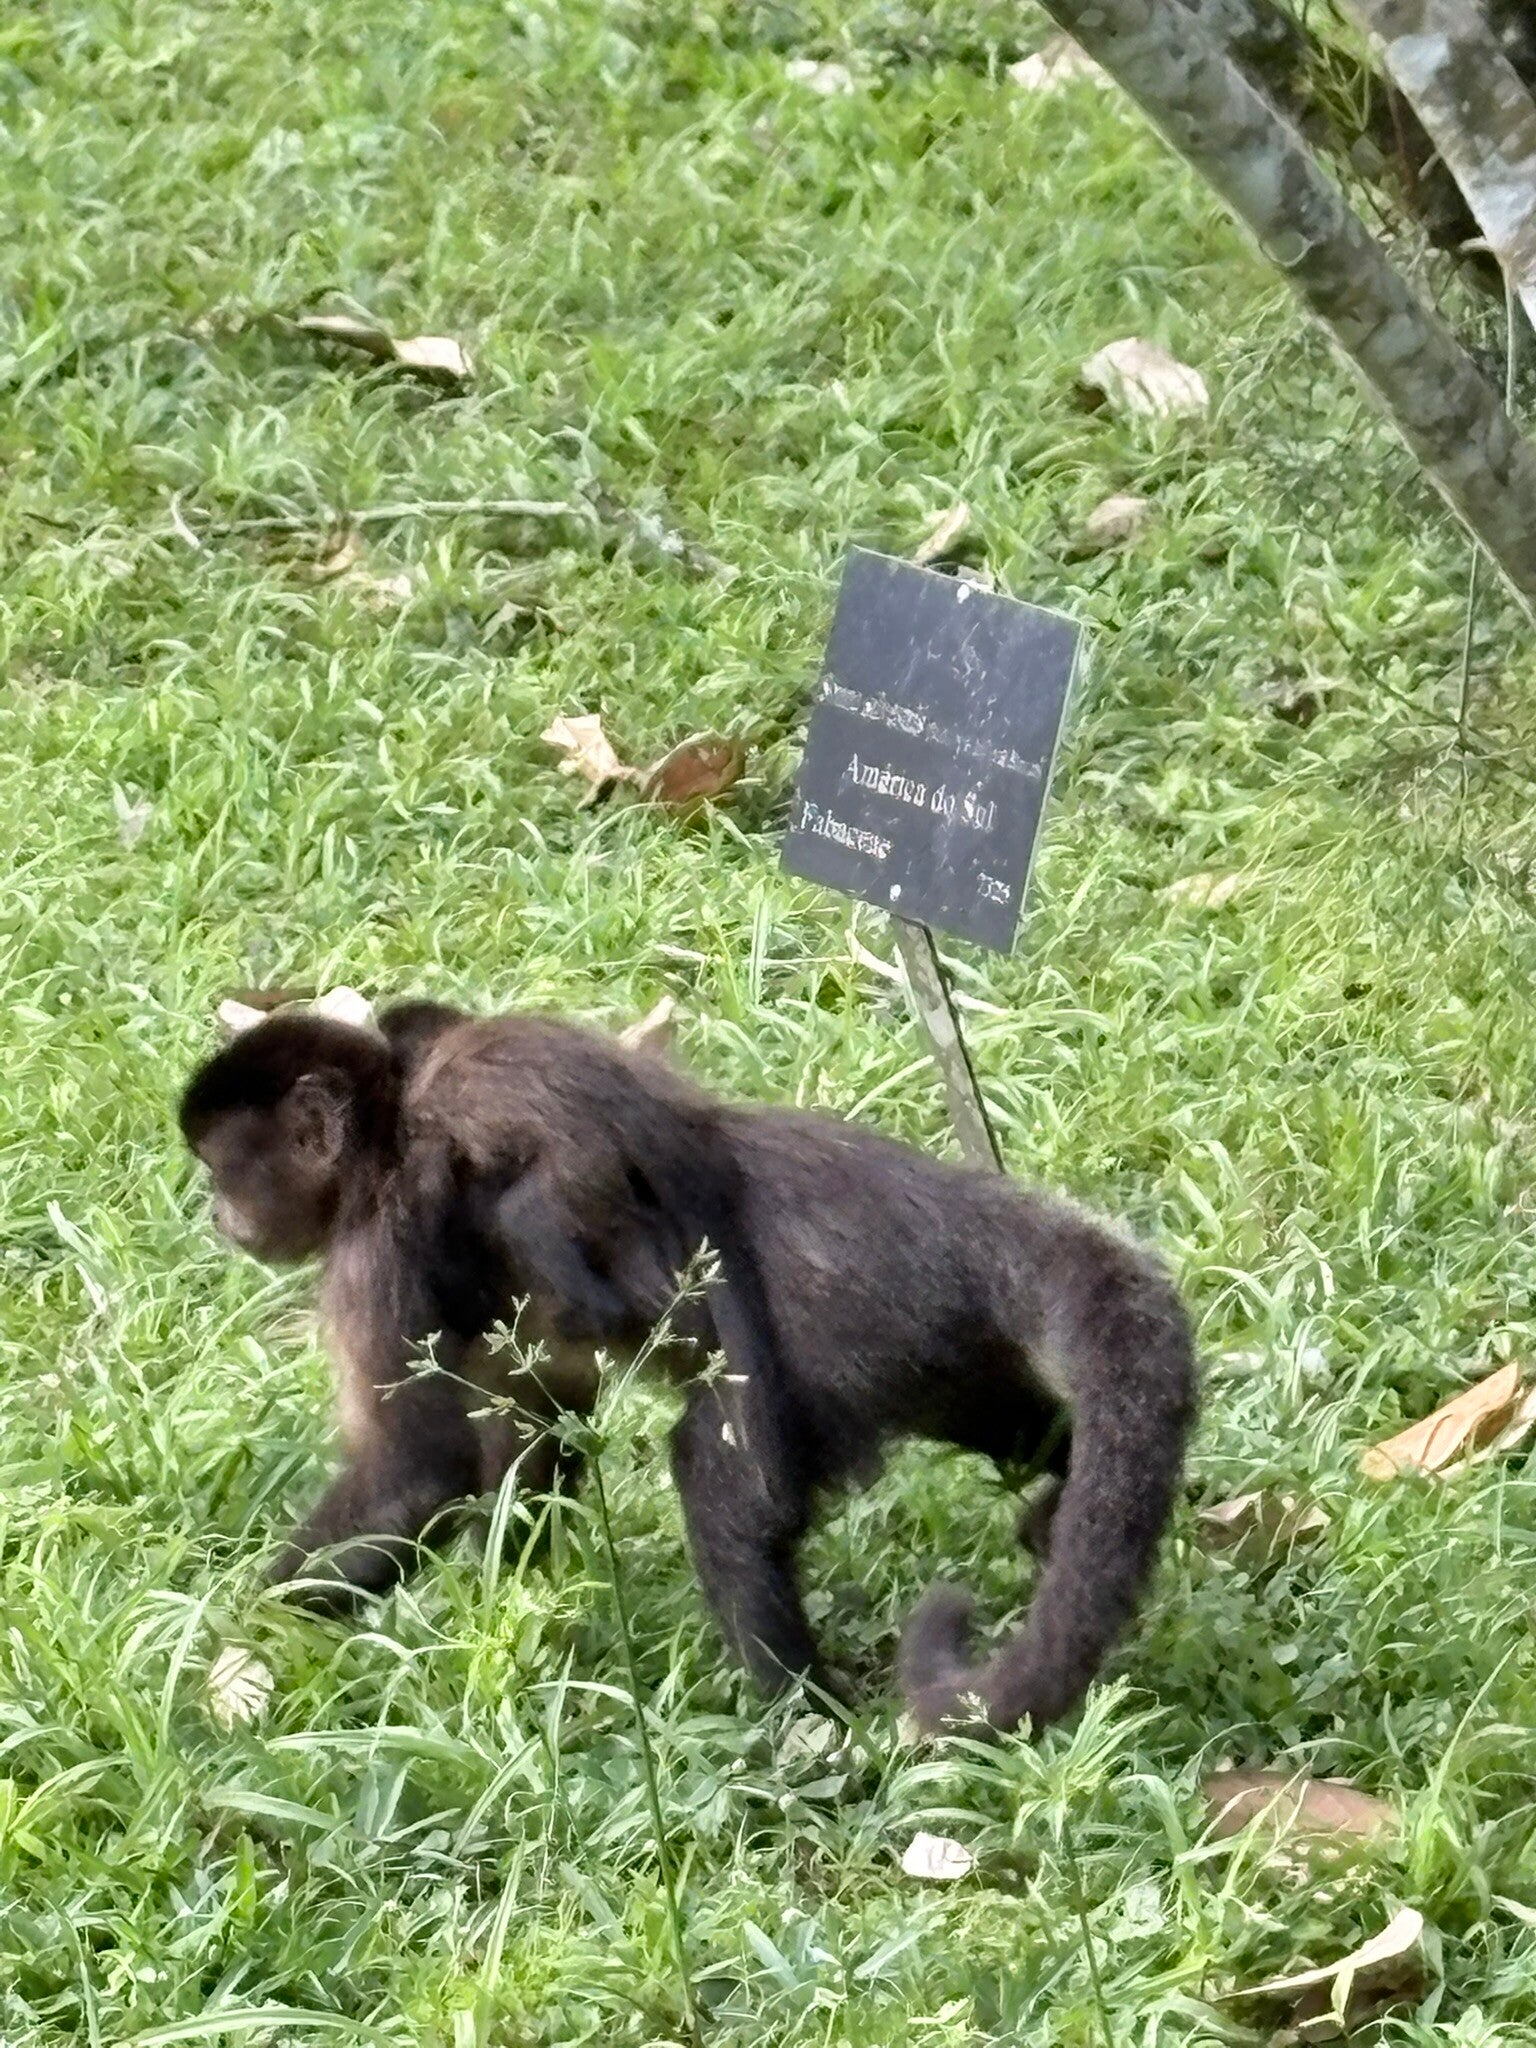
Highlights include sky-high royal palms, Amazon-region trees, giant water lilies, orchids, cacti, and a bamboo forest. I especially loved strolling the palm avenue and spotting wildlife like common marmosets, capuchin monkeys and even toucans. 🐒🦜
Day 7: hike (one last time) and eat your way through Rio
🌄 Morning option: Pedra Bonita (easy hike, big payoff)
On the last day in Rio de Janeiro, you can spend the morning lounging on the beach or, if you haven't yet had enough of epic views, hiking to another gorgeous viewpoint of Pedra Bonita. From the start of the Trilha da Pedra Bonita, it takes about 45 minutes to reach the top. The trail is straightforward and doable for anyone without mobility limitations. From the summit, you’ll be right in front of Pedra da Gávea, the massive monolith you hiked on Day 3. It's a spectacular view as the cliff resembles a carved head, and the legend says it's a head of a Norse king that reached the coasts of Rio in ancient times. At the bottom of the trail there’s also a cozy café, which is perfect for a post-hike açaí or a light lunch.


🍹 Afternoon: a culinary tour
In the afternoon, you can relax or take one final journey across Rio, this time through food. I did a gastronomic + historical tour in Barra da Tijuca (in the city’s southeast zone). It’s an affluent neighborhood, often described as wealthier than Copacabana, Centro and Ipanema combined, so it also felt like a very comfortable area to explore Rio’s food scene.
We tried a great mix of classics, including:
- Feijoada (Brazil’s national dish)
- Caipirinhas
- Carne de sol com macaxeira (sun-cured meat with cassava)
- Coconut-based sweets like brigadeiro, beijinho, quindim, and cajuzinho
What I didn’t expect (in a good way) was how much context the guide added, touching on Brazil’s history and heavier topics like slavery without turning it into a lecture.
We also visited Ilha da Gigóia, a little car-free island that you can only reach by taxi boat. It has a mini “Venice” feel—just with mangroves and warm air - and it genuinely feels like a local escape from the city’s hustle.
Overall, it was a delicious, interesting, and memorable way to end the trip, and I can absolutely recommend it.
P.S. Even though it wasn’t part of this tour, you must try pão de queijo (Brazilian cheese bread). It’s pure comfort food: it's a hearty, cheesy goodness, crunchy on the outside with slightly salty chewy texture on the inside.


Over one week, you’ll get a mix of Rio’s most iconic sights, its best viewpoints, and a few experiences that add depth beyond the postcard version of the city. Expect early starts, sweaty hikes, and big rewards - balanced with great food, neighbourhood vibes, and plenty of chances to slow down when you need to.
🔄 Easy ways to make it less intense
- Turn one day into a full rest day with beach time
- Pick one major hike (Pedra da Gávea or Telégrafo or Bonita) instead of stacking them
- Add an extra “buffer” afternoon for naps, beach or just doing nothing :)
🛡️ Staying Safe in Rio de Janeiro (without letting it ruin your trip)
Rio is one of the most beautiful cities I’ve ever visited—but for me, it came with a price. It’s the only place (out of 60+ countries) where I’ve been robbed: my phone was stolen in the city center. I also witnessed another woman having her phone yanked out of her hands during a tour in broad daylight. I’m not sharing this to scare you off—quite the opposite. Rio is absolutely worth visiting and I want you to enjoy it while staying smart about safety.
🧠 The main principle: don’t keep everything in one place
When you’re out exploring, try not to carry your phone, wallet, cards, cash, smartwatch, etc. all together. If one thing gets taken, you don’t want to lose everything in one go. Leave extra cards, cash, and devices at the hotel whenever you can.
A quick note on payments: going out with only cash sounds safer, but in Rio it can actually be inconvenient. Many places strongly prefer card (or PIX, the local payment method) and people often don’t have change. Cash could only work if you have small notes or exact change.
✅ Practical safety tips (what I’d actually do)
- Only take your phone out when you need it, and hold it firmly with both hands.
A cross-body phone strap helps a little, but it’s not foolproof - straps can be cut.
If possible, consider going out with a spare/backup phone that only has your local SIM/eSIM in it.
- At night, don’t walk home, even in nicer neighbourhoods. Uber is easy and convenient in Rio.
- Never leave belongings unattended on the beach, even “for a second.”
- Keep a second device at the hotel (laptop/old phone/smartwatch) so you can recover accounts if your phone is stolen.
- Memorize your PIN codes and key passwords before you travel. If you need help remembering, write down partial hints on paper (not the full password).
- Know how to contact your telecom provider to help restore your sims on another device.
📱 SIM cards in Brazil
Most tourists in Brazil use eSIMs from providers like Airalo, because buying a local prepaid SIM can be surprisingly difficult without a Brazilian CPF (personal ID number). TIM is often mentioned as the exception that can sometimes be sold to foreigners, but the “tourist pricing” typically isn’t very attractive.
🛡️ Staying Safe in Rio de Janeiro (without letting it ruin your trip)
Rio is one of the most beautiful cities I’ve ever visited—but for me, it came with a price. It’s the only place (out of 60+ countries) where I’ve been robbed: my phone was stolen in the city center. I also witnessed another woman having her phone yanked out of her hands during a tour in broad daylight. I’m not sharing this to scare you off - quite the opposite. Rio is absolutely worth visiting and I want you to enjoy it while staying smart about safety.
🧠 The main principle: don’t keep everything in one place
When you’re out exploring, try not to carry your phone, wallet, cards, cash, smartwatch, etc. all together. If one thing gets taken, you don’t want to lose everything in one go. Leave extra cards, cash, and devices at the hotel whenever you can.
A quick note on payments: going out with only cash sounds safer, but in Rio it can actually be inconvenient. Many places strongly prefer card (or PIX, the local payment method) and people often don’t have change. Cash could only work if you have small notes or exact change.
✅ Practical safety tips (what I’d actually do)
- Only take your phone out when you need it, and hold it firmly with both hands.
A cross-body phone strap helps a little, but it’s not foolproof - straps can be cut. If possible, consider going out with a spare/backup phone that only has your local SIM/eSIM in it.
- At night, don’t walk home, even in nicer neighbourhoods. Uber is easy and convenient in Rio.
- Never leave belongings unattended on the beach, even “for a second.”
- Keep a second device at the hotel (laptop/old phone/smartwatch) so you can recover accounts if your phone is stolen.
- Memorize your PIN codes and key passwords before you travel. If you need help remembering, write down partial hints on paper (not the full password).
- Know how to contact your telecom provider to help restore your sims on another device.
📱 SIM cards in Brazil
Most tourists in Brazil use eSIMs from providers like Airalo, because buying a local prepaid SIM can be surprisingly difficult without a Brazilian CPF (personal ID number). TIM is often mentioned as the exception that can sometimes be sold to foreigners, but the “tourist pricing” typically isn’t very attractive.
Add comment
Comments
Submit the cost for the 7 day tour please.
Can you recommend accommodations
thank you for comments Bard and Farhana.
@Bard, I did not invlude accommodations on purpose, as it's very individual depending on the budget and preferences. Common places to stay in Rio de Janeiro are Copacabana and Ipanema.
@Farhana, this is not an organized tour company, it's only me sharing my travel experiences and there are links to all the tours I took together with the cost.