Get ready for an incredible 5-day trek that leads you all the way to Machu Picchu! If hiking isn't your thing, feel free to skip ahead to Day 5 for Machu Picchu visit tips. For those ready to embark on this adventure, let’s dive into the details!
You can reach Machu Picchu via two famous trekking routes: the Inca Trail and the Salkantay Trail. So, which one should you choose? 🥾
Inca Trail vs. Salkantay Trail
The Inca Trail is the original path used during Inca times, where you can hike on ancient Inca stairs, explore Inca ruins along the way, and arrive at Machu Picchu through the Sun Gate. This entrance provides a breathtaking first view after days of trekking. 🌄
While the Inca Trail sounds fantastic, I opted for the Salkantay Trail for several reasons:
- Less Crowded: The Salkantay Trail tends to be less congested than the Inca Trail, allowing for a more serene hiking experience. Although it's still busy, so I can only imagine how crowded the Inca Trail must get!
- Cost-Effective: The Salkantay Trail is significantly cheaper, making it a more budget-friendly option.
- No Advance Reservations Needed: Unlike the Inca Trail, which requires reservations many months in advance, the Salkantay Trail offers more flexibility in planning.
- Better Camping Options: The Salkantay Trail provides more comfortable accommodations in huts, compared to the tents used on the Inca Trail. 🏕️
That said, I encourage you to do your own research to determine which option appeals most to you.
Choosing a Tour Provider
Another crucial factor to consider is the selection of your tour provider. The Salkantay Trek experience is offered by numerous companies, but here are some of the most reputable and established providers:
- Salkantay Trekking
- Alpaca Expeditions
- Sam Travel Peru
- Machu Picchu Reservations (Budget Option)
I decided to go with Machu Picchu Reservations because their prices were almost half (!!!) that of other companies, yet they maintained an impressive record of 5-star reviews. The 5-day Salkantay trek with Machu Picchu Reservations costs between $250 - $350 USD, depending on various add-ons you can select at checkout. I have shared my experience with them below to help you make an informed decision.
Pros 👍
- Unbeatable Price: The most affordable option available.
- Experienced Provider: A well-established company with a solid reputation.
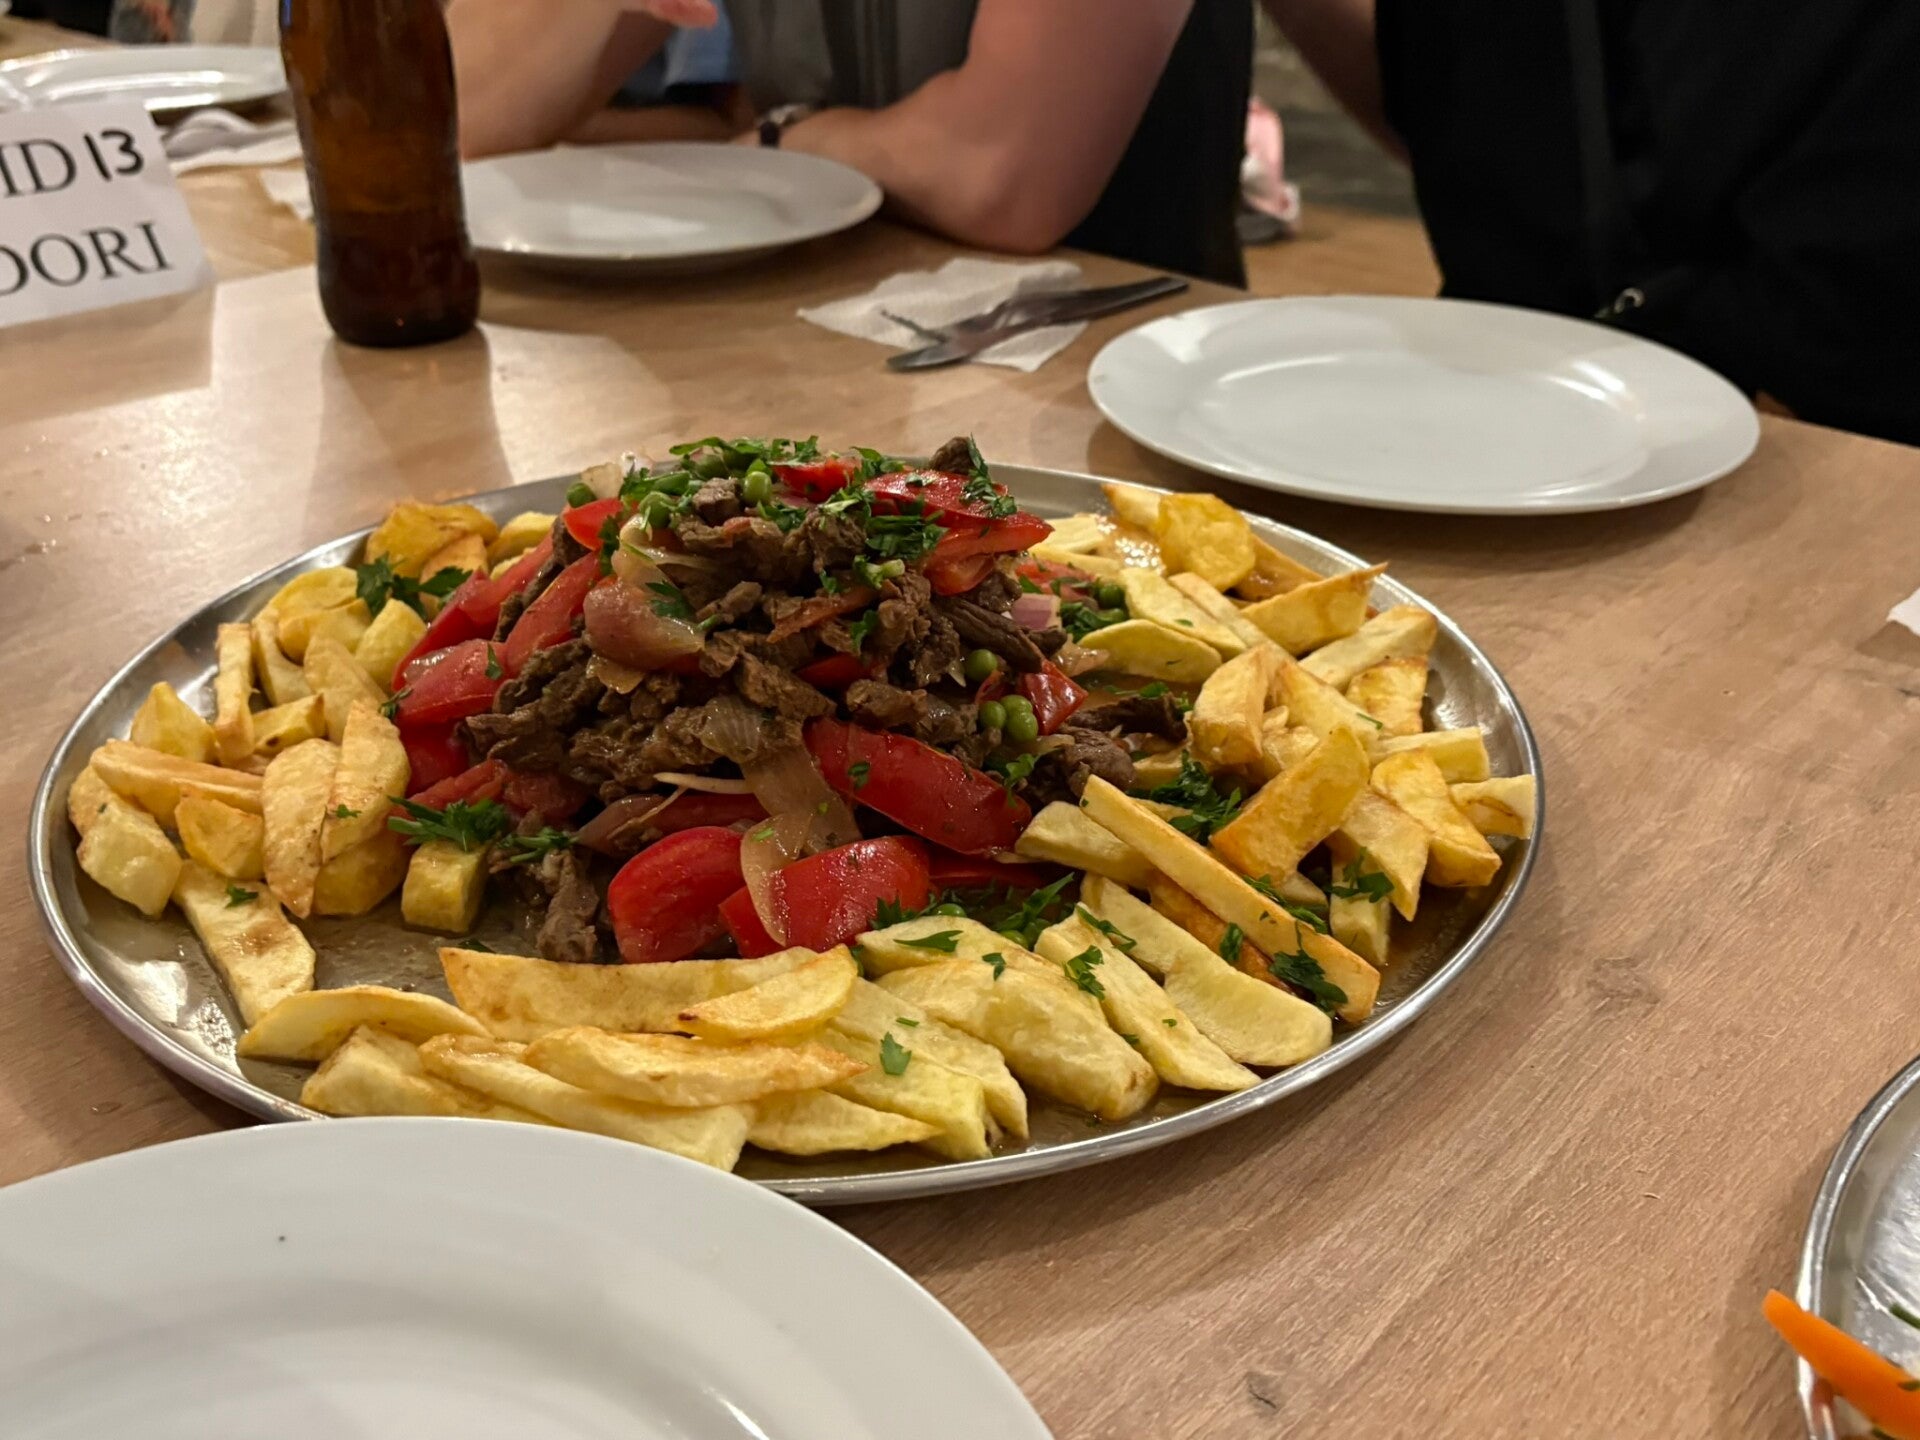
- Delicious Food: Multiple meal options were surprisingly good, especially given the challenging cooking conditions!
- Satisfactory Accommodations: Domes and huts were acceptable for the price paid.
Cons 👎
- Poor Time Management: Our guide struggled with keeping us on schedule, resulting in our group being the last to receive meals and often arriving at campsites at night. This experience can vary greatly depending on the guide, so it's somewhat a matter of luck.
- Basic Accommodations: Not as luxurious as other providers like Salkantay Trekking, and the shower facilities left much to be desired (e.g. inconsistent temperatures and cleanliness).
- No Snacks Provided: You must bring your own snacks to keep your energy up during the trek.
- Missing Tour: The hydroelectric power plant tour was listed in the itinerary but not included in our experience.
- Extra Costs: Hot springs and zip line activities were not included in the package and required additional payment. If you prefer to rest at the campsite, those options might not be necessary.
While the cons may seem significant, Machu Picchu Reservations remains a good budget option. However, if cost is less of a concern for you, I would recommend considering one of the other three top providers.
Packing List Sneak Peek 🎒
While your tour provider will likely give you a packing list, here’s a preview of the essential items you should consider bringing:
- Bug spray
- Sunscreen
- Sunglasses
- Swimsuit for the hot springs
- Lock for lockers at the hot springs
- Quick-drying towel
- Extra money (for snacks, water, beer, etc.)
- Hat
- Multiple layers of clothing
- Good boots (preferably with ankle support)
- Flip flops or sandals for showers
- Plenty of toilet paper (yes, accommodations often lack this!)
- Personal medications and hygiene items, including altitude sickness pills
- Rain cover for your bag (both day pack and larger bag)
- Note: Plastic bags work just as well and can be purchased before the trek on Day 1.
Day 1 of the Trek 🌅
The trek started with an early morning (around 4-5 AM) pickup from the accommodation. After approximately 2 hours of driving, we stopped for breakfast and last-minute supply and snack shopping. After another hour of driving, we started the hike to Humantay Lake, while our bags were loaded onto mules for transport to the camping destination (we hiked with day bags only).
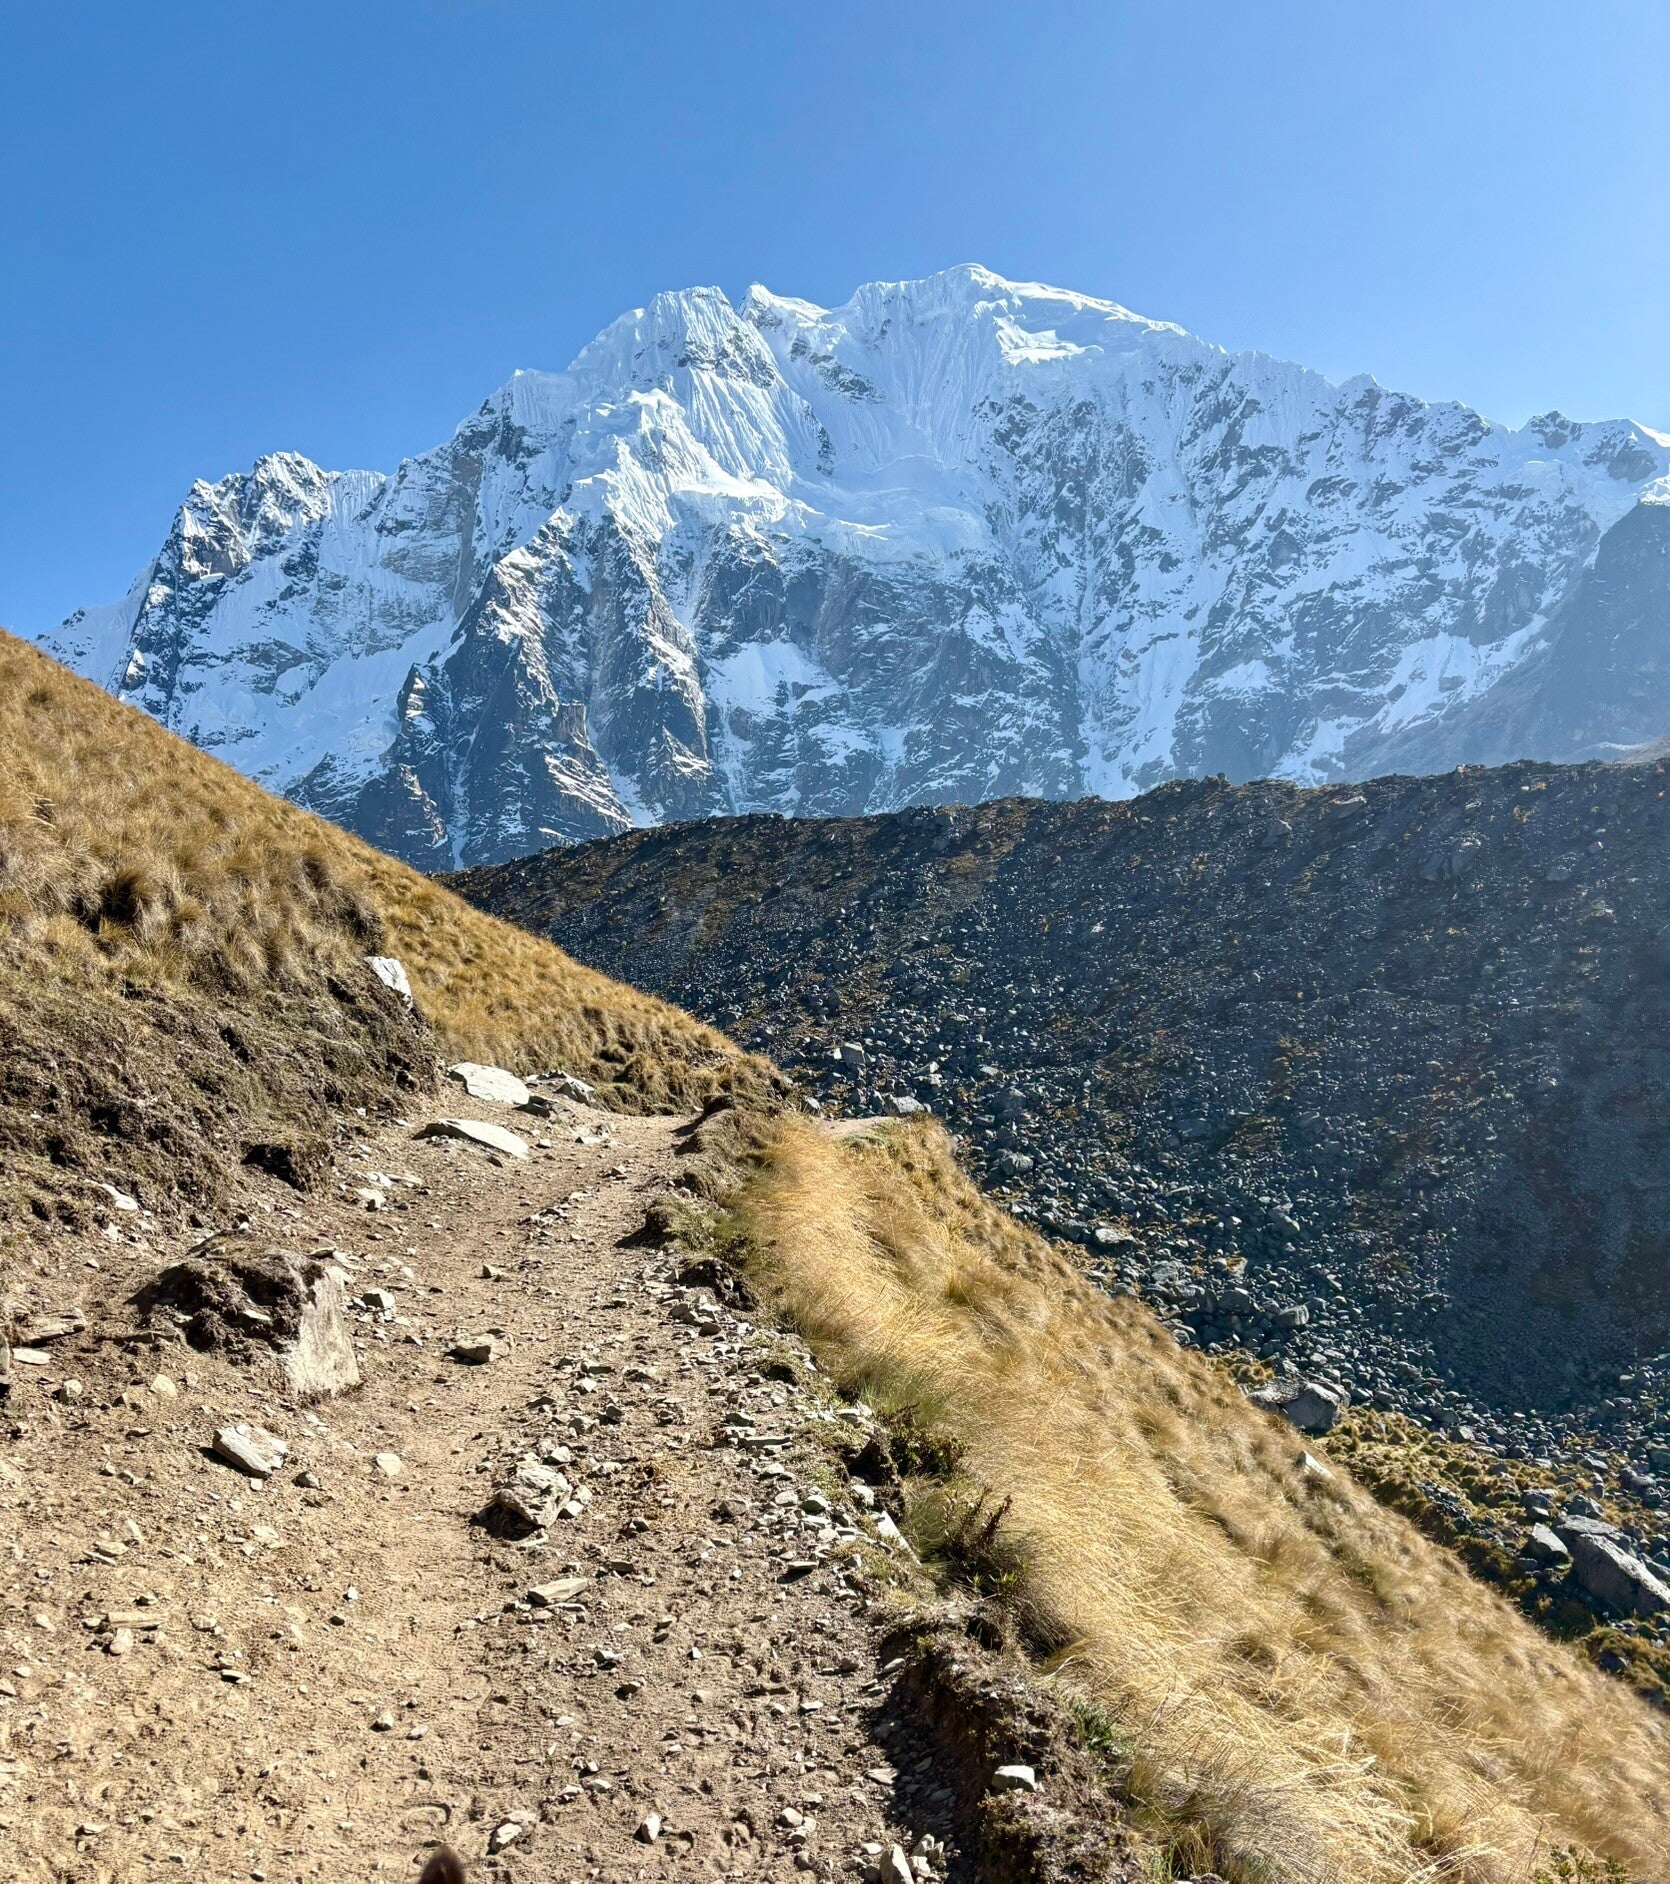
- Humantay Lake: The lake sits at around 4200m (13.800 ft) above sea level, and the hike started at around 3800m (12.500 ft). While a 400m (1300 ft) altitude gain doesn’t seem like much, the trail is quite steep, and many people struggled due to the altitude. However, the hike was short and sweet, making it great for acclimatization and warming up before the next day, which pushes to the highest point on the trek.
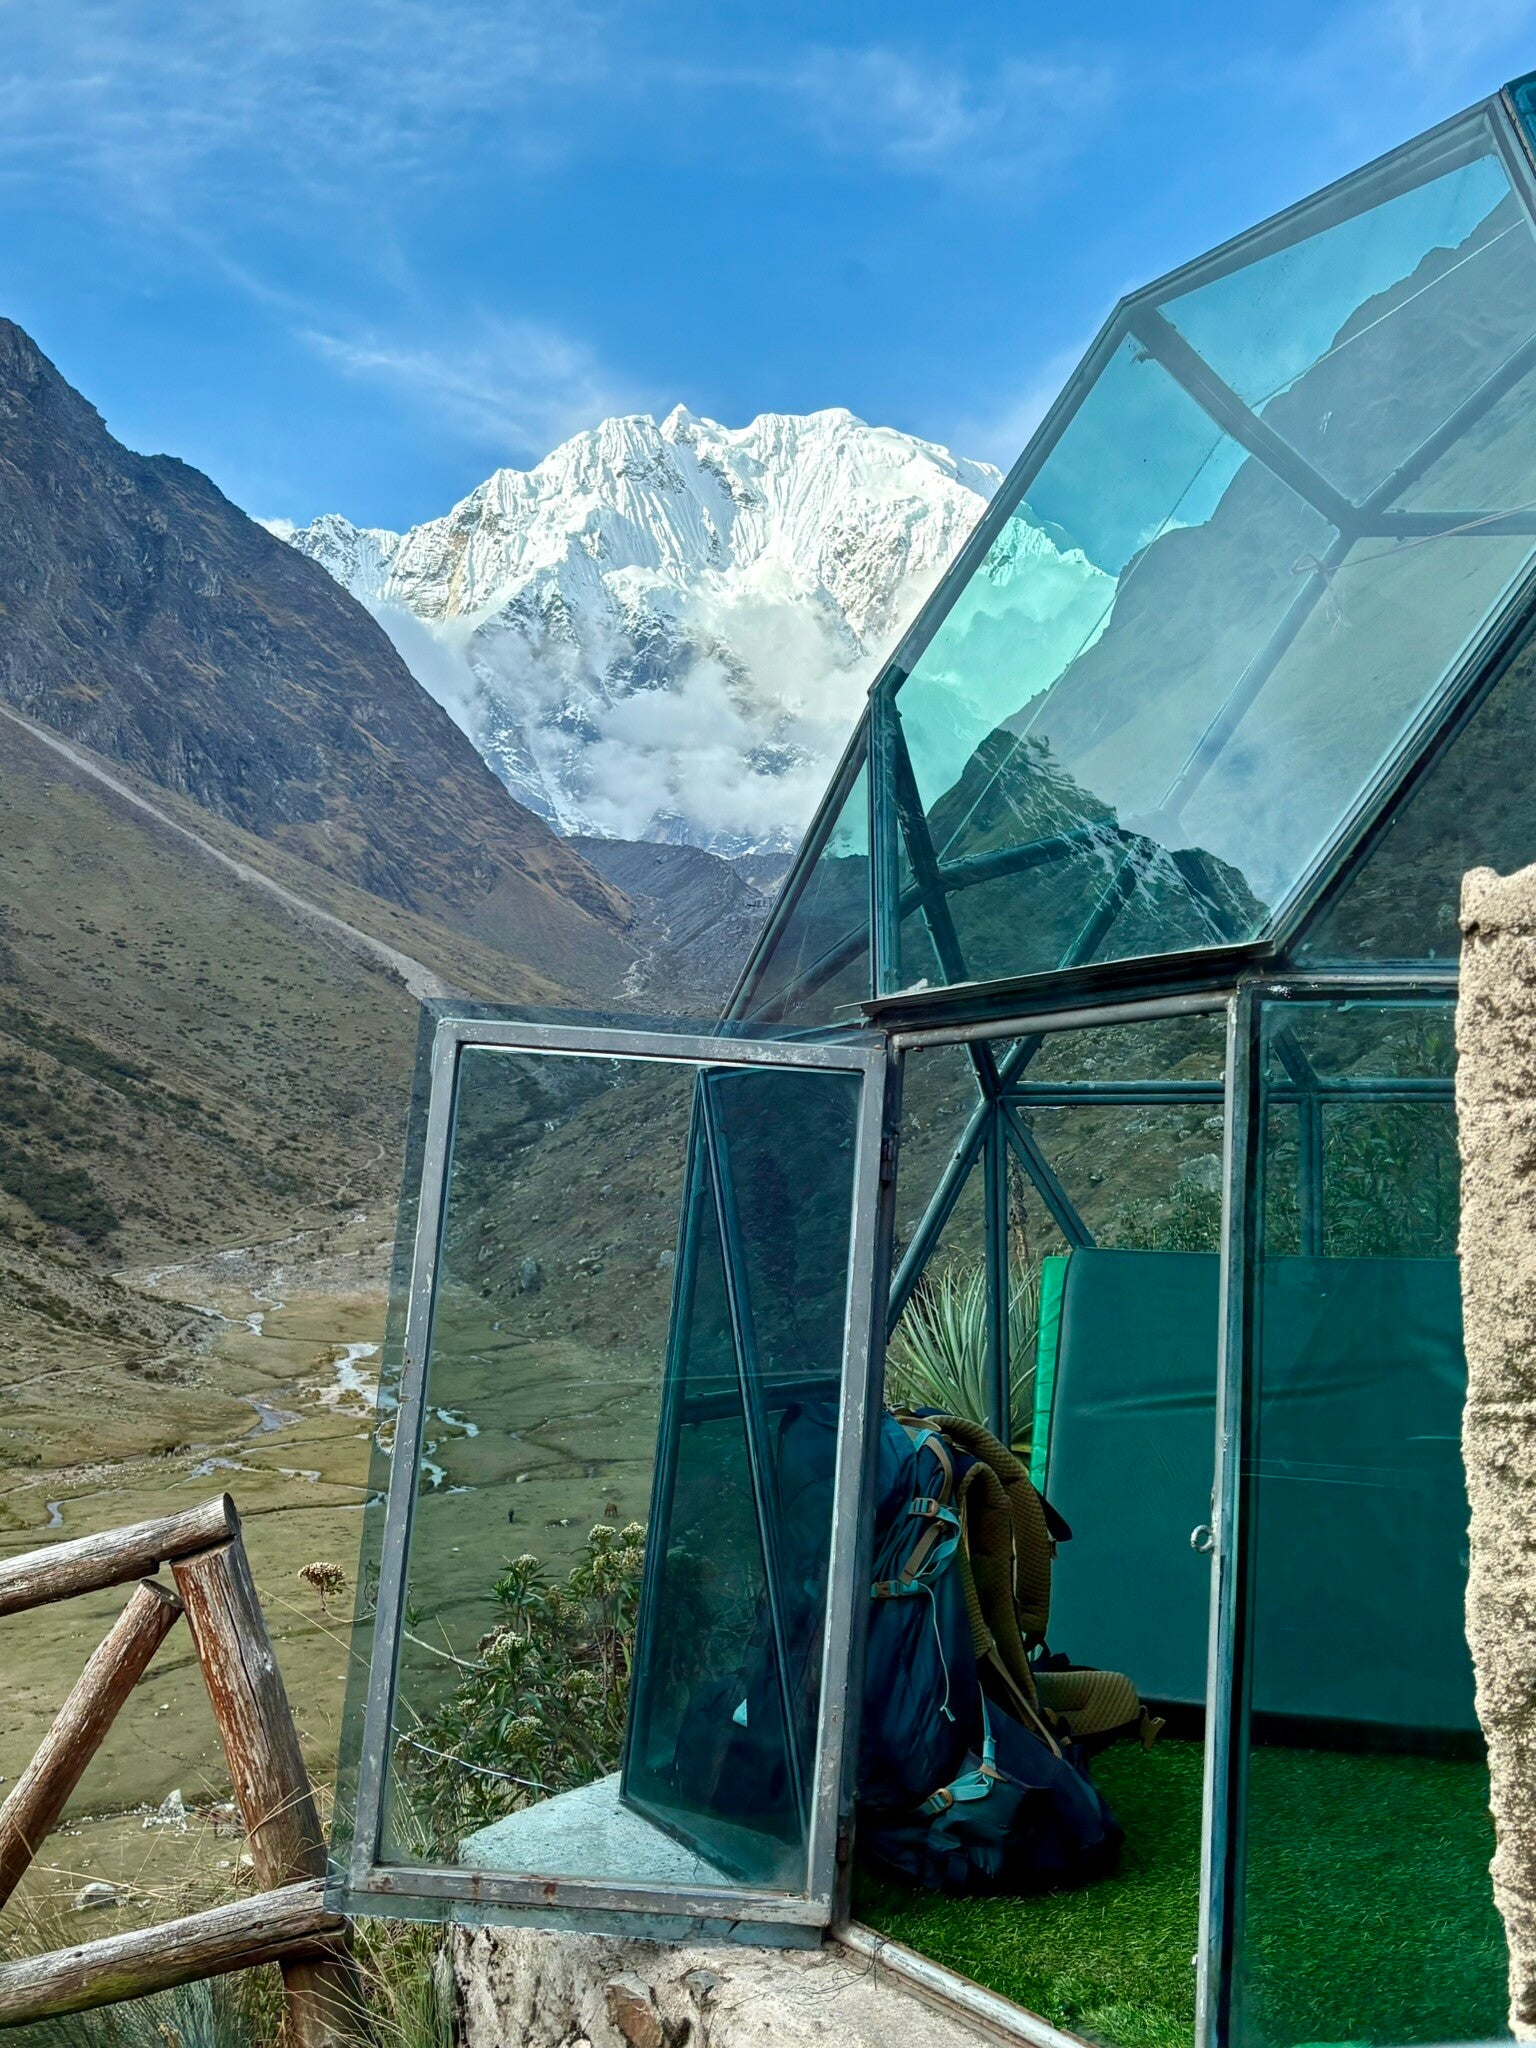
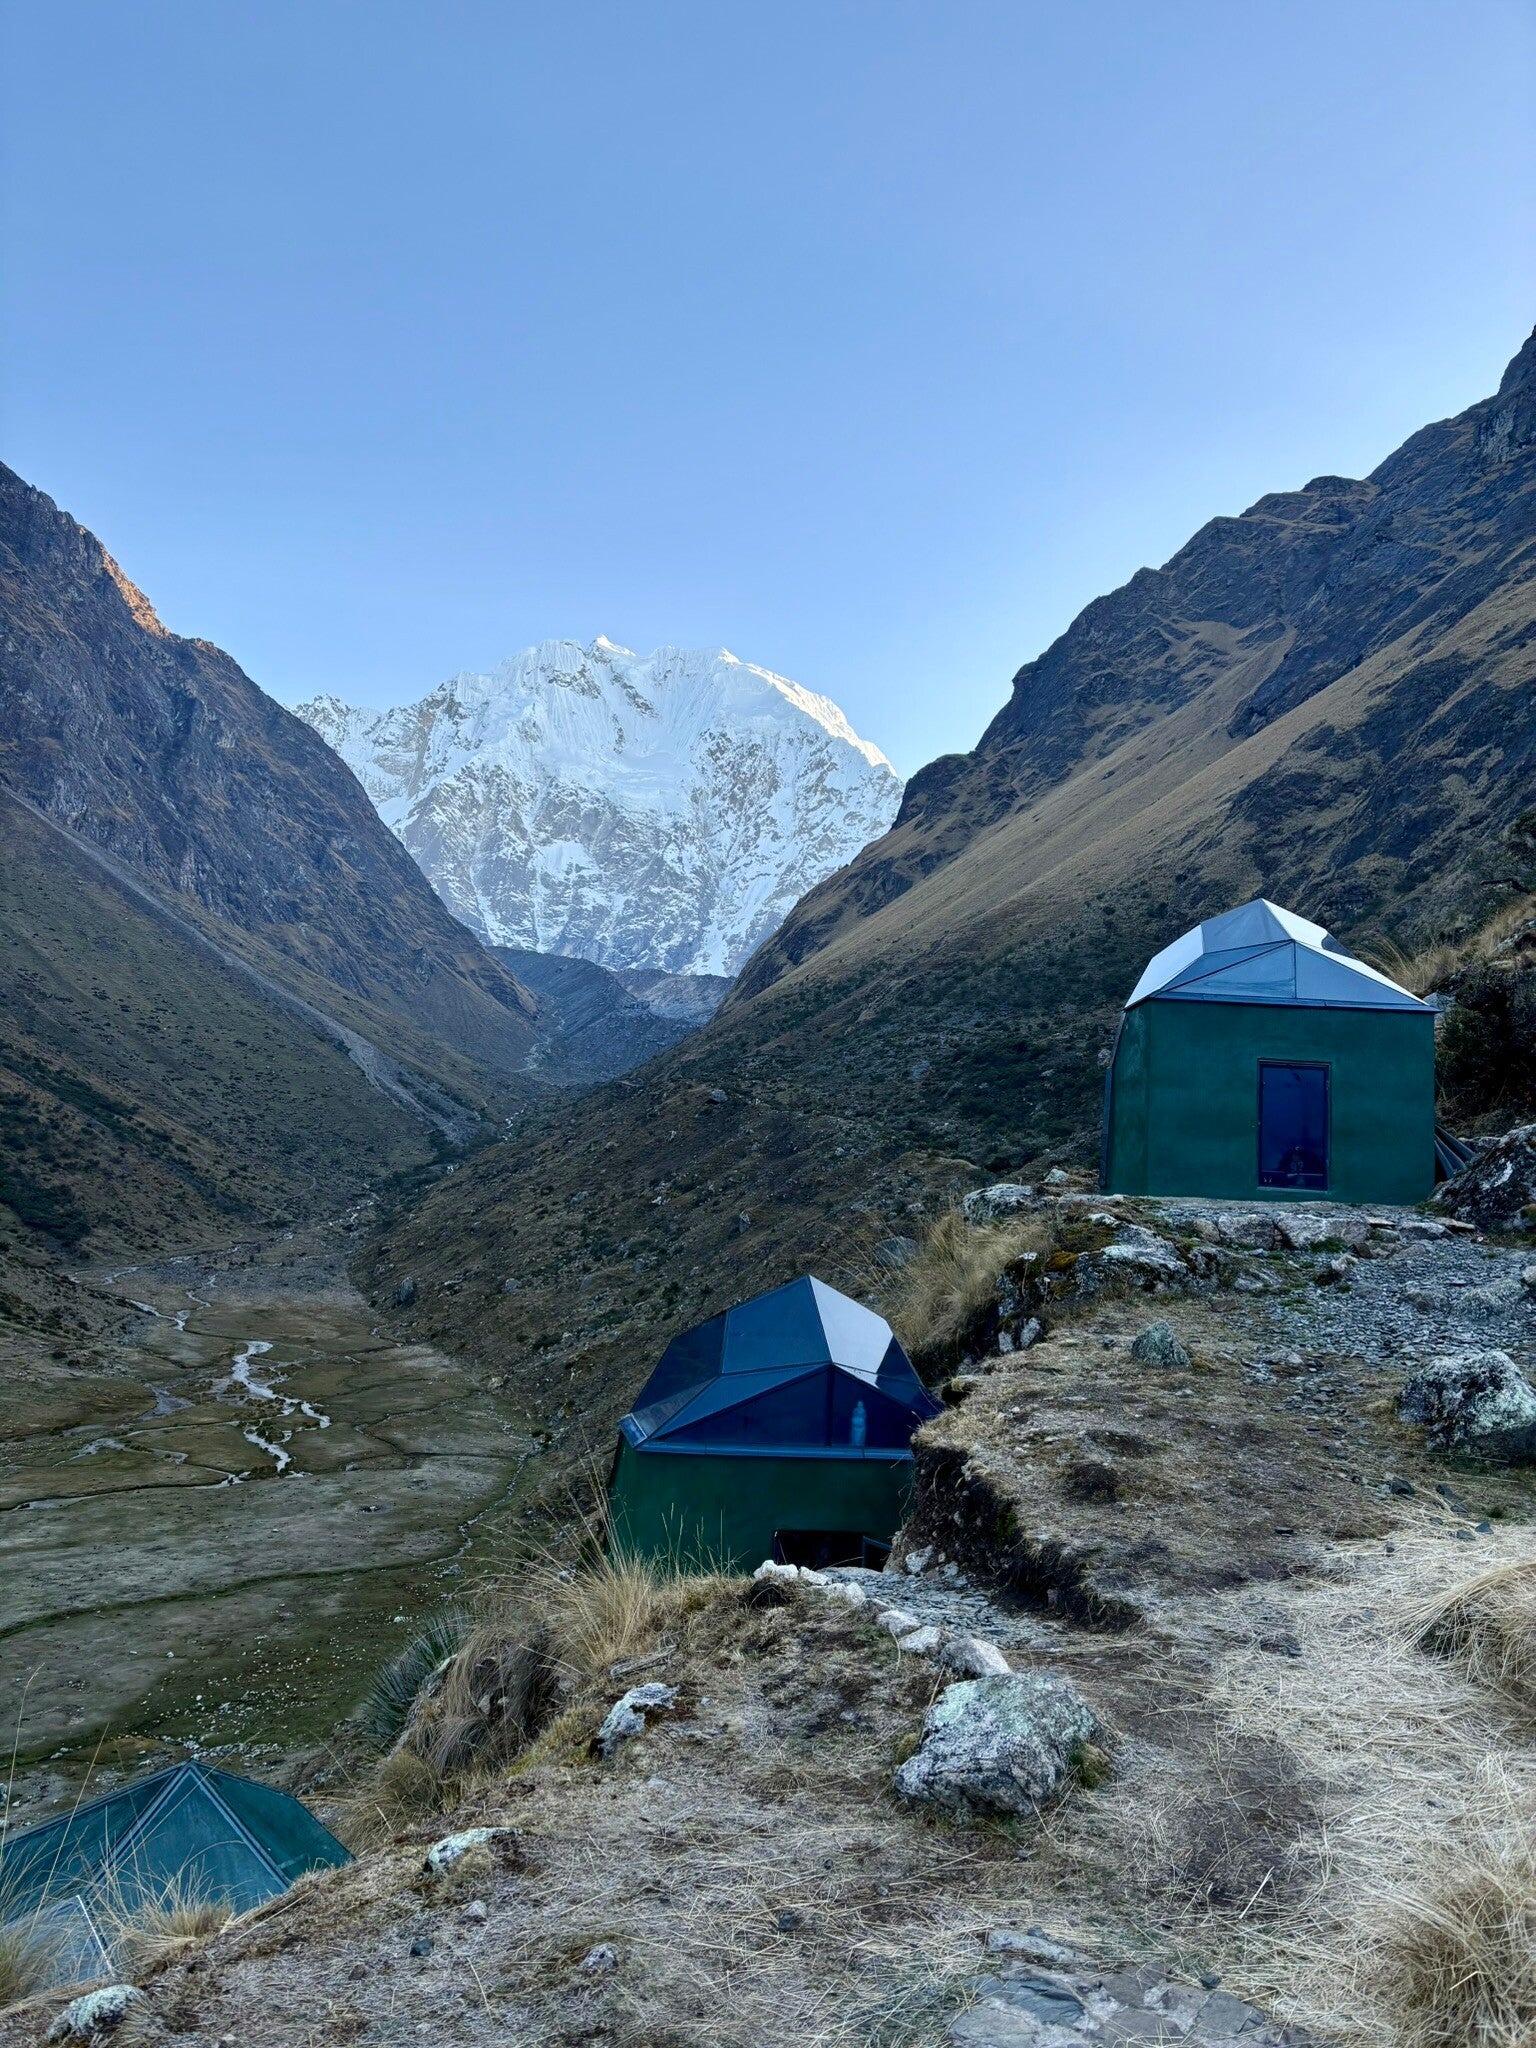
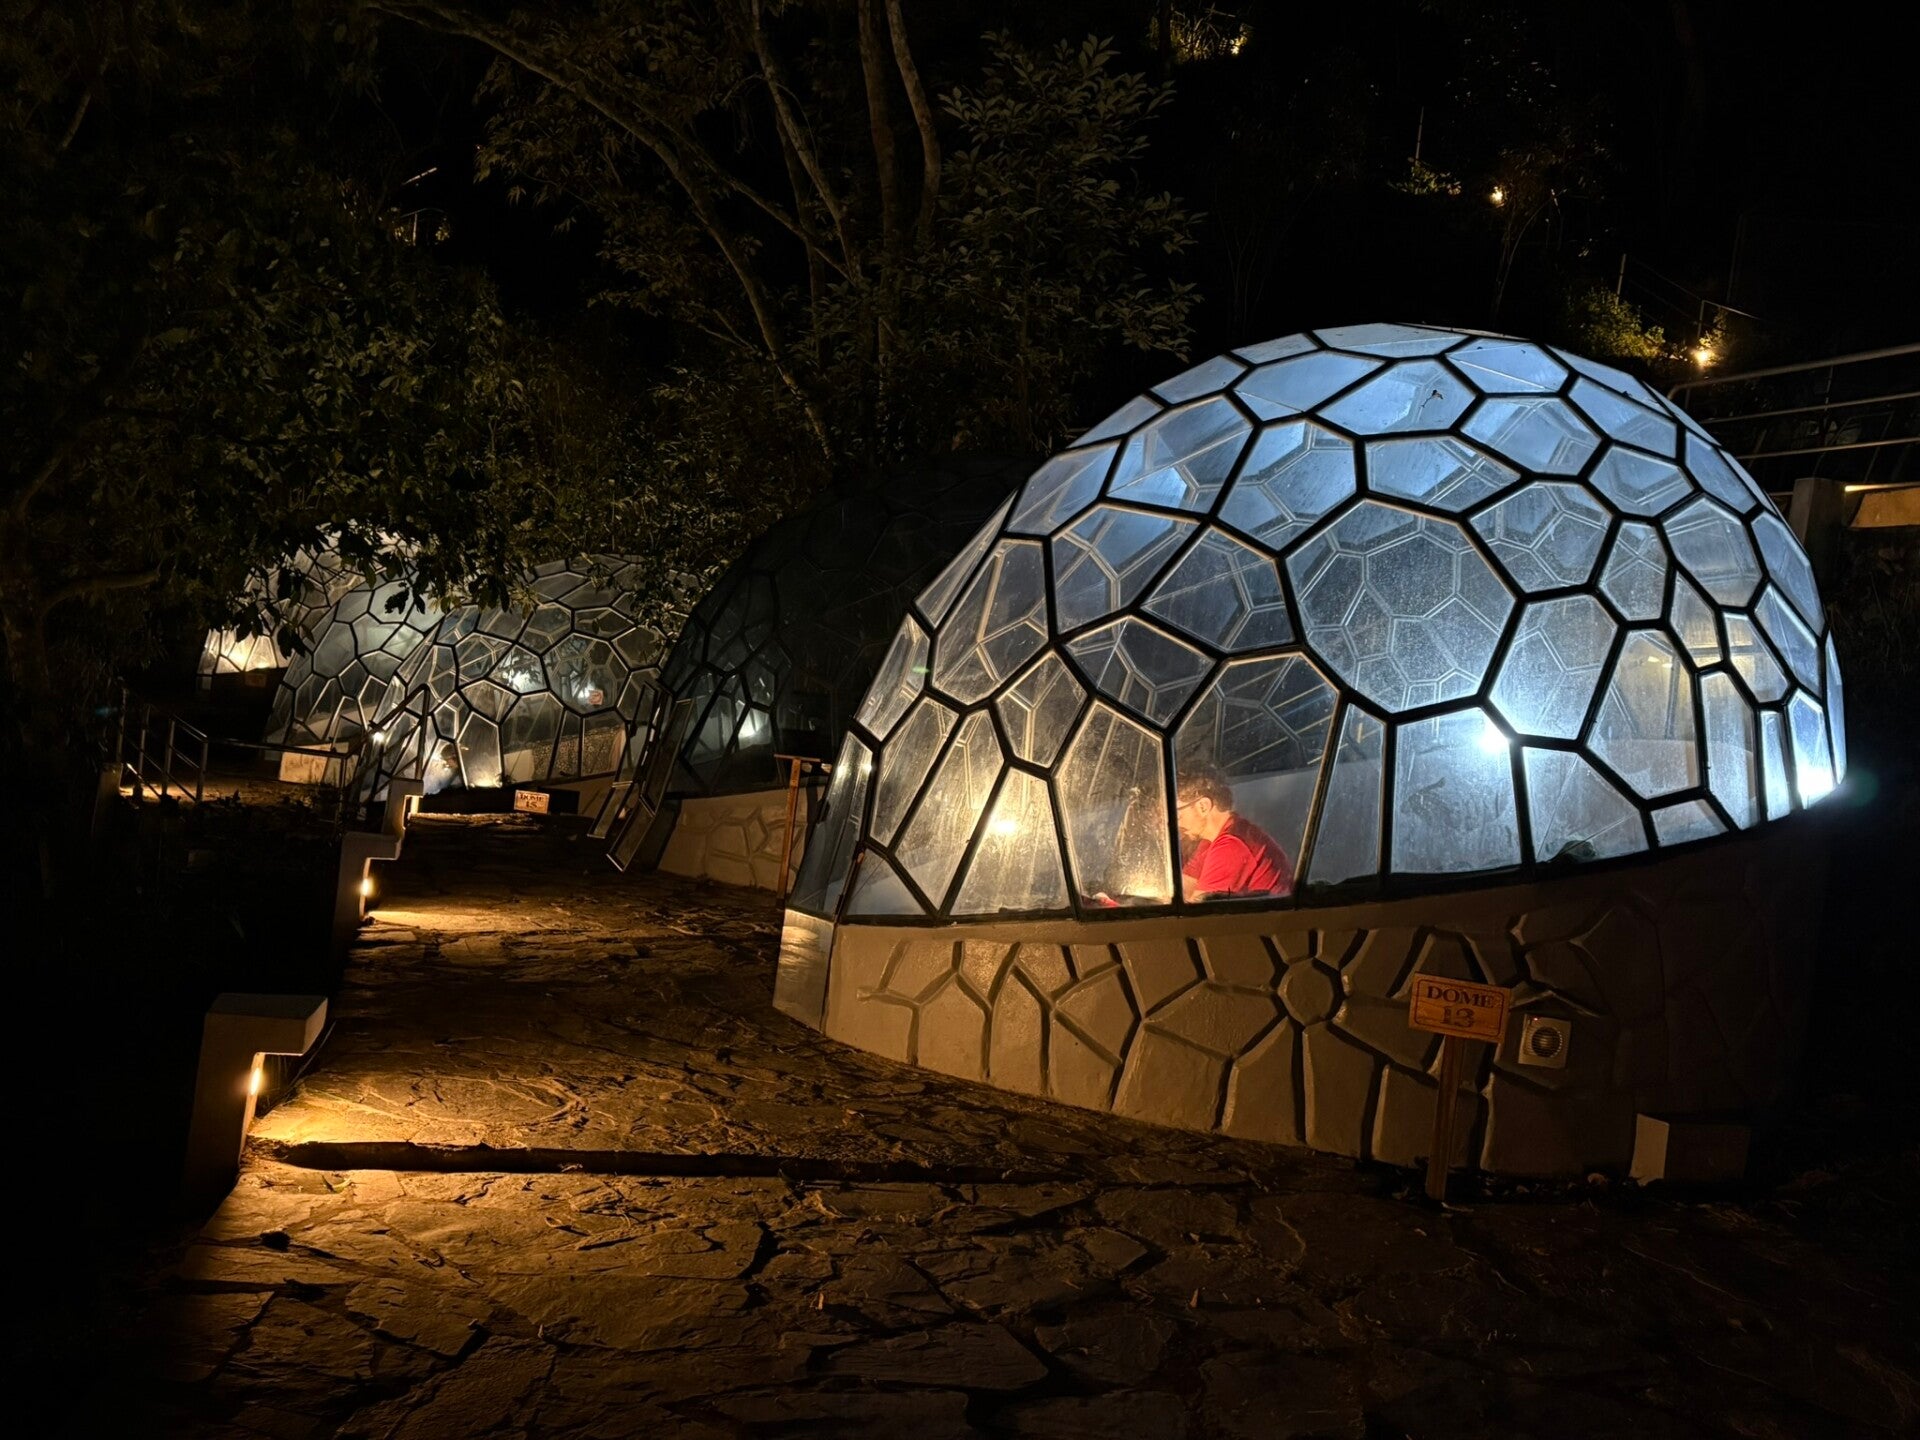
- After enjoying the lake, we descended back to the campsite where a hot lunch was served. We were introduced to our quarters, which, in our case, were gorgeous glass domes with mountain views. 🌄
Lunch was served late (around 2 PM), while breakfast was around 7 AM, so make sure to pack enough snacks. After lunch, there was free time until dinner, which many chose to use for a nap (altitude and an early start are exhausting!). 😴 After dinner, we called it an early night as another 4:30 AM wake-up and a trail of approximately 25 km awaited the next day.
Note: This campsite has no shower facilities (which are not particularly needed due to the cold temperatures!).

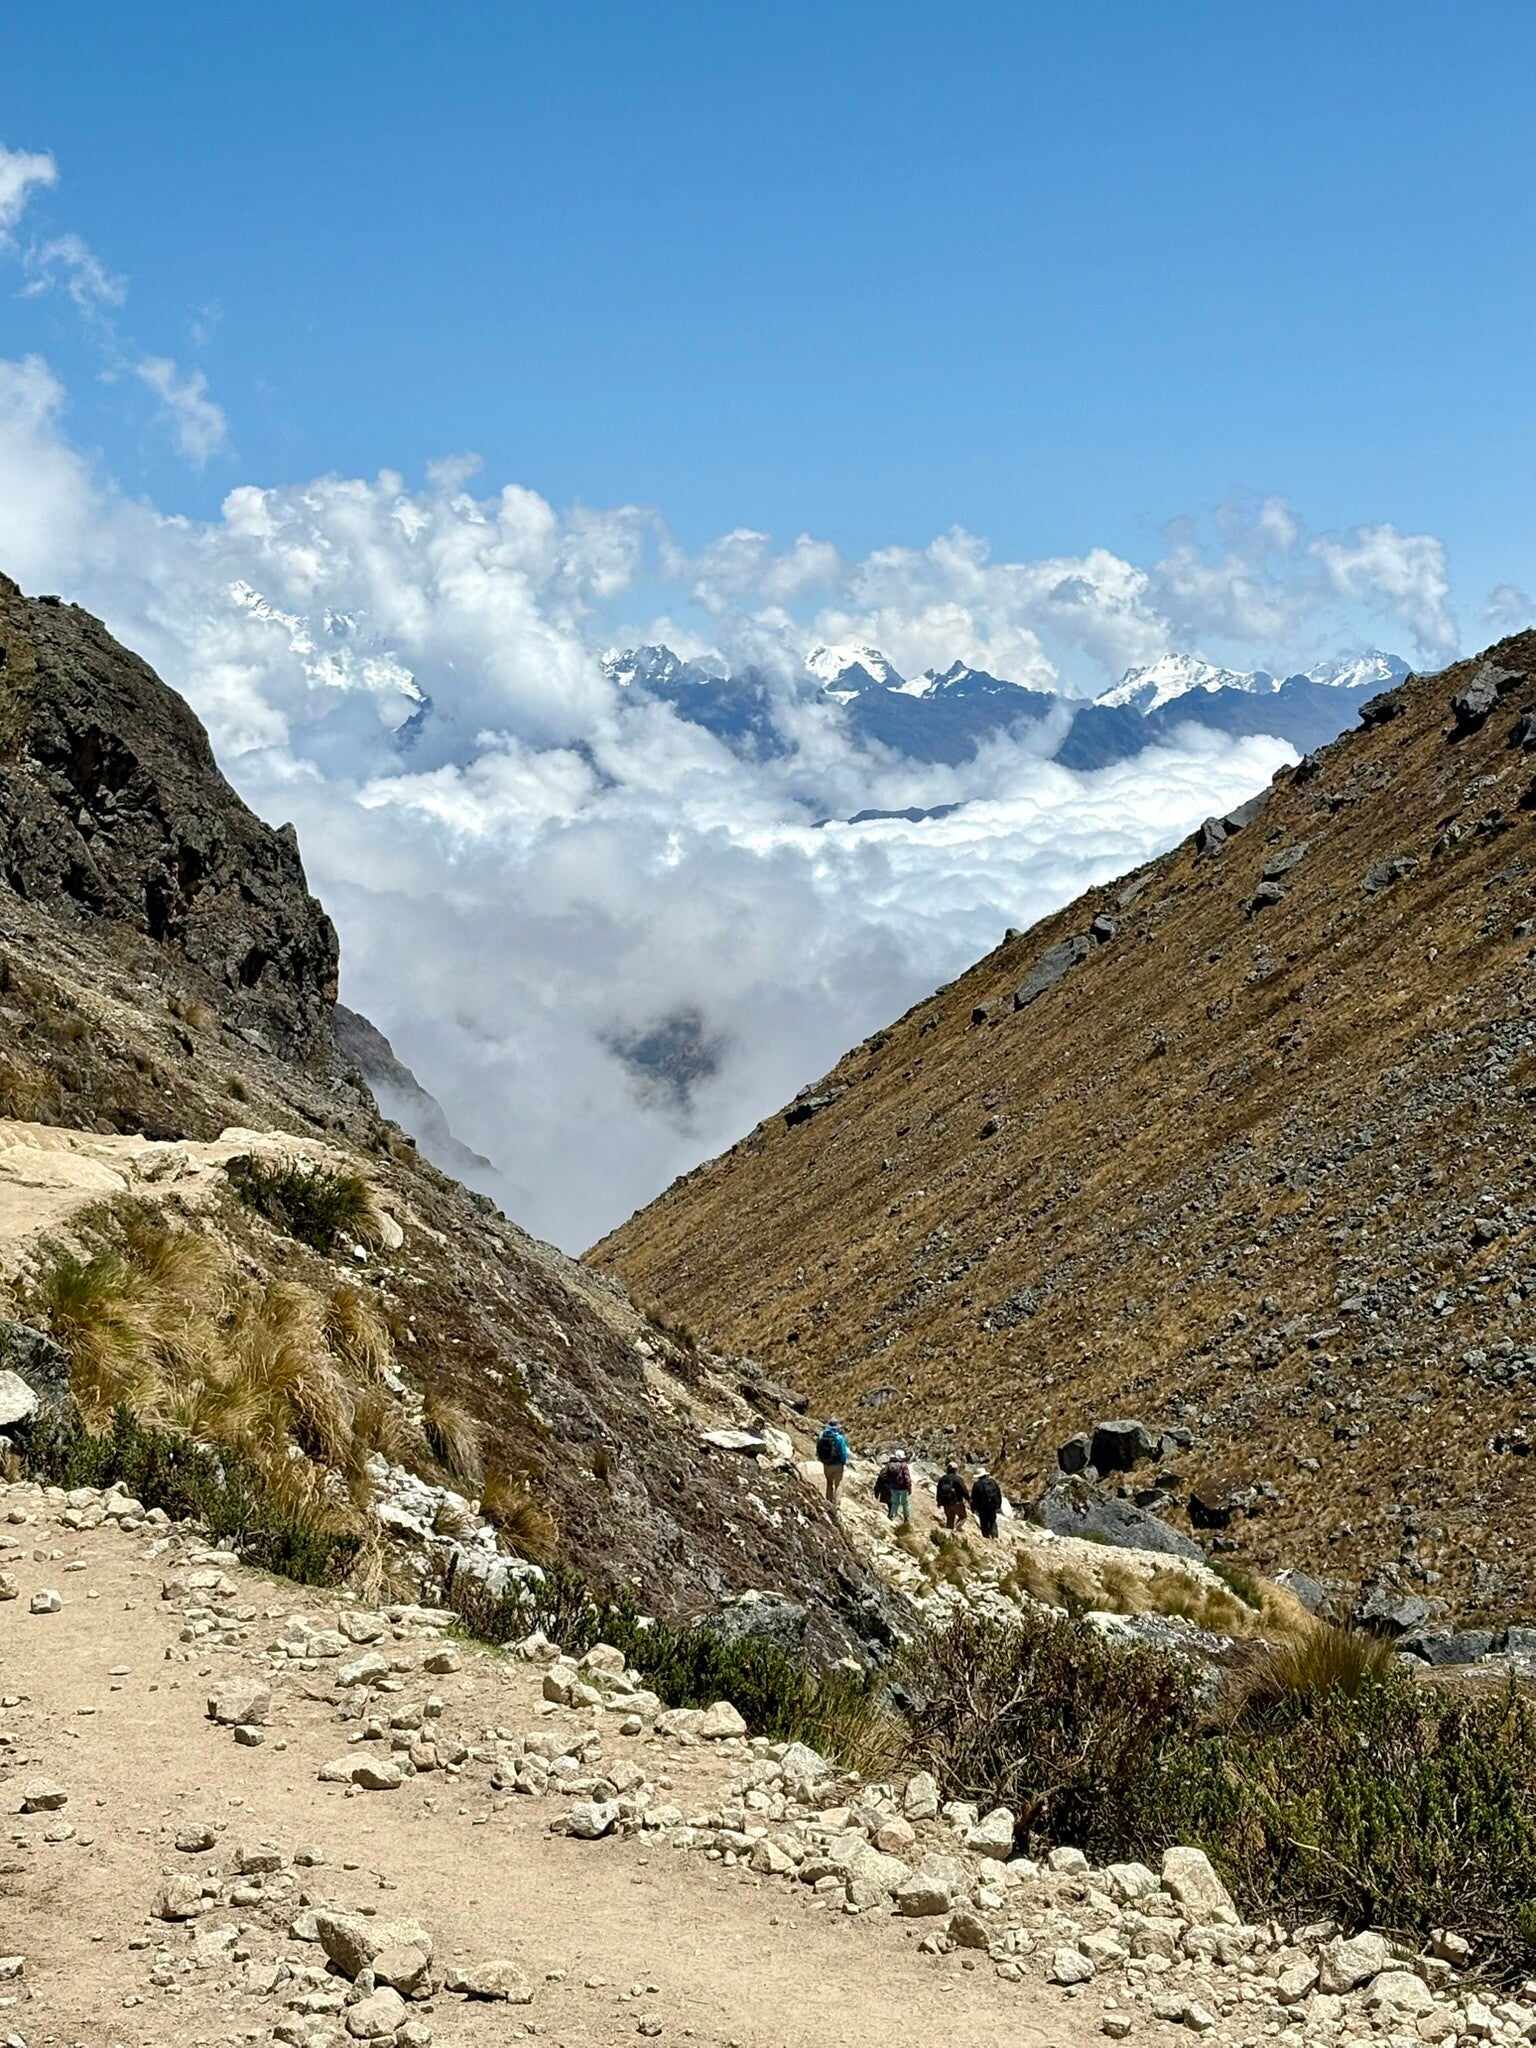
Day 2 - The Hardest Day 🥵
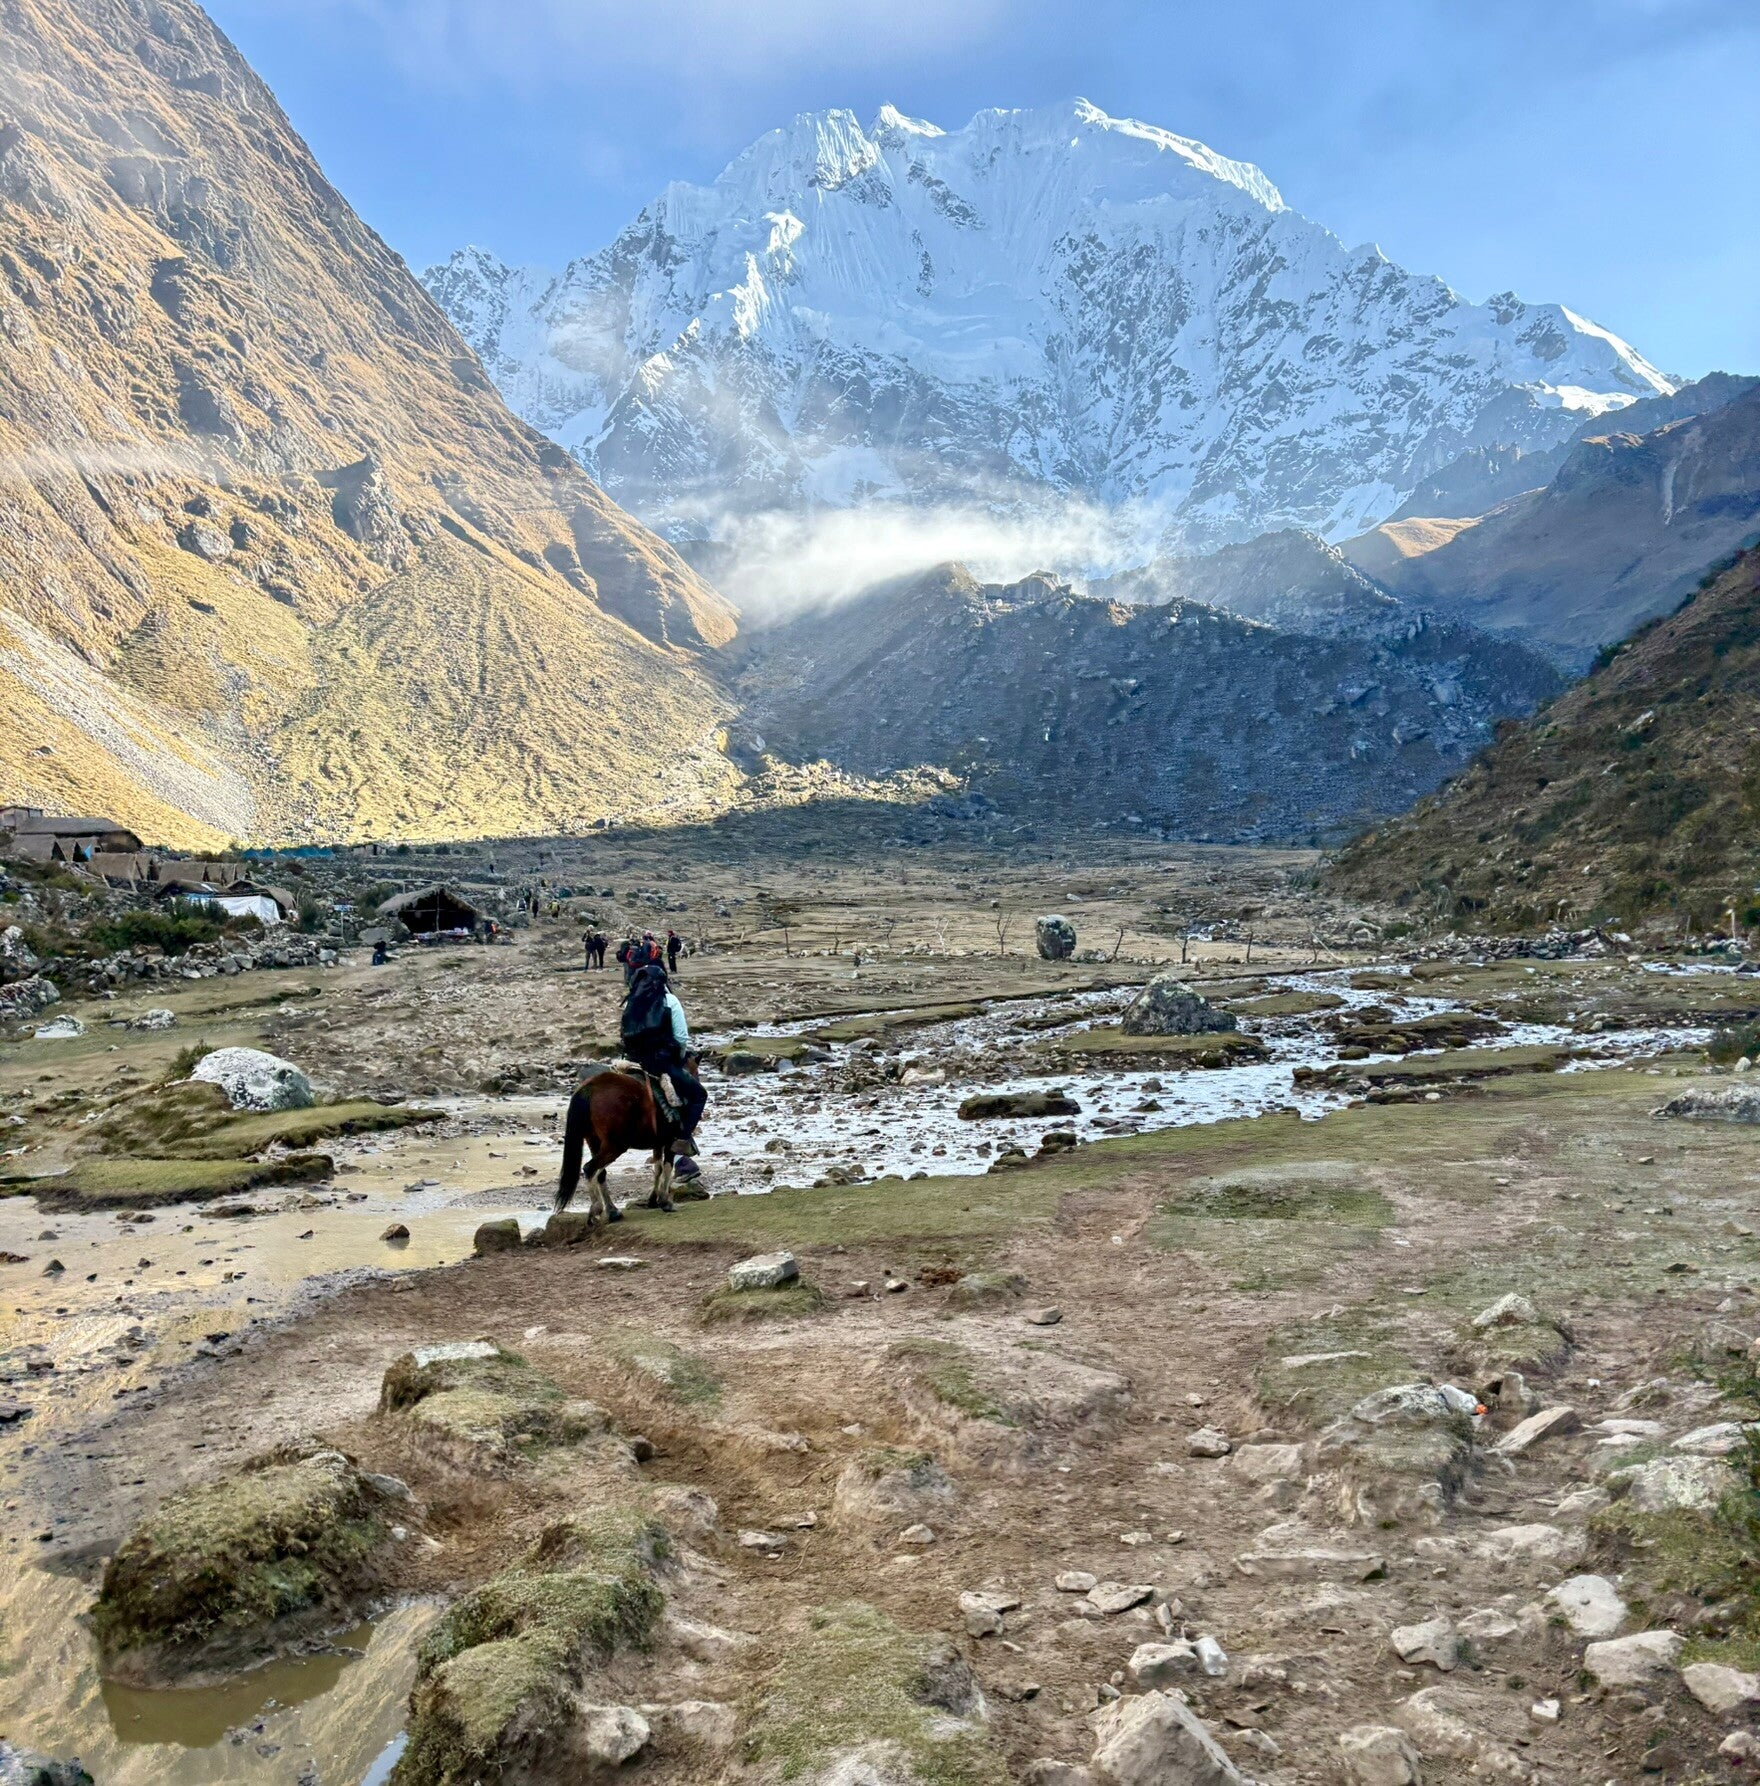
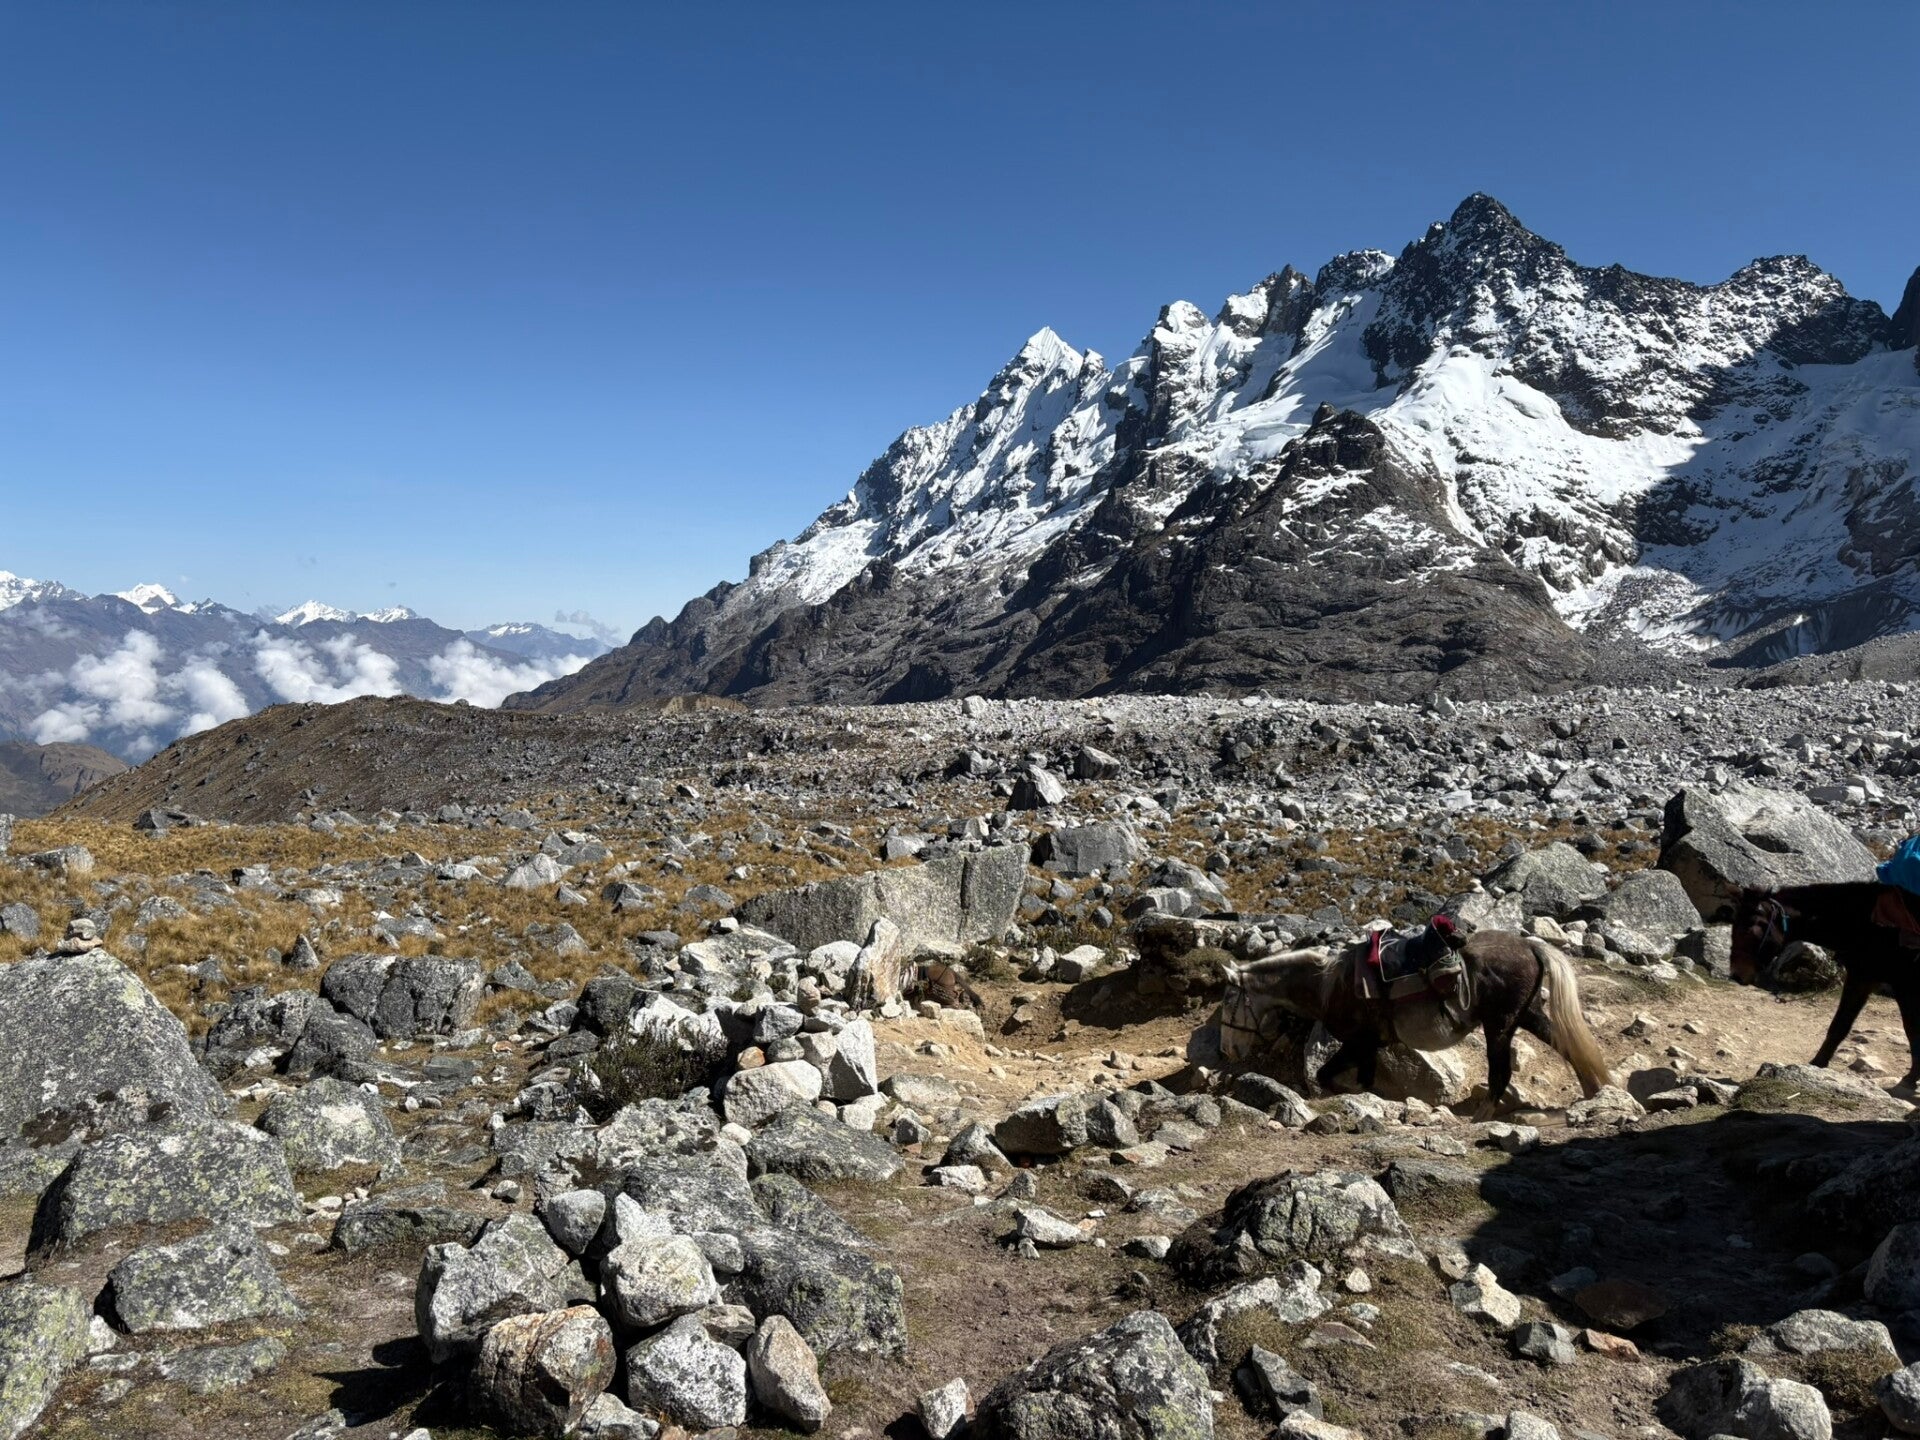
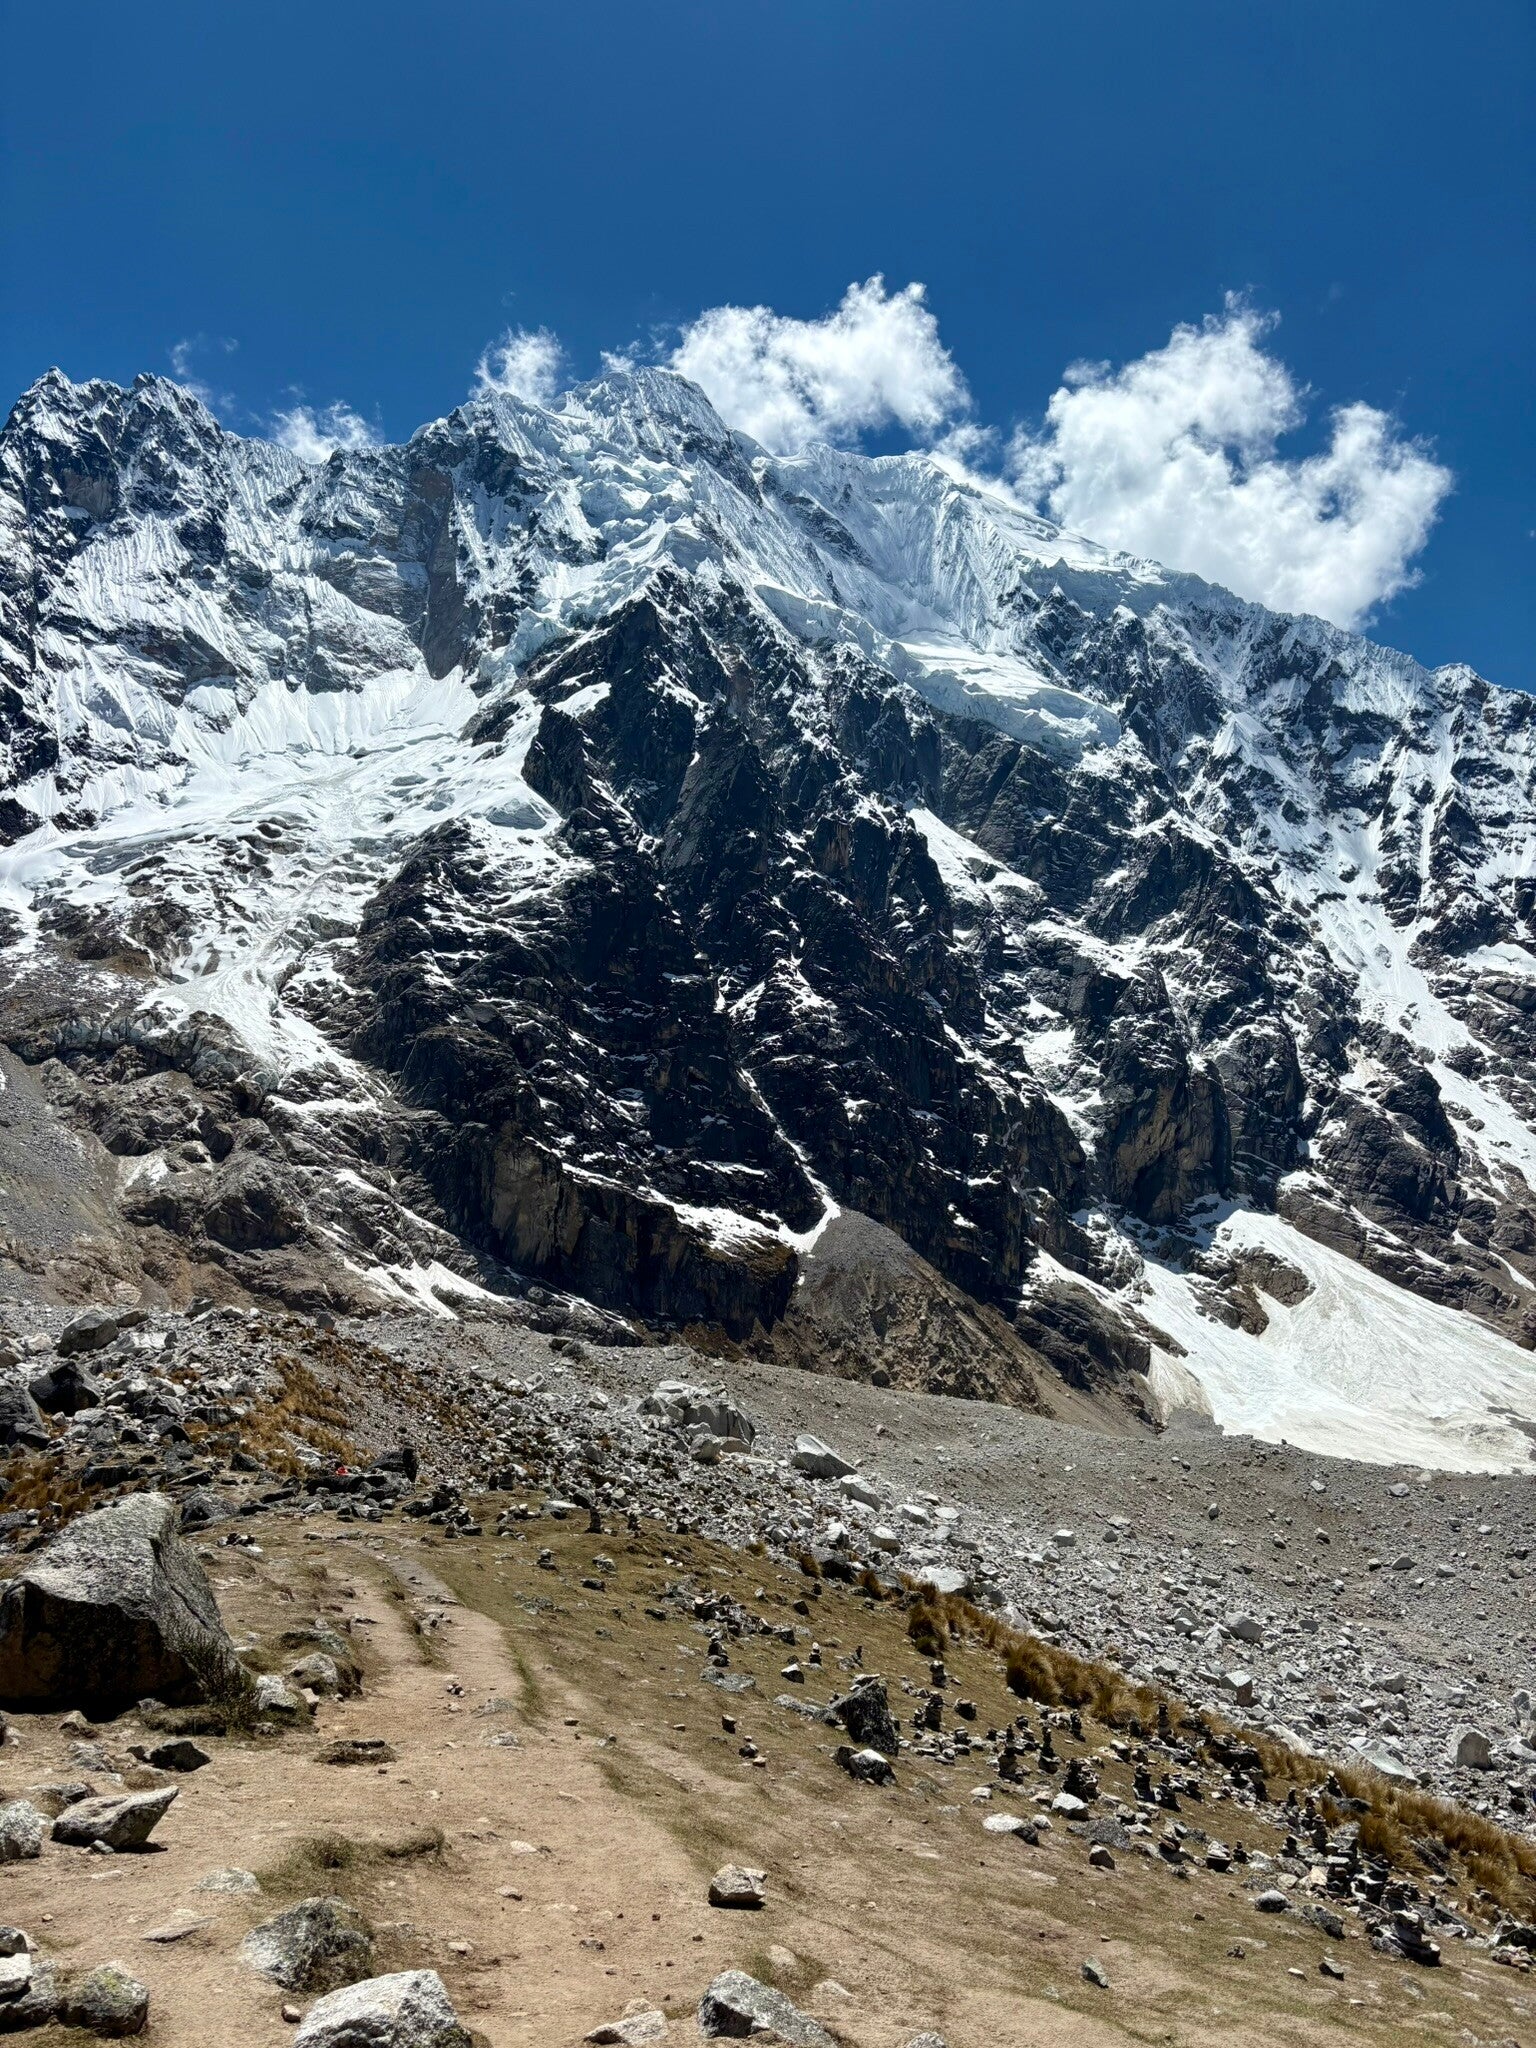
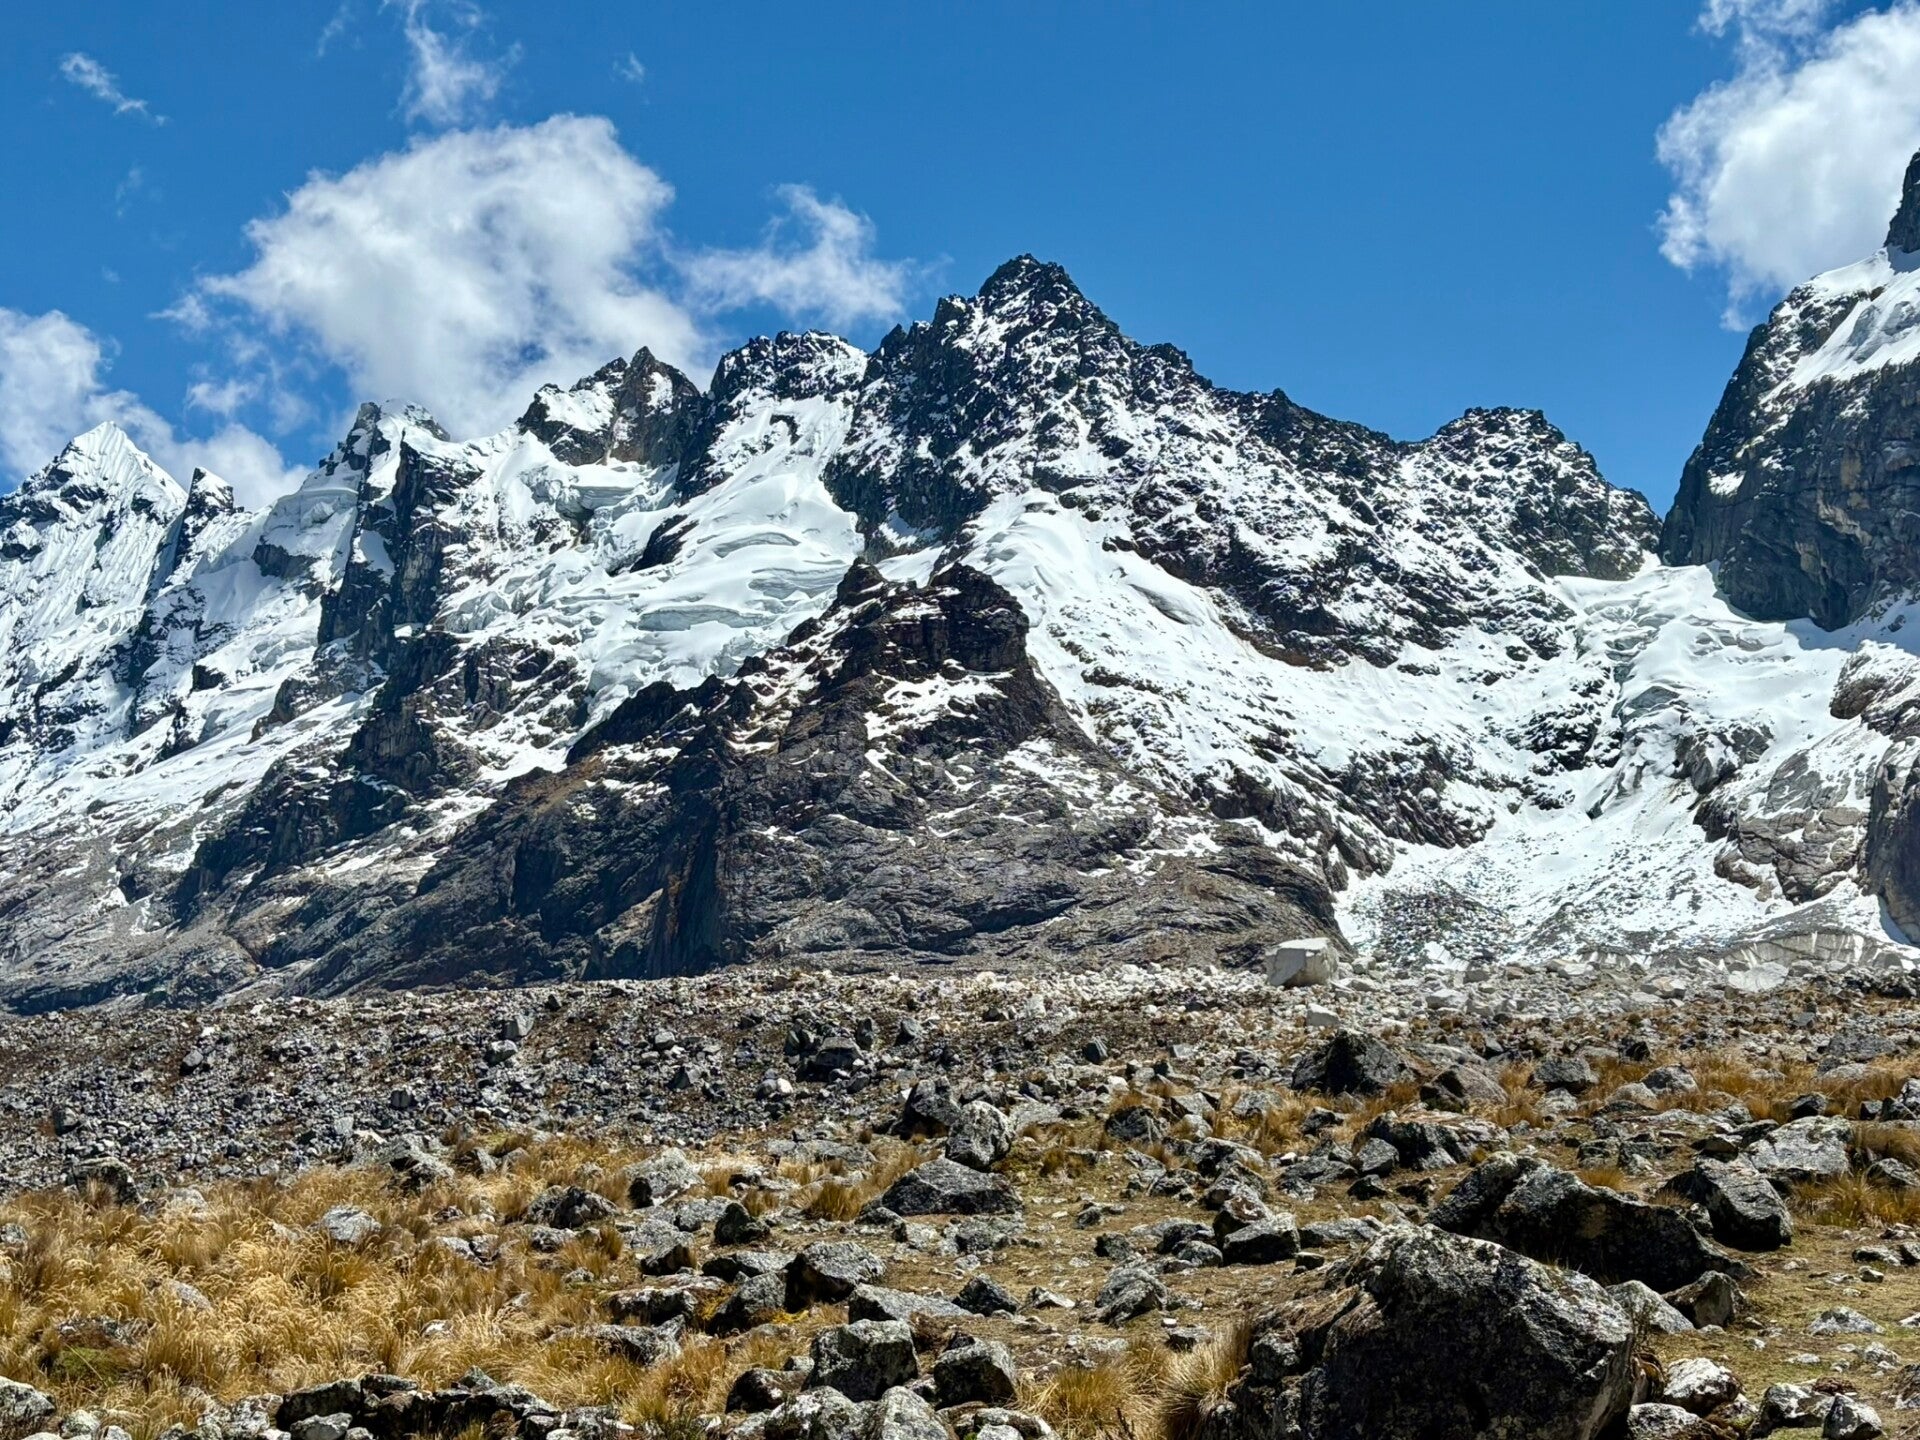
Day 2 was the hardest day of the whole trek. First of all, it’s the coldest night and morning, so multiple layers were needed just to crawl out of the sleeping bag in the cold and dark. Secondly, we were at around 4000m (13.000 ft) altitude and needed to reach Salkantay Pass at 4650m (15.250 ft) through a steep incline.
- Luckily, for those not feeling well (which was half of the group!), there was option to rent a mule for 120 PEN (approximately 36 USD), which takes you all the way up to the pass.
- At the pass, guides entertained us with some Inca history before we descended 8 km (5 mi) to the lunch spot. Again, there was a long break between breakfast and lunch, so snacks are crucial to keep you going.
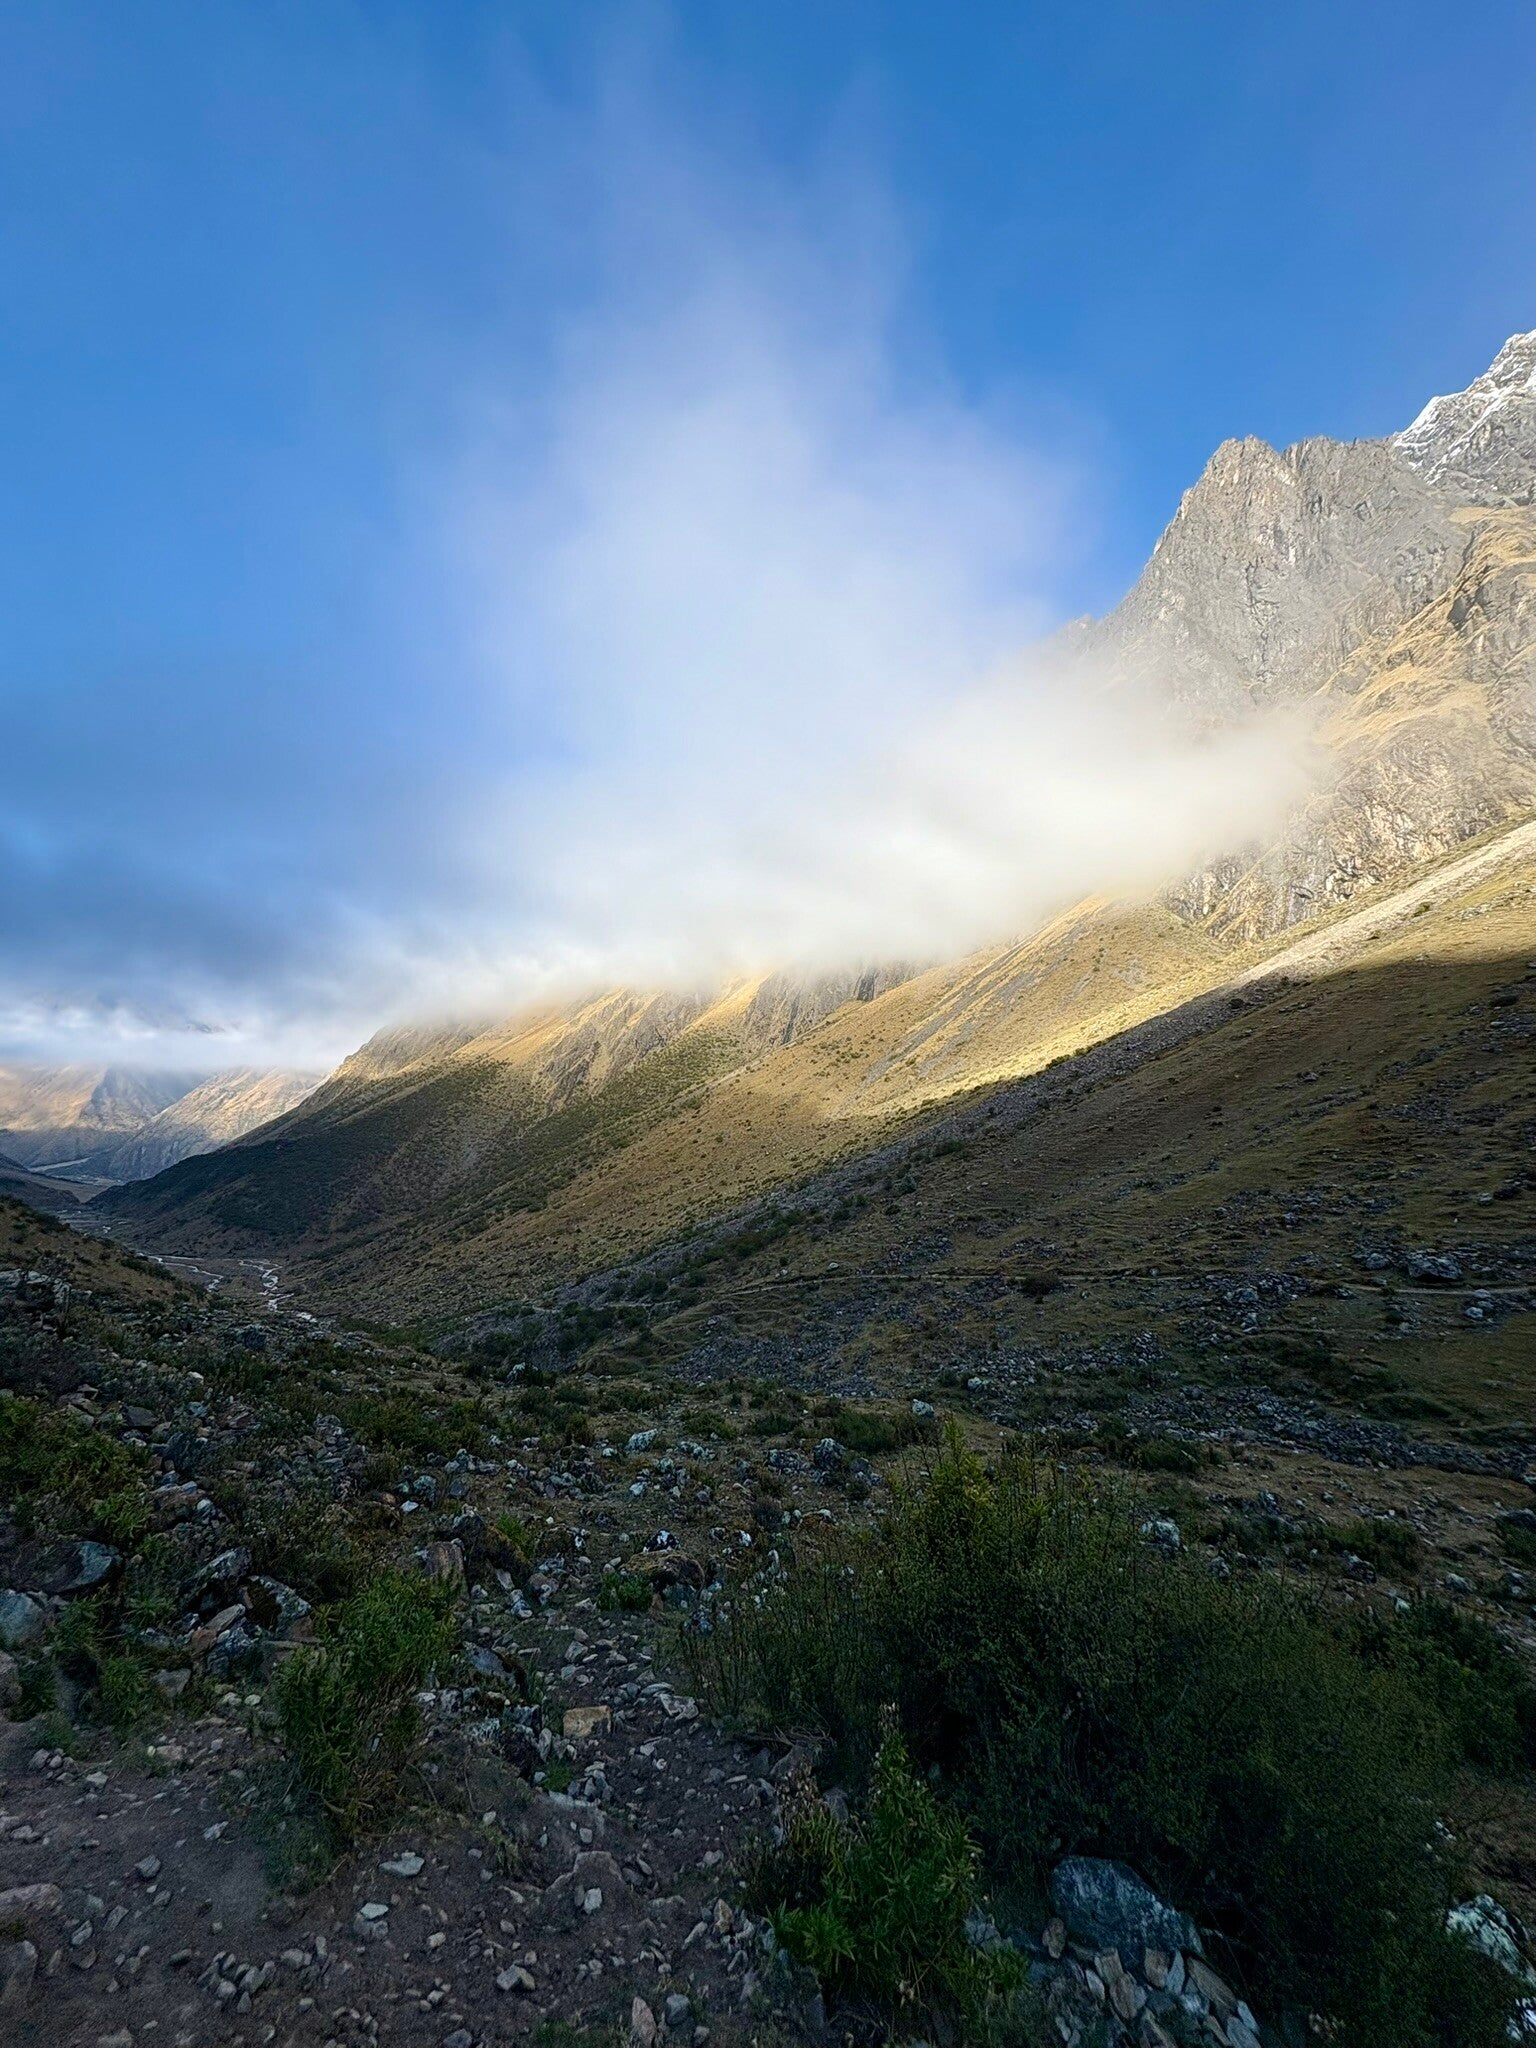
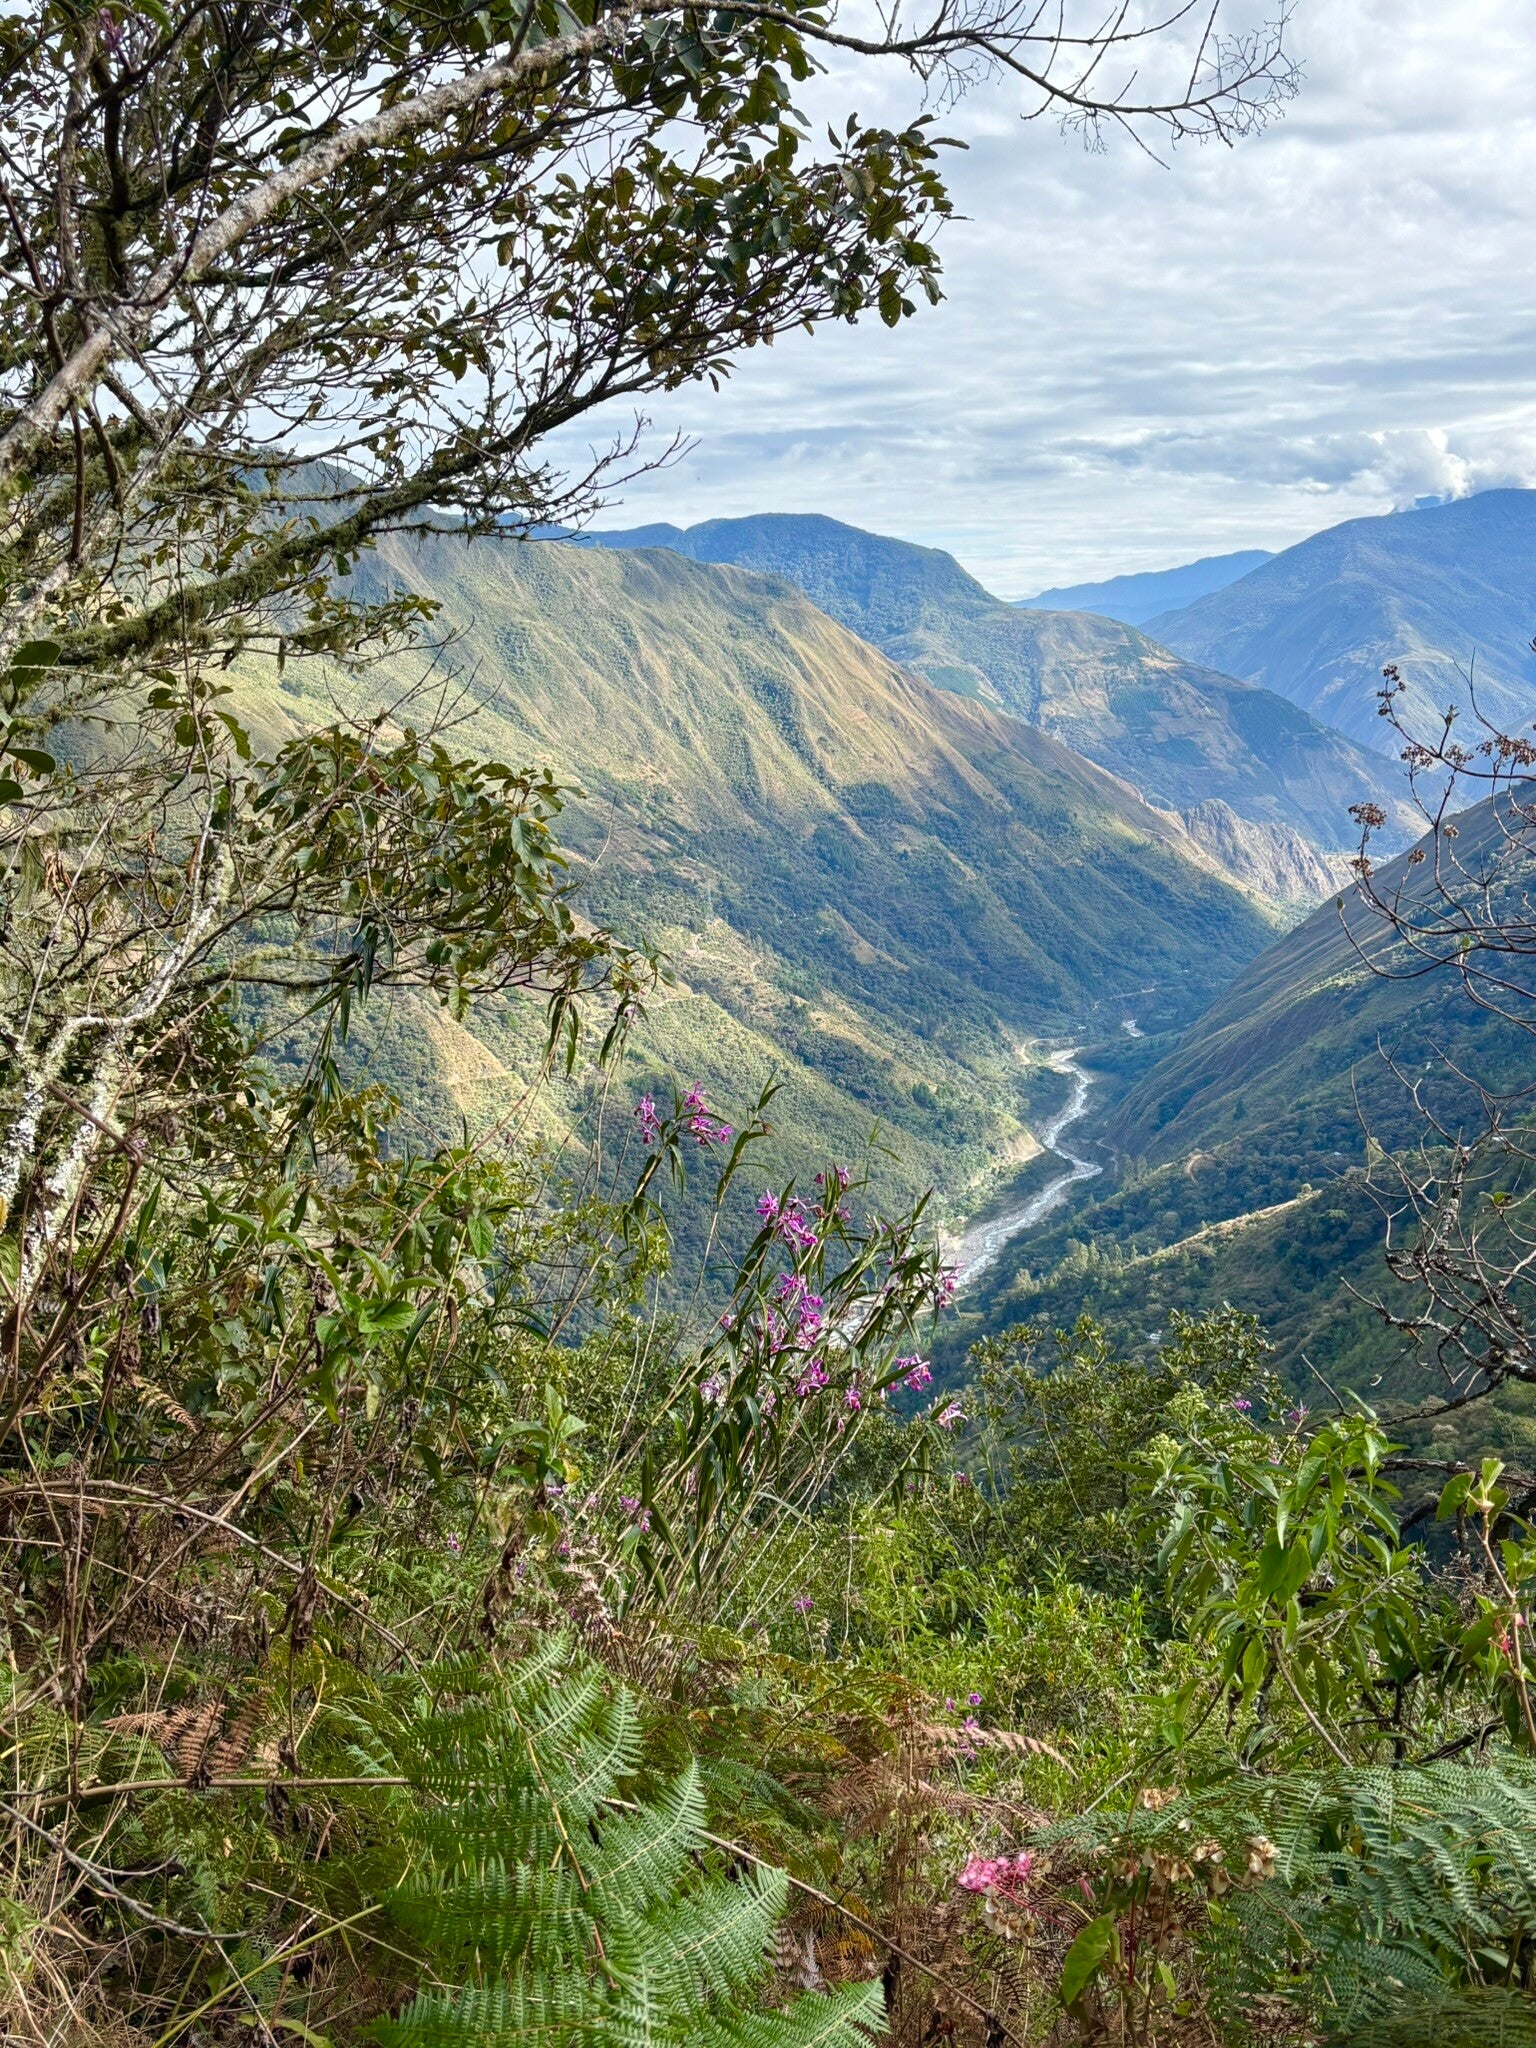
- After lunchtime, another 8 km (5 mi) of descent awaited. This time, we witnessed how barren mountain landscapes slowly changed into lush jungle vegetation, and the temperature gradually increased 🌿
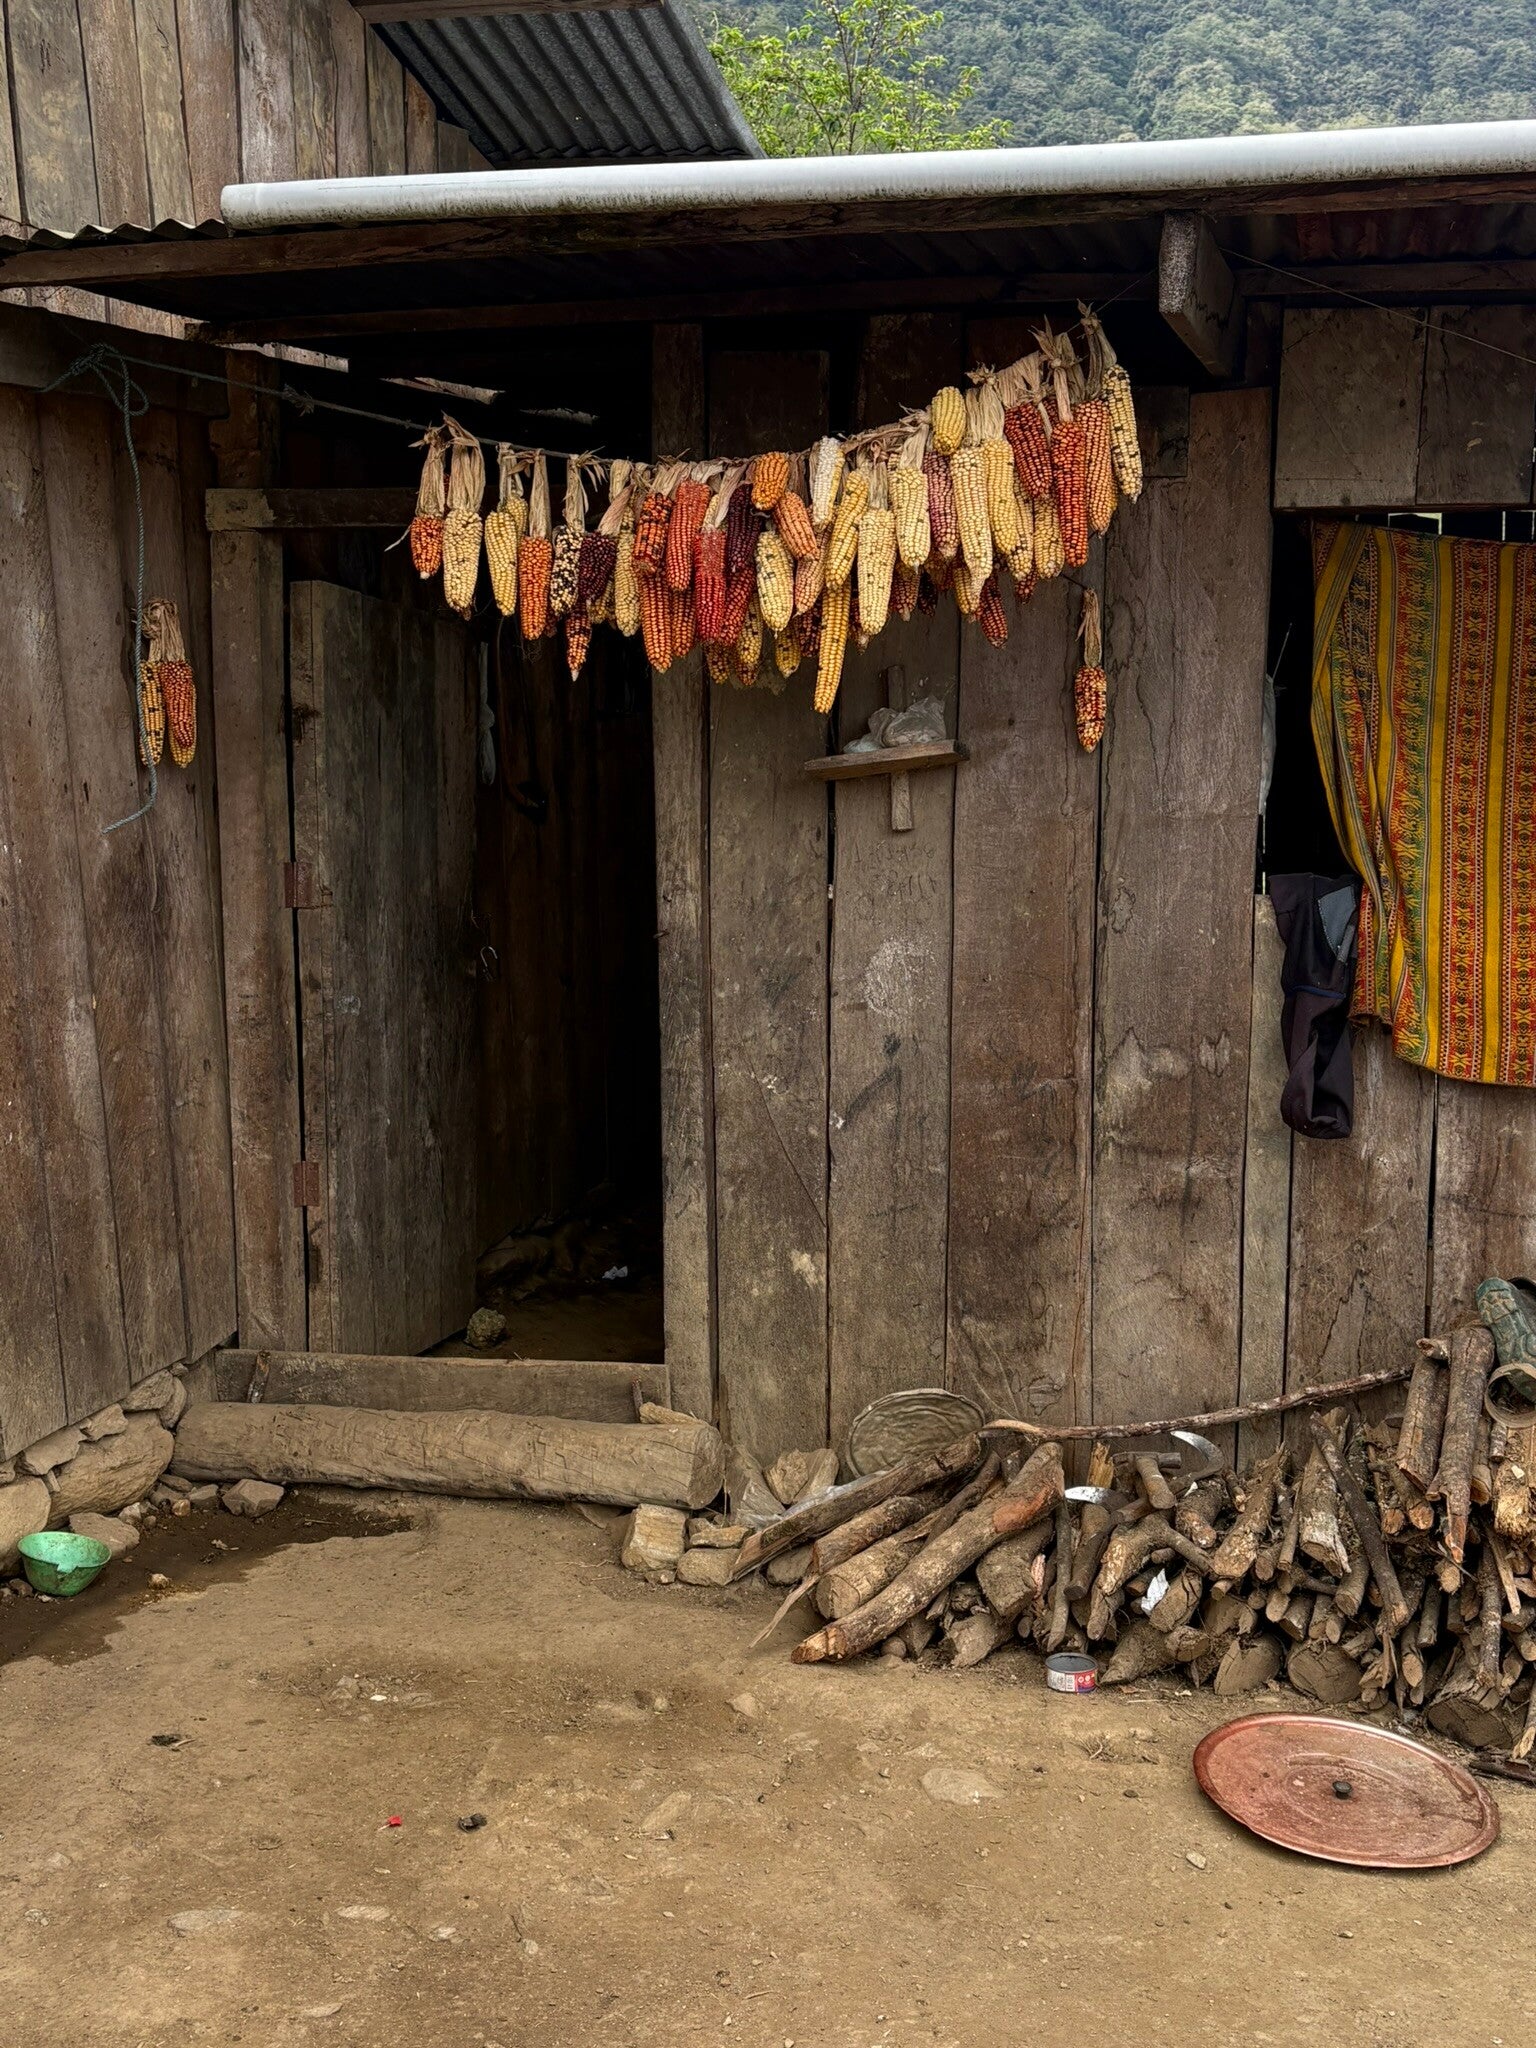
Campsite Amenities: The second day's campsite offered wooden huts as accommodation, free cold showers, and hot showers for a 10 PEN (approximately 3 USD) fee. Note that by "hot," they really mean scorching hot, as there was no cold tap to moderate the water temperature! You can also buy Wi-Fi for 10 PEN, but the connection was barely enough to load messages.
Tip: Make sure to have many layers ready for Day 2, as the climate changes drastically from freezing mornings to mild daytime temperatures and humid jungle conditions in the late afternoon
Day 3 - A Rest Day 🏖️
Day 3 is considered to be a rest day, with only 11 km of hiking in the morning, followed by lunch and optional activities like ziplining (120 PEN / 36 USD) and hot springs (50 PEN / 15 USD).
If you wish to only visit the hot springs and not the zip line, you still need to tag along with the group, as there's only one car, and the hot springs are on the way from the zip line.
At the hot springs area, Salkantay trek groups have tables reserved for drinks and socializing while the night is spent in glass domes at a beautiful and modern campsite - by far the best one on the trek! However, there is still no internet at the campsite and only cold showers (you may not need them after the hot springs!).
Day 4 - The Final Push 🏁
This was another difficult day with 26 km (16 mi) of hiking and only somewhat easier than Day 2.
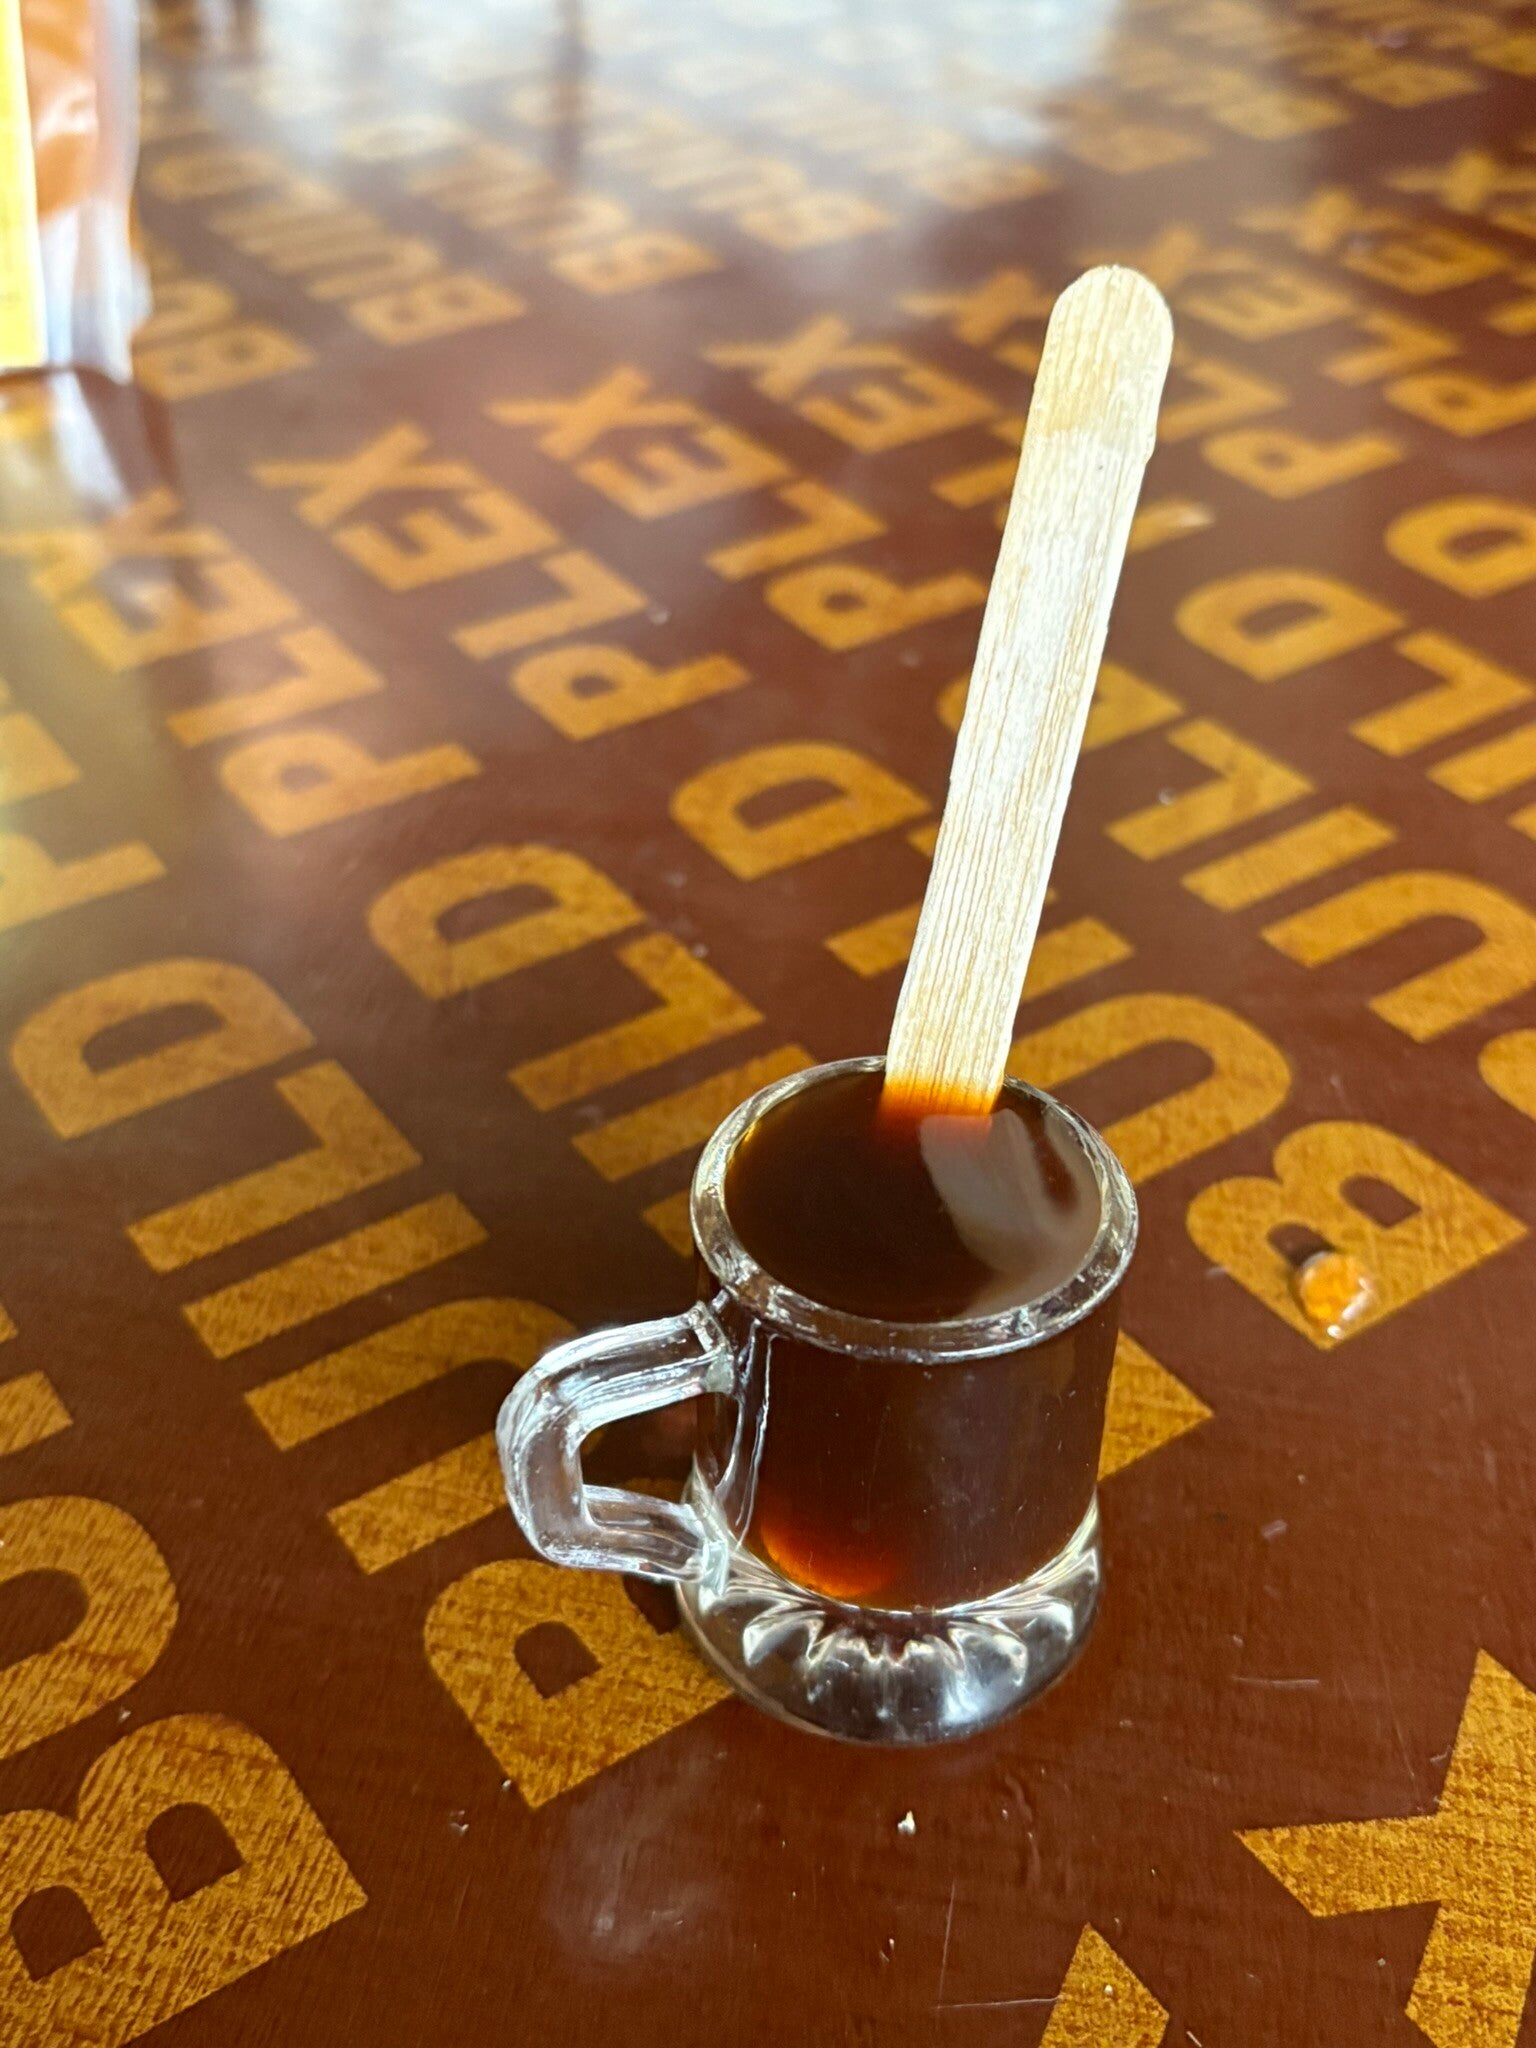
- The day started slowly with a coffee-making demonstration and tasting (this activity can also happen on Day 3 depending on the guide and agency). ☕
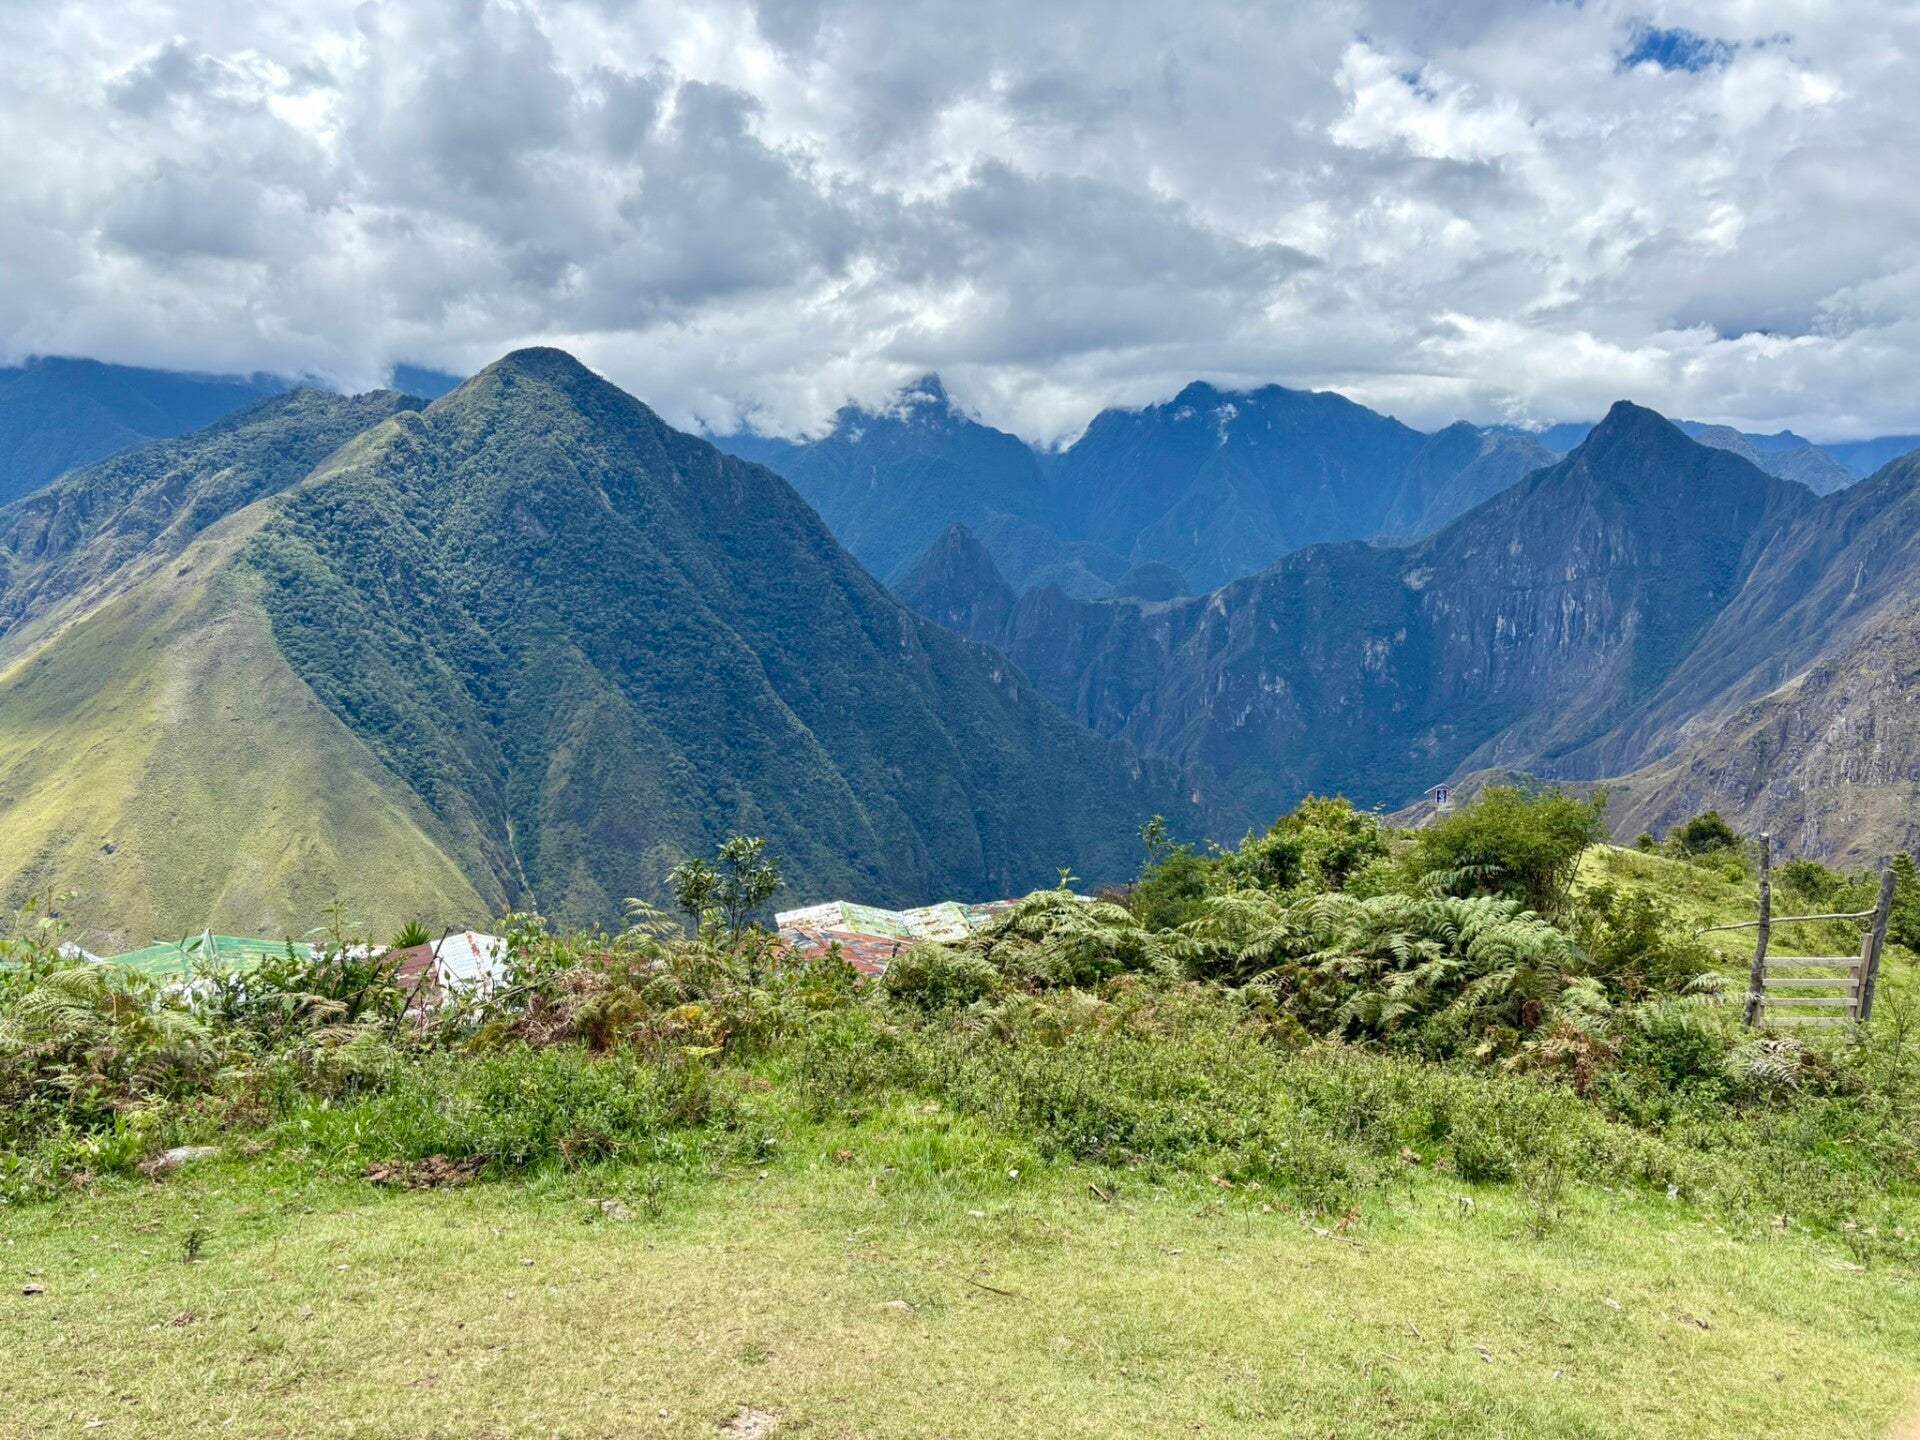
- Next was an uphill climb of approximately 3 hours. Luckily, the mild and pleasant jungle morning, along with strong homemade coffee, made the hike very bearable. This part of the hike overlapped with the original Inca Trail, featuring stairs that date back to Inca times, and we stopped by the ruins from which Machu Picchu can be seen in the distance.
-
After a break and some Inca history, we continued downhill for approximately 8 km until Hidroelectrica (power plant) for lunch. Again, there was a long gap between breakfast and lunch, so snacks are essential.
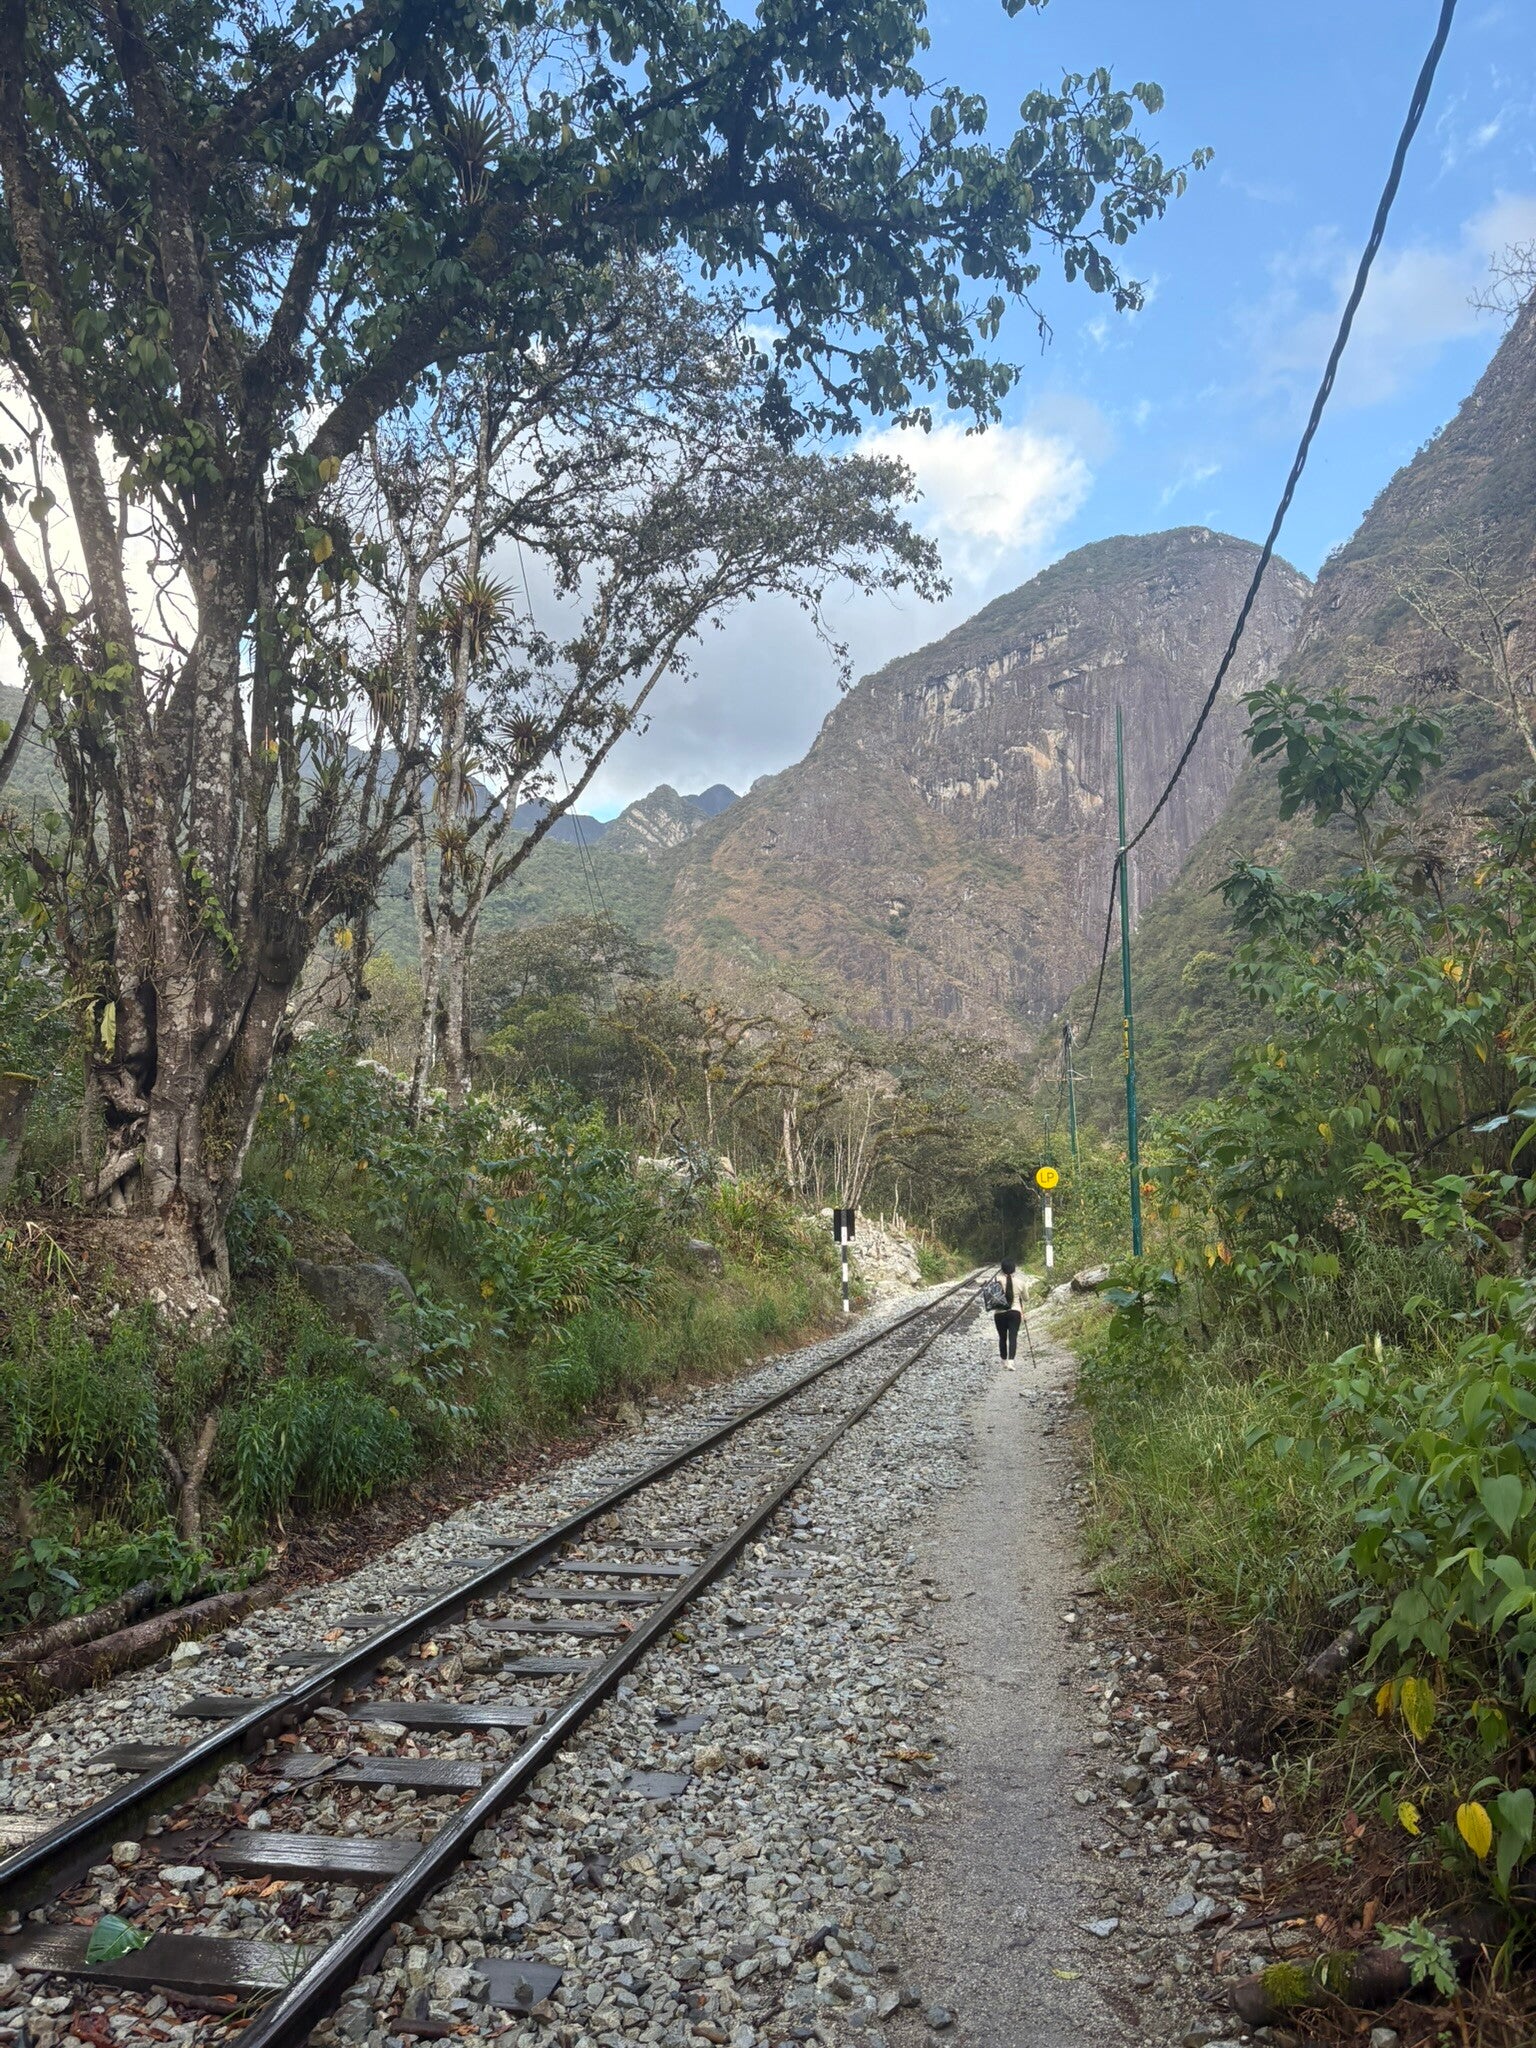
- After lunch, the final stretch of the hike—10 km (6.2 mi) along the train tracks—remained. While this part is not hard, it is mentally taxing and rather monotonous. The only entertainment came from the signs warning against the mortal danger of walking near the train tracks. Yes, this part of the trail is still official Salkantay Trek!
After completing the 26 km (16 mi), we checked into a hotel with private rooms, real beds, and hot showers. This was followed by a team dinner at a restaurant and instructions for the big day tomorrow—Machu Picchu! 🎉

Day 5: Machu Picchu at First Light
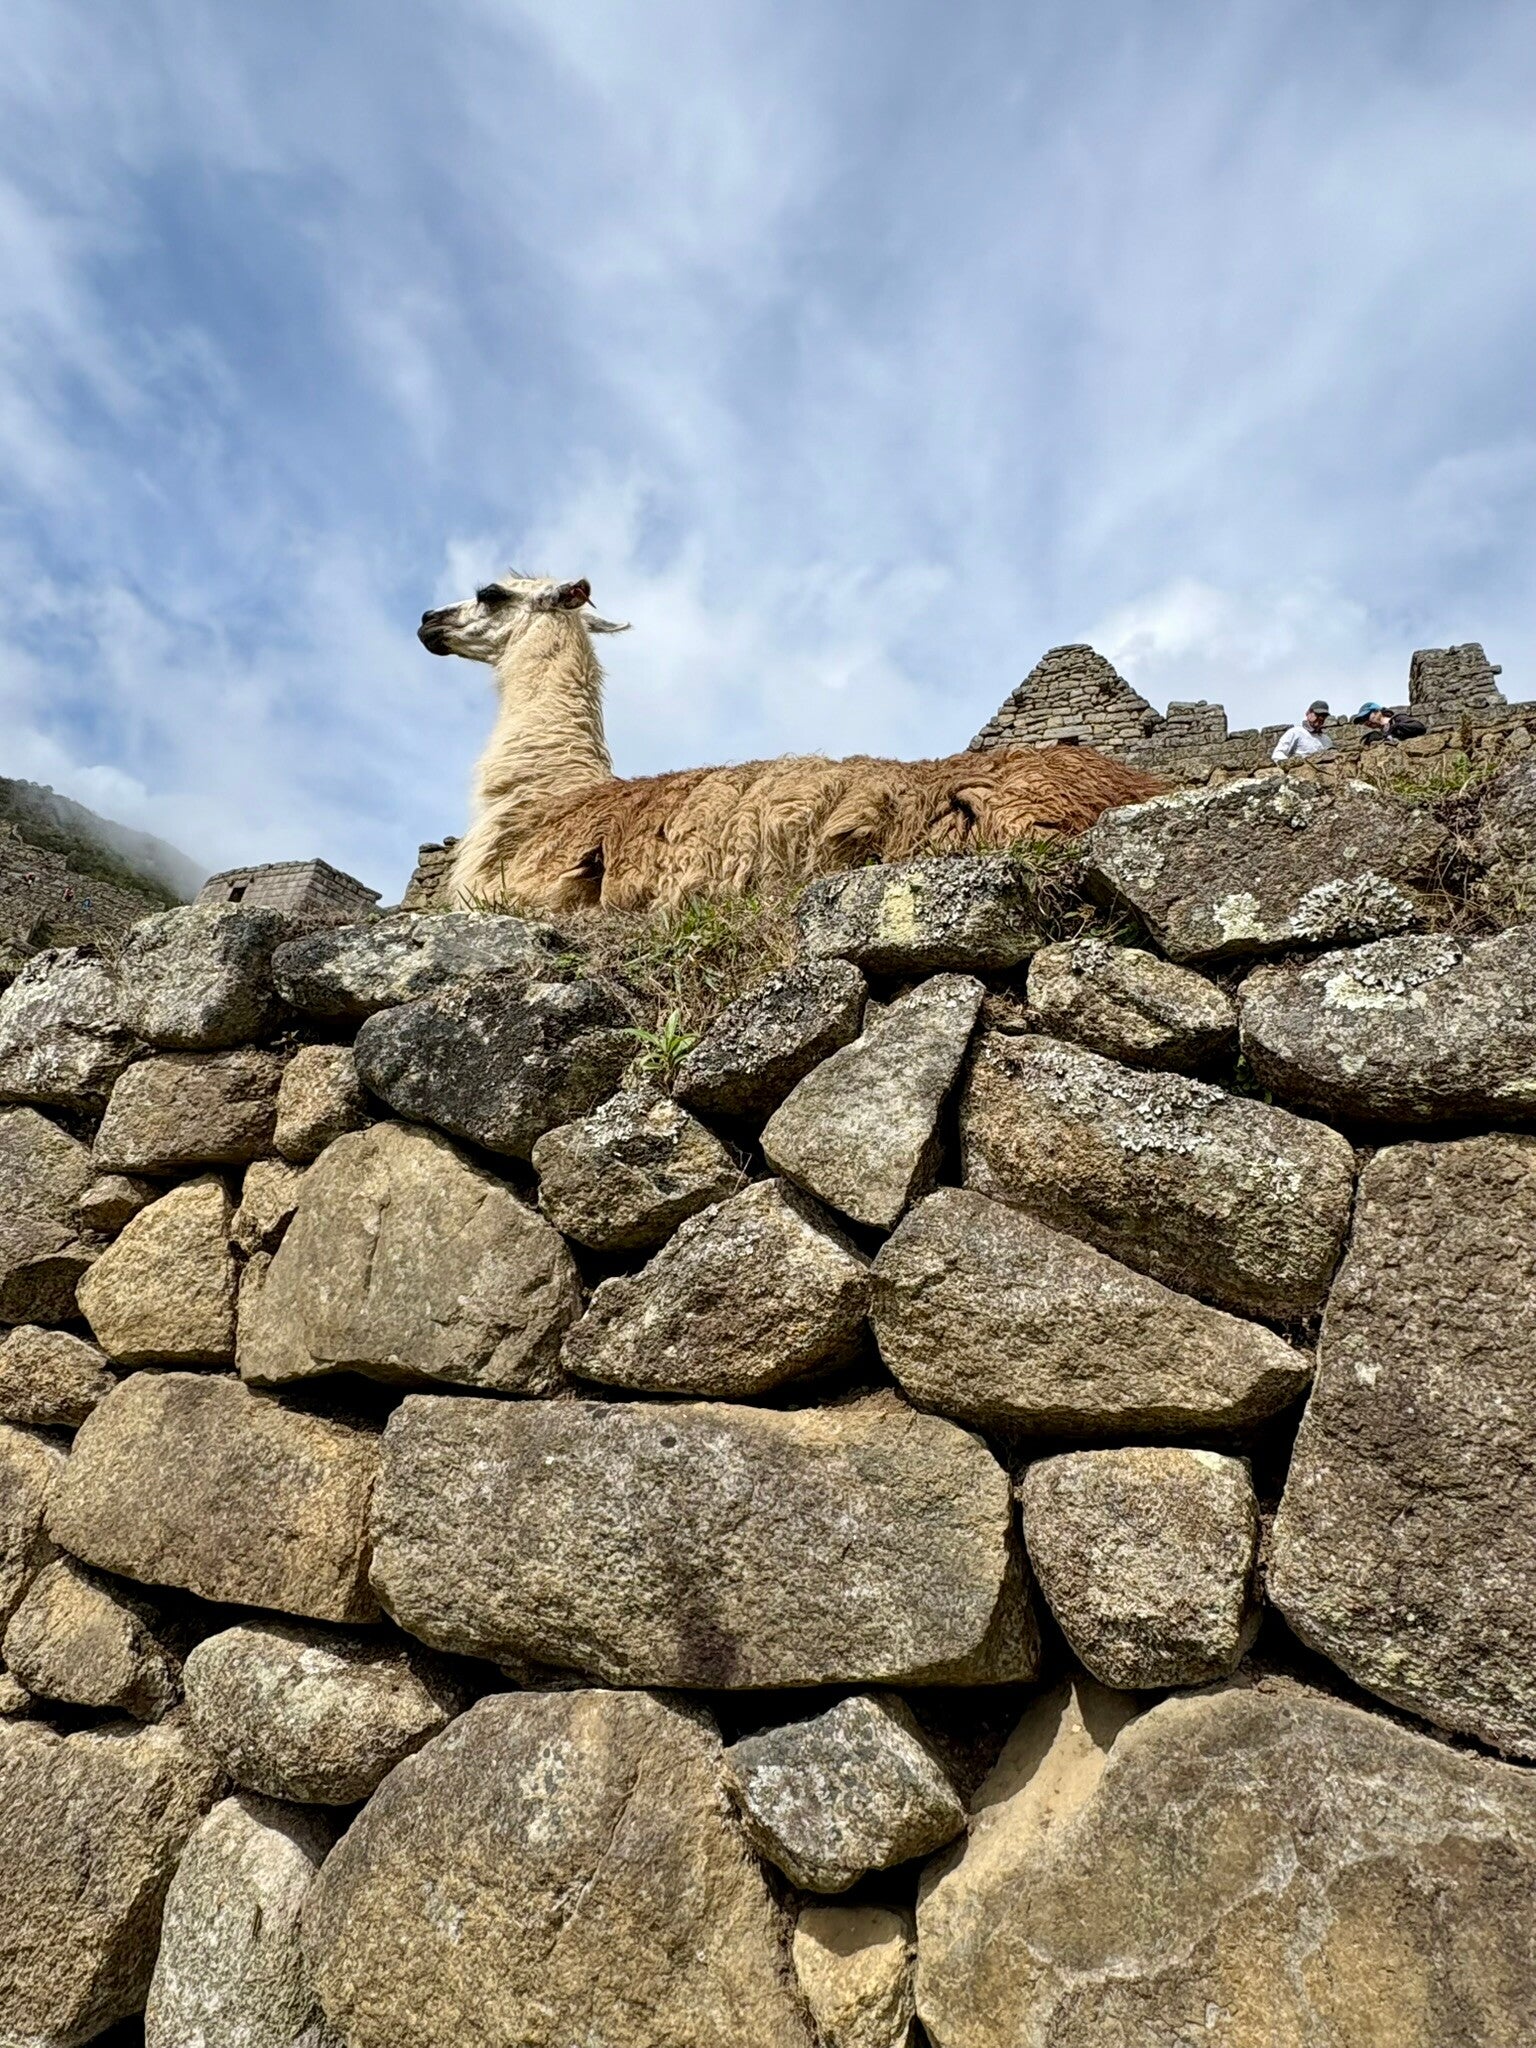
Machu Picchu is absolutely worth the hype. It’s one of those rare places that lives up to its reputation—not just because of the citadel itself, but because of the dramatic setting in the cloud forest and the mountains surrounding it. There are other incredible ruins in Peru (including more remote options like Choquequirao), but Machu Picchu is a classic for a reason.
Visiting Machu Picchu: Timing Tips
If you’d like a calmer start to your visit and the best chance of seeing the site in soft morning light, try to book a 6:00 AM entrance for Circuit 2. Circuit 2 is popular because it includes the iconic viewpoints and a well-rounded route through the site. Arriving early can also make it easier to take photos and enjoy the views at your own pace.
Circuit 2 overview:
- The route begins with the panoramic viewpoint (up the stairs) and then continues down toward the citadel walls.
- Arriving right after opening means fewer crowds, allowing for a truly magical morning view.
- Allocate 2-3 hours for your visit, including guided explanations, picture stops and time to explore independently.
- Entry tickets include a 40-minute buffer, meaning you can arrive up to 40 minutes after the time shown on your ticket.
Getting to and from Machu Picchu 🚍
Getting up to the entrance is straightforward via the shuttle buses from Aguas Calientes. Here’s what you need to know:
- Frequency: Buses run approximately every 10 minutes, starting from 5:30 AM.
- Tickets: You can buy a return ticket online through the Consettur travel agency (official operator) or at their office in Aguas Calientes.
A smooth morning plan
- Early Arrival: If you have a 6 AM entrance ticket, plan to start queuing well before the first bus departs. Arriving around 4:45 AM is advisable, as you’ll likely find a small queue already formed.
- Balance: It’s an early start, but many travelers find the morning atmosphere and light worth it. If you prefer a slower morning, a later entry time can still be a great experience.
- Queues: While waiting in line for the buses is unavoidable, don’t be discouraged by long lines. Buses arrive frequently and the queue moves quickly, ensuring you’ll be on your way to Machu Picchu or back in no time!
Returning to Cusco
After you’re back in Aguas Calientes, most people take the train to Ollantaytambo (often included as an add-on if you booked the Salkantay trek). From there, it’s typically a shared van transfer to Cusco arranged by your tour operator. Alternatively, you can book the train ticket to Ollantaytambo independently on Peru Rail or Inca Rail (prices range from $50 to $130 USD, depending on the class) and then hop into a shared van that will drop you off in central Cusco (approximately 20-30 PEN / $6-9 USD).


Optional Circuit 1 Trek: A Challenging Adventure
While visiting Machu Picchu, I also decided to tackle Circuit 1, which is a panoramic trek up to Machu Picchu Mountain (the citadel was built in front of it). To be honest, the hike was quite brutal—600 meters (about 2,000 feet) up steep and sometimes narrow stairs, with no flat or even less steep sections. You need to be physically fit and have good knees to tackle this trek!
- Views: The trek offers incredible views of the citadel and the surrounding landscape from a high vantage point, but be prepared for a great workout!
- Return Path: On the way back, you’ll also see Machu Picchu from a slightly different angle, as the return path differs from Circuit 2.
Access to Circuit 1 must be reserved in advance, with an additional fee of $50-60 USD, depending on the exchange rate. I was more than 40 minutes late to enter this circuit after completing Circuit 2, but I was still allowed entry (though I wouldn’t recommend taking the same risk!)


Add comment
Comments